Welcome to Hyperdash
The Real-Time Hyperdash Delivery Platform 🚀
Welcome to Hyperdash, a powerful and scalable real-time delivery system inspired by leading quick-commerce and food-delivery platforms.
Built to connect customers, sellers, and admins on a unified ecosystem, Hyperdash enables instant ordering, real-time tracking, and location-based delivery — all optimized for speed, reliability, and user experience.
What is Hyperdash?
Hyperdash is an advanced multi-role platform designed for on-demand local delivery.
Whether it’s groceries, food, or daily essentials — customers can order in seconds, track their deliveries live, and receive items within minutes.
The ecosystem includes:
- 🧑💼 Admin Panel (Laravel) — Manage users, stores, orders, zones, and delivery operations.
- 🛍️ Seller Panel (Laravel) — Empower sellers to list products, track inventory, and manage orders in real time.
- 👨👩💻 Customer Web (Next.js) — A fast, responsive, and location-based ordering experience with live delivery tracking.
- 📱 Customer App (Flutter) — Mobile app for customers to browse products, place orders, and track deliveries on the go.
- 🚚 Delivery App (Flutter) — Dedicated app for delivery partners to manage assignments, navigate routes, and update order status.
Why Choose Hyperdash?
We built Hyperdash to make local deliveries smarter and faster.
Unlike generic delivery systems, Hyperdash focuses on real-time updates, location accuracy, and scalability — giving you full control and transparency.
Here’s what makes it special:
- ⚡ Real-Time Tracking: Customers can track orders minute-by-minute with live driver updates.
- 📦 Instant Ordering Experience: Designed for speed — place, confirm, and receive orders in record time.
- 📍 Location-Based System: Uses GPS to fetch nearby stores and optimize delivery routes.
- 🧩 Multi-Role Architecture: Admin, Seller, and Customer modules — each tailored to their workflow.
- 🔗 Seamless Integration: Laravel powers backend APIs while Next.js ensures a blazing-fast customer experience.
- 🛠️ Scalable Design: Built with flexibility to expand into multi-city or multi-vendor setups.
Tech Stack Overview 🧠
- Frontend (Customer Web): Next.js 15 + Tailwind CSS 4
- Backend (Admin + Seller): Laravel
- Database: MySQL
- Realtime Updates: WebSockets / Pusher (for order and delivery status)
- Maps & Location: Google Maps API (Geolocation, Places, and Distance Matrix)
- Notifications: Firebase Cloud Messaging (Push Notifications)
Core Features at a Glance 💡
- 🔥 Real-time order management and delivery tracking
- 🧾 Dynamic product listing and variant management
- 💰 Automated pricing, discounts, and delivery charges
- 🗺️ Location-aware store and delivery radius system
- 🔔 Push notifications for order updates
- 📊 Powerful analytics and admin insights
Built for Growth
Whether you’re launching in one city or scaling across regions, Hyperdash is built to grow with you.
Its modular design and API-driven structure make it easy to integrate with new features, delivery partners, or third-party services.
Getting Started
Ready to explore Hyperdash?
Check out the next sections for installation, setup, and deployment guides for each module:
Need help or have questions?
Open an issue on our GitHub repository or contact our support team.
Let’s build the future of real-time local delivery together! 🛵💨
Hyperdash — Deliver Faster. Smarter. Locally.
Introduction — Admin Panel (Laravel)
The Admin Panel is built with Laravel, a robust PHP framework known for its elegant syntax and powerful features. This backend system provides a comprehensive management interface for your application, allowing you to control users, content, and other essential aspects of your platform.
Overview
The Admin Panel serves as the central hub for managing your application's data and configurations. It's built with:
- Laravel - A powerful PHP framework with elegant syntax and robust features
- MySQL - For reliable data storage and management
- Blade Templates - Laravel's templating engine for dynamic views
- Laravel Mix - For asset compilation and management
Key Features
- User Management: Control user accounts, roles, and permissions
- Content Management: Manage your application's content and data
- Settings: Configure system-wide settings and preferences
- Analytics: Track and analyze user behavior and system performance
- API Endpoints: RESTful API endpoints for the Customer Web interface
System Requirements
To run the Admin Panel locally, your system needs to meet these requirements:
- PHP >= 8.1
- MySQL >= 5.7 or MariaDB >= 10.3
- Composer (PHP package manager)
- Apache/Nginx web server
- Node.js >= 16.x (for asset compilation)
- Git for version control
For detailed installation instructions, please proceed to the Prerequisites and Installation sections.
Prerequisites — Admin Panel (Laravel)
Before installing the Laravel Admin Panel, ensure your system meets all the necessary requirements and has the required software installed.
System Requirements
Hardware Requirements
- Processor: 2 GHz dual-core or better
- RAM: Minimum 4GB, recommended 8GB
- Storage: At least 2GB free space
- Internet Connection: Broadband connection for downloading packages
Software Requirements
- Operating System
- Windows 10 or later
- macOS 10.15 (Catalina) or later
- Linux (Ubuntu 20.04 or later recommended)
- Required Software
- PHP >= 8.1
- MySQL >= 5.7 or MariaDB >= 10.3
- Composer (Latest version)
- Node.js >= 16.x
- Git
- PHP Extensions
The following PHP extensions must be enabled:
- BCMath
- Ctype
- Fileinfo
- JSON
- Mbstring
- OpenSSL
- PDO
- Tokenizer
- XML
Development Environment
Recommended IDE/Editor
We recommend using Visual Studio Code with these extensions:
- PHP Intelephense
- Laravel Blade Snippets
- Laravel Artisan
- DotENV
Development Tools
- Git
- Required for version control
- Download from: https://git-scm.com/downloads
- Postman (Optional)
- Useful for testing API endpoints
- Download from: https://www.postman.com/downloads/
- MySQL Workbench (Optional)
- GUI tool for database management
- Download from: https://dev.mysql.com/downloads/workbench/
Next Steps
Once you have all prerequisites installed and configured, proceed to the Google Cloud Setup guide for step-by-step instructions on setting up the Google Cloud Console.
Google Cloud Setup
This guide provides step-by-step instructions on setting up Google Cloud services required for the Admin Panel, specifically for Google Maps functionality.
Prerequisites
To ensure that Google Maps work properly within the Admin Panel and Website, you must enable the following keys/APIs in your Google Cloud Project:
- Places API (New)
- Geocoding API (Required for address conversion)
- Maps JavaScript API (Required for displaying maps)
Step-by-Step Setup
1. Enable Google Billing Account
To use Google Maps Platform APIs, you must have a valid billing account enabled on your Google Cloud project.
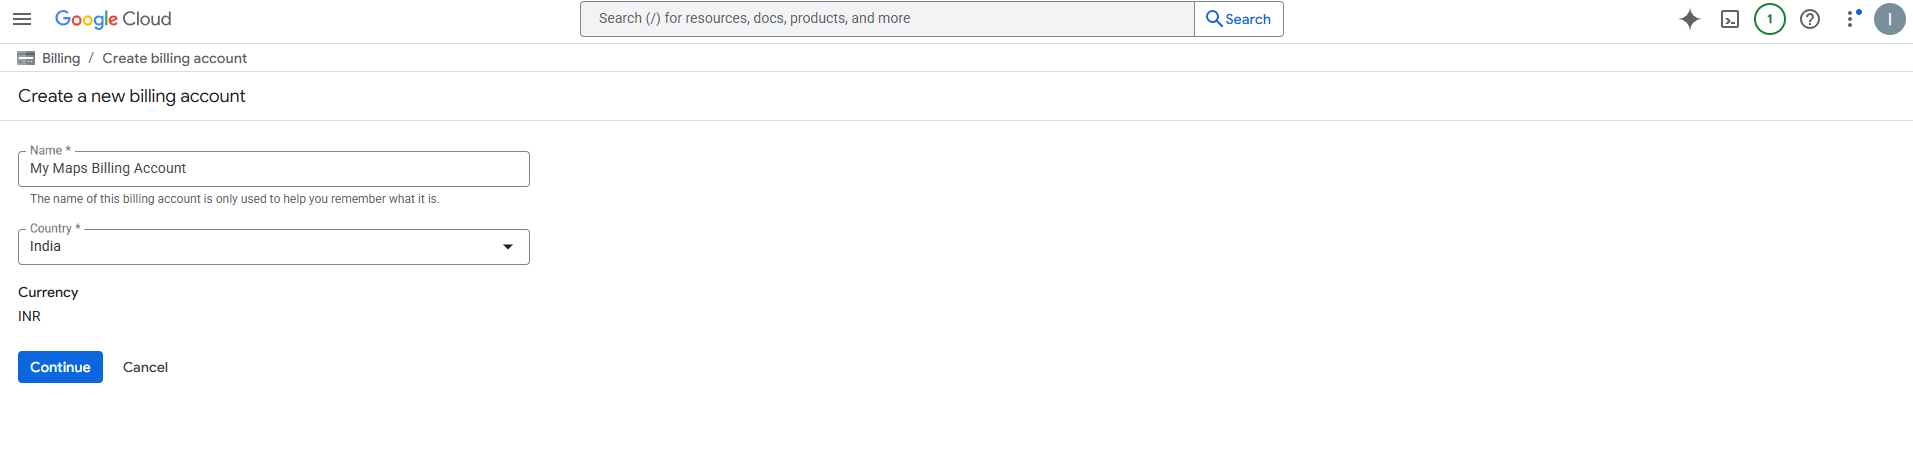
Make sure your billing is active before proceeding.
2. Enable Required APIs
Before creating keys, you need to enable the specific Google Maps services.
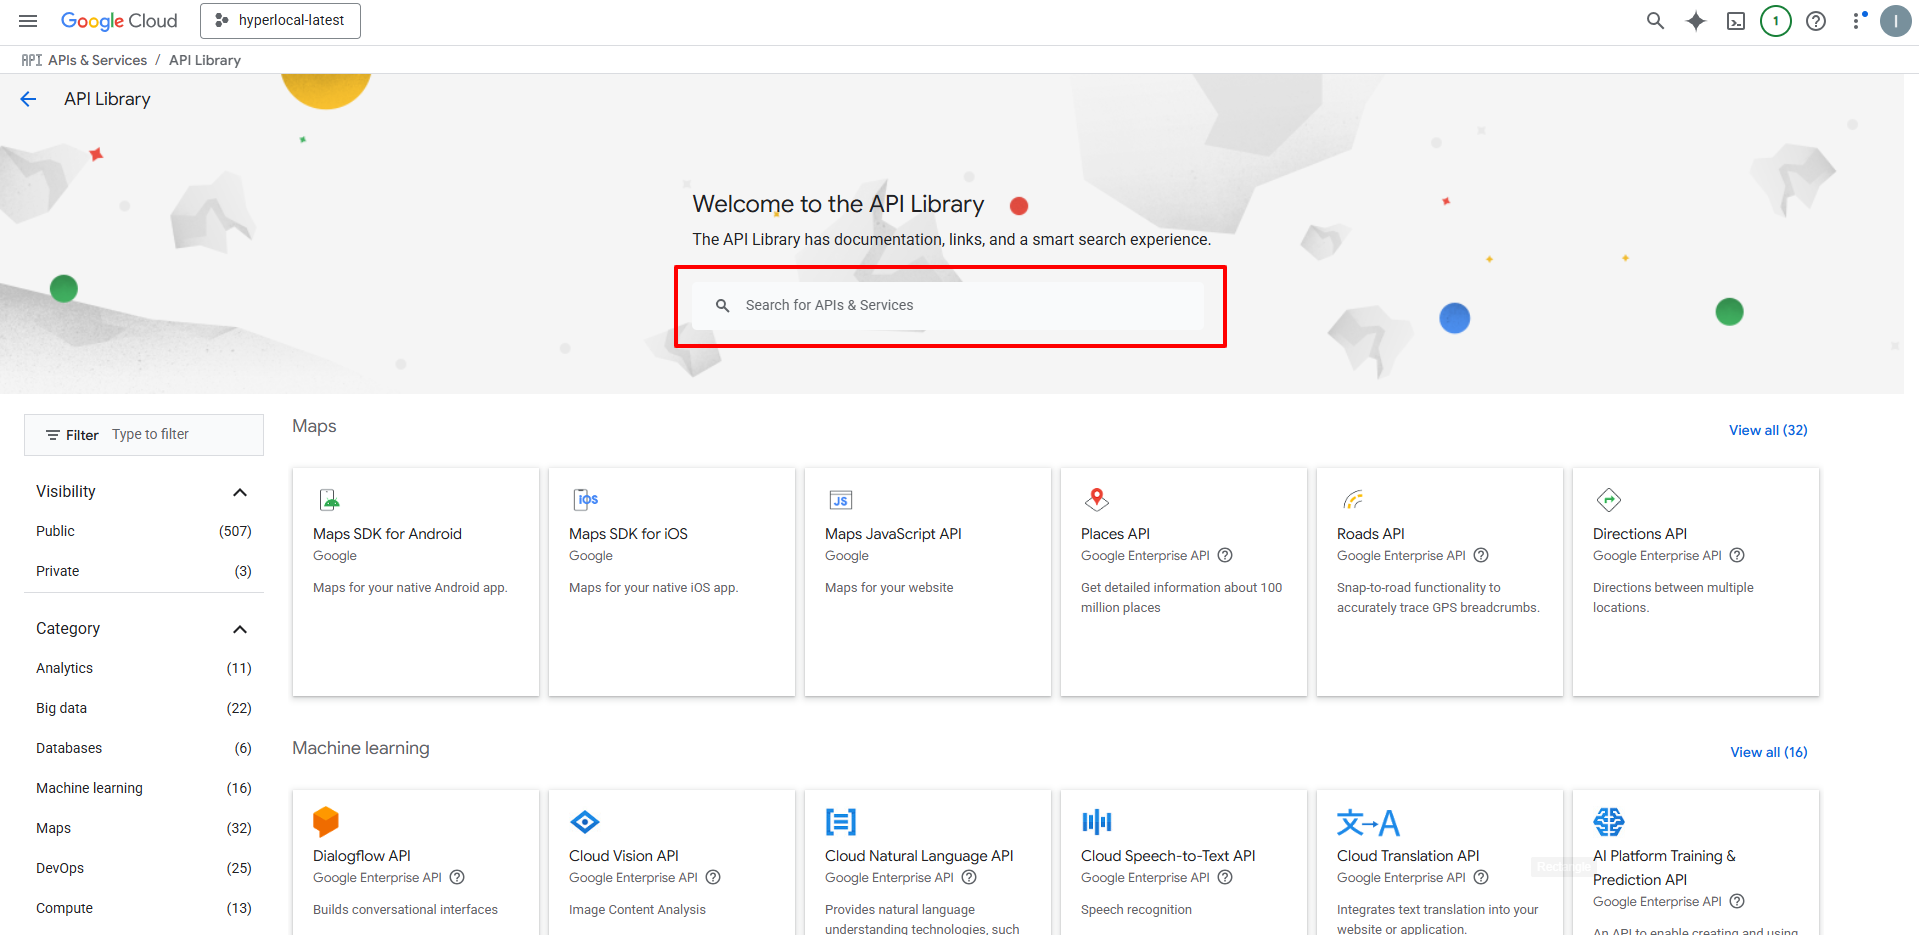
- Navigate to APIs & Services -> Library in the Google Cloud Console.
- Search for and enable the following APIs one by one:
- Places API (New)
- Geocoding API
- Maps JavaScript API
3. Create and Configure API Keys
- Go to the Google Cloud Console.
- Navigate to APIs & Services -> Credentials.
- Click Credentials -> API key.
- Select the newly created key to configure it.
Check if the key is restricted to specific domains.
4. Add API Key to Admin Panel
Once you have your Google Maps API Key:
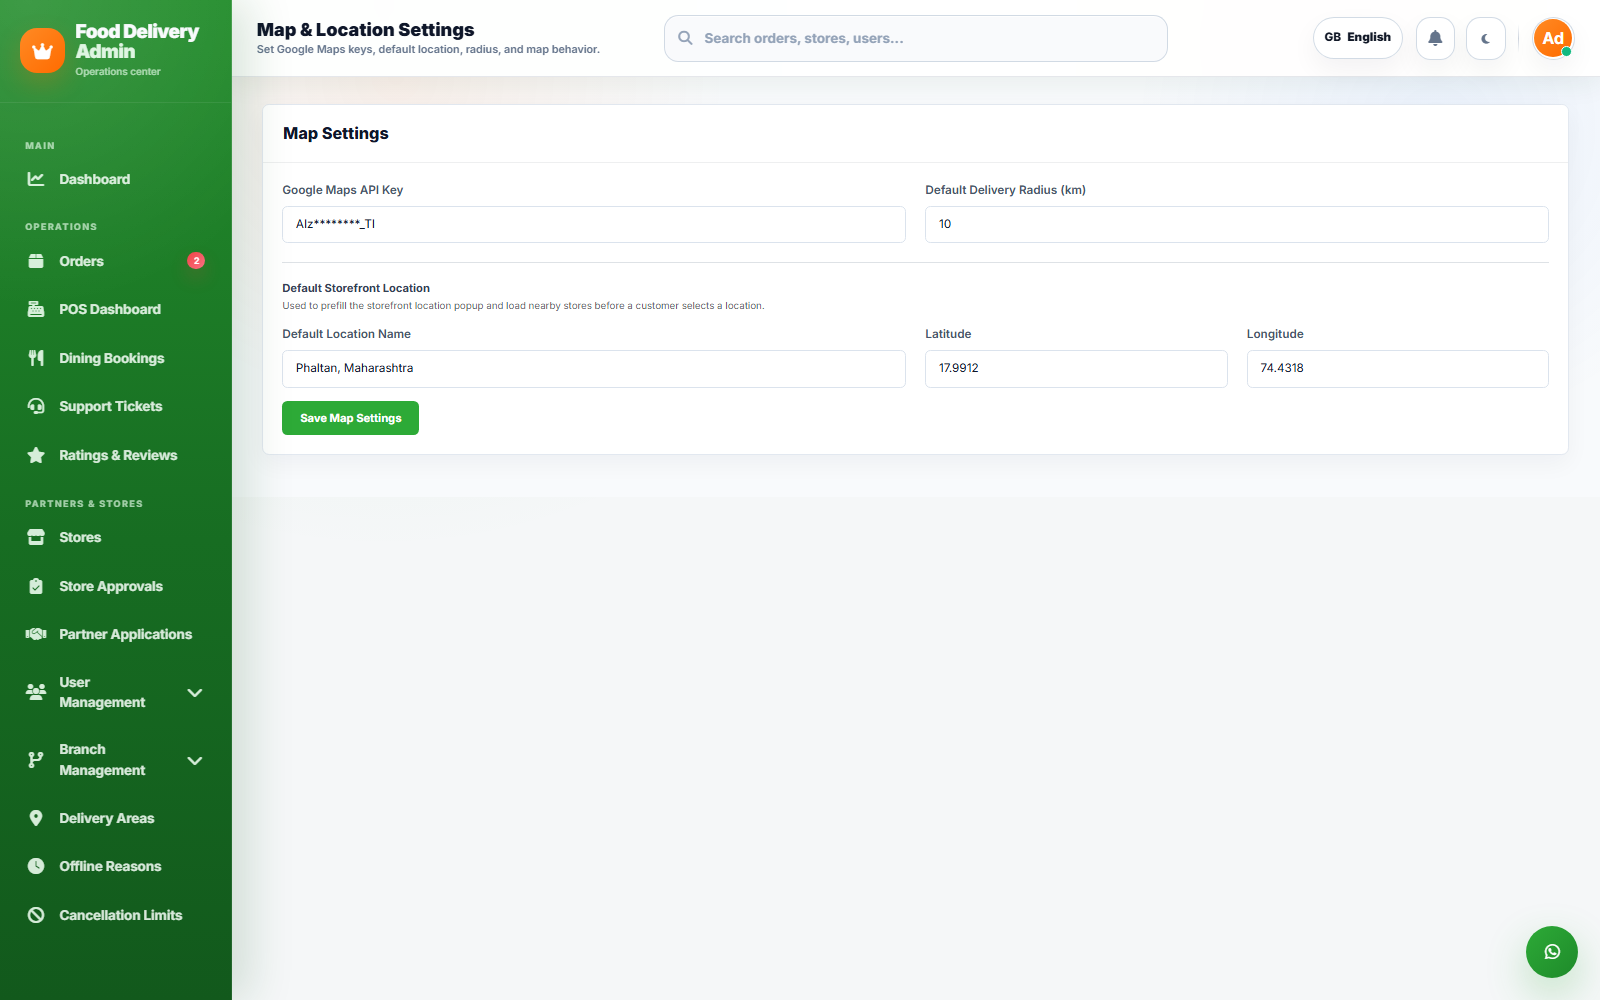
- Login to your Admin Panel.
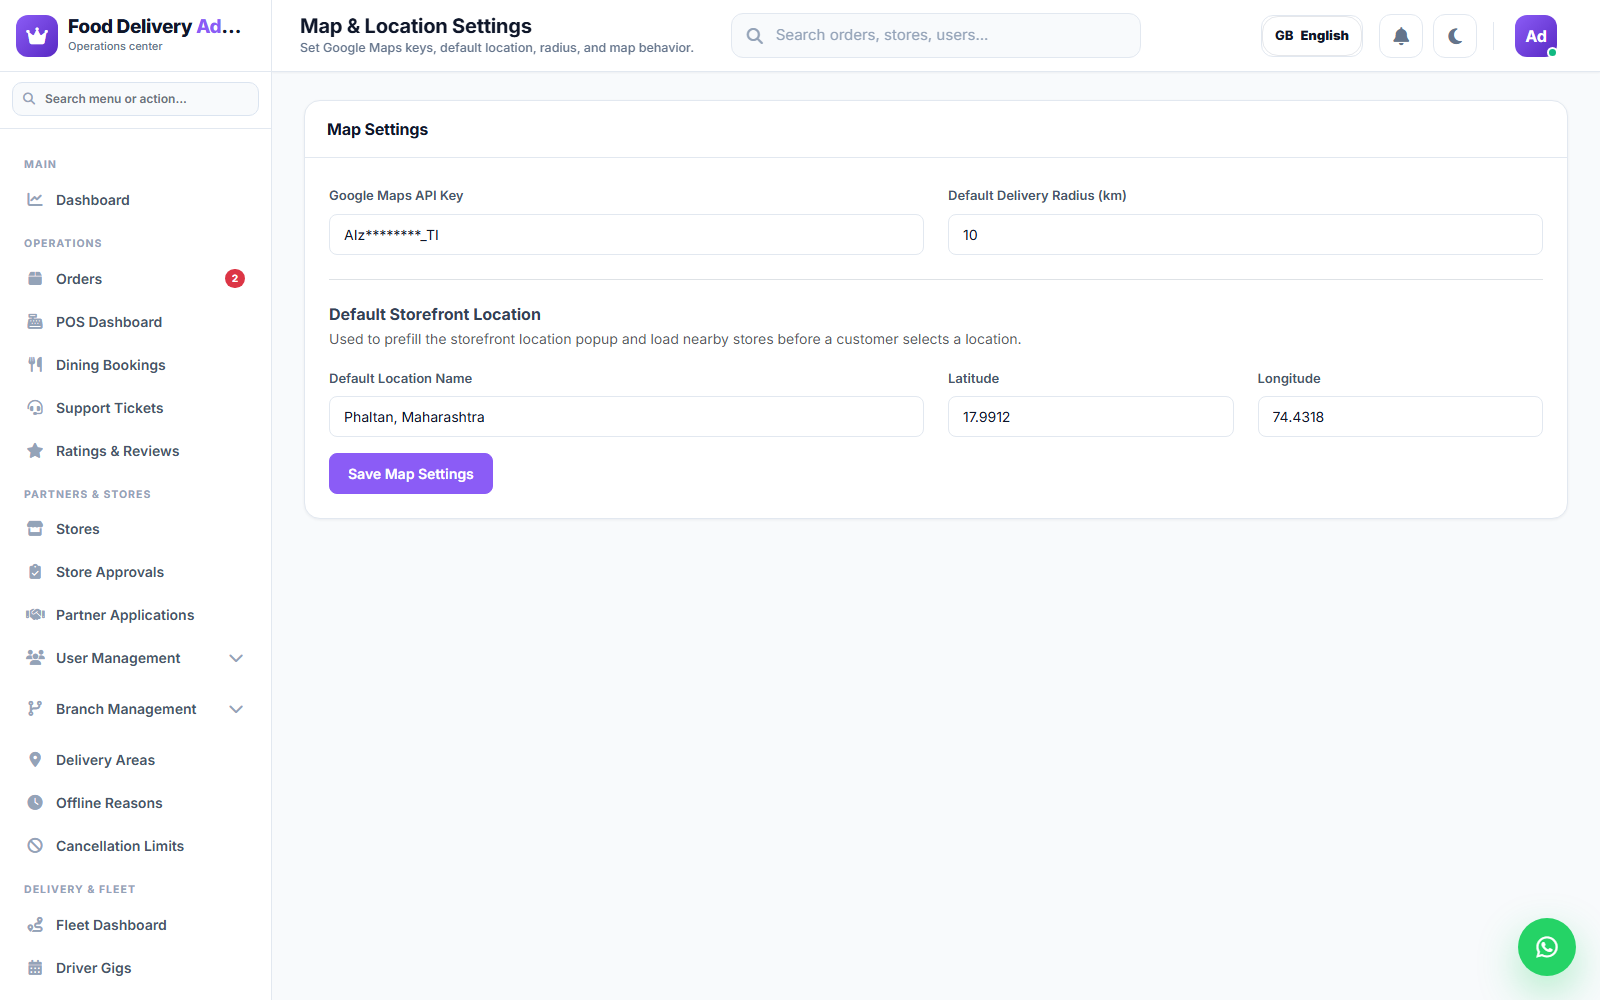
- Navigate to Settings -> Map Settings.
- Paste your key into the Google Maps API Key field.
- While you're there, also set the Default Delivery Radius and Default Storefront Location (name, latitude, longitude) used to prefill the storefront location popup.
- Click Save Map Settings.
5. Verification
After updating the settings:
- Check if Google Maps loads correctly in the Admin Panel or Customer Website.
- If the map does not load, verify:
- Are the Maps JavaScript API, Places API, and Geocoding API enabled?
- Are there any Domain Restrictions on the API Key blocking the request?
If you encounter issues, revisit the Credentials page in Google Cloud Console to ensure no restrictions are blocking your current domain.
Next Steps
Once you have all prerequisites installed and configured, proceed to the Installation guide for step-by-step instructions on setting up the Admin Panel.
Installation — Admin Panel (Laravel)
This guide walks you through the process of setting up the Laravel Admin Panel on your local machine. Follow these steps carefully to ensure a proper installation.
1) What you'll need
- A computer with internet access
- Basic knowledge of command line operations
- The project's source code (from CodeCanyon)
2) Install PHP and Composer
The Admin Panel requires PHP 8.2 or newer.
Steps (Windows):
- Install PHP:
- Download PHP for Windows from https://windows.php.net/download
- Choose the latest PHP 8.2.x (or newer) Thread Safe version
- Extract the ZIP to
C:\php - Add PHP to your system's PATH:
- Open System Properties → Advanced → Environment Variables
- Under System Variables, find PATH and click Edit
- Add
C:\phpas a new entry - Click OK to save
- Open
php.iniand enable the extensions Laravel needs:bcmath,ctype,curl,fileinfo,json,mbstring,openssl,pdo_mysql(orpdo_sqlite),tokenizer,xml.
- Install Composer:
- Download the Composer installer from https://getcomposer.org/download/
- Run the installer and follow the prompts, selecting the PHP you just installed
- Verify installation by opening a new PowerShell window and typing:
php -v
composer -v
3) Install Node.js
The Admin Panel's UI assets are built with Vite, so you'll also need Node.js:
node -v
npm -v
If these aren't recognized, install Node.js LTS from nodejs.org.
4) Choose a database
The Admin Panel works with either SQLite (simplest for local development, no server to install) or MySQL (recommended for production). Pick one:
- SQLite — nothing to install; you'll just create an empty database file (step 6).
- MySQL — download and install MySQL Installer (Server only), and remember the root password you set.
5) Get the project files and install dependencies
- Locate the
admin-panelfolder from your CodeCanyon download and open it in VS Code. - Install PHP and JavaScript dependencies:
composer install
npm install
6) Configure the environment
- Copy
.env.exampleto.envand generate an application key:
copy .env.example .env
php artisan key:generate- Open
.envand set your database connection. For SQLite (the default):
DB_CONNECTION=sqliteThen create the empty database file:
type nul > database\database.sqliteFor MySQL instead, create an empty database first, then set:
DB_CONNECTION=mysql
DB_HOST=127.0.0.1
DB_PORT=3306
DB_DATABASE=your_database_name
DB_USERNAME=root
DB_PASSWORD=your_password
7) Start the server and complete setup in the browser
- Start the Laravel dev server and, in a separate terminal, the Vite dev server:
php artisan servenpm run dev- Open http://localhost:8000 in your browser. On a fresh install (no
storage/app/installed.lockyet), you're redirected to the built-in installer wizard, which walks through four steps:
- Requirements — confirms your PHP version and required extensions are OK, and that
storage/andbootstrap/cache/are writable. - License — enter your CodeCanyon Purchase Code, which is verified with Hyperdash's activation server.
- Database — enter your App URL and database host/port/name/username/password. The installer runs the migrations and seeds the default accounts for you — no manual
artisan migrateneeded. - Finish — confirms installation is complete and lists the default accounts that were created (Super Admin, Admin, Store Owner, Delivery Driver, Customer — all with password
password). Change these before going to production.
- Click Continue to Login and sign in with one of the accounts shown on the Finish step.
8) Configure Customer Web Connection
Make sure your Customer Web's .env file has the correct admin panel URL:
NEXT_PUBLIC_ADMIN_PANEL_URL=http://localhost:80009) Troubleshooting
- If PHP is not recognized, verify it's in your PATH.
- For database connection errors, check your MySQL service is running (if you chose MySQL), or that
database/database.sqliteexists (if you chose SQLite). - If the installer won't let you past Requirements, run
php -mto confirm the required extensions are enabled inphp.ini, then restartphp artisan serve. - For permission issues in storage or cache:
php artisan cache:clear php artisan config:clear - For composer memory issues, try:
php -d memory_limit=-1 composer install - If you need to redo the installer (e.g. on a fresh clone), delete
storage/app/installed.lock— the next visit to the site will show the wizard again. Don't do this on a live production instance.
Once installed, proceed to the Overview guide for a step-by-step tour of the Admin Panel.
Admin Panel Overview
A complete walkthrough of every section in the Admin Panel sidebar, in the same order they appear on screen: Main, Operations, Partners & Stores, Delivery & Fleet, Catalog, Marketing & Content, Finance, AI & Automation, and System.
Main
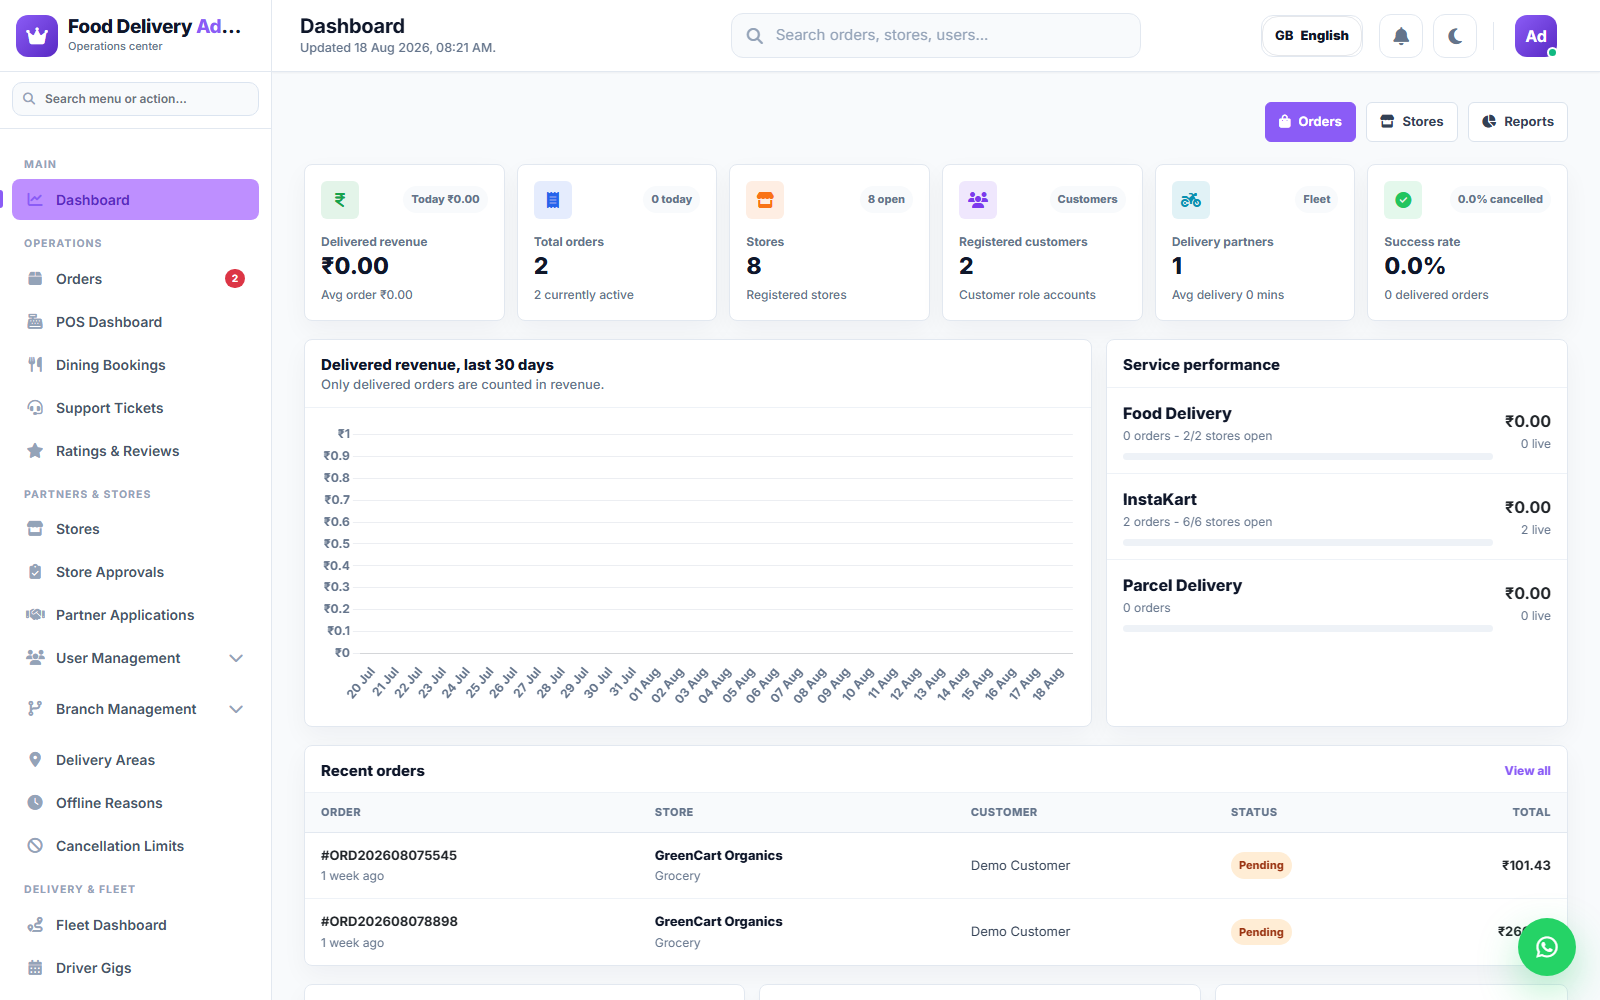
Dashboard
The Dashboard is the landing page after login. It shows business insights (sales, earnings, and order graphs) and top-performer lists (Top Rated Sellers, Top Selling Products, Top Categories).
Operations
Orders
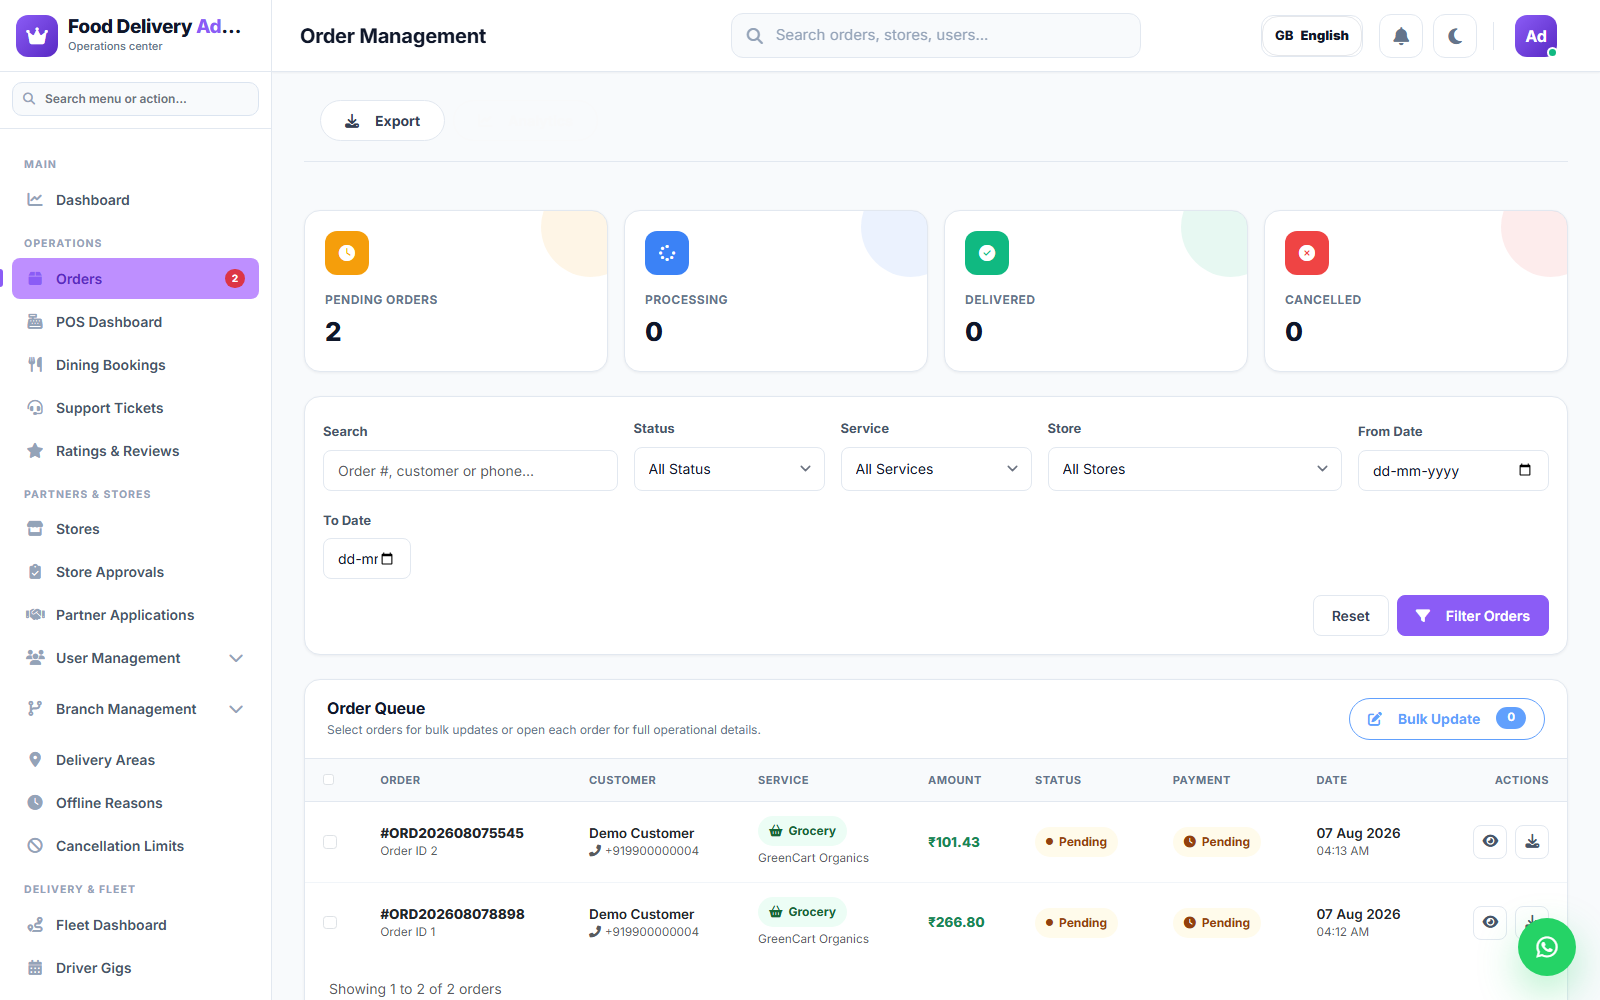
View every order placed across all services (food, grocery, parcel, etc.), open an order for full details, and generate its invoice. A red badge on the sidebar shows how many orders are currently pending or confirmed.
POS Dashboard
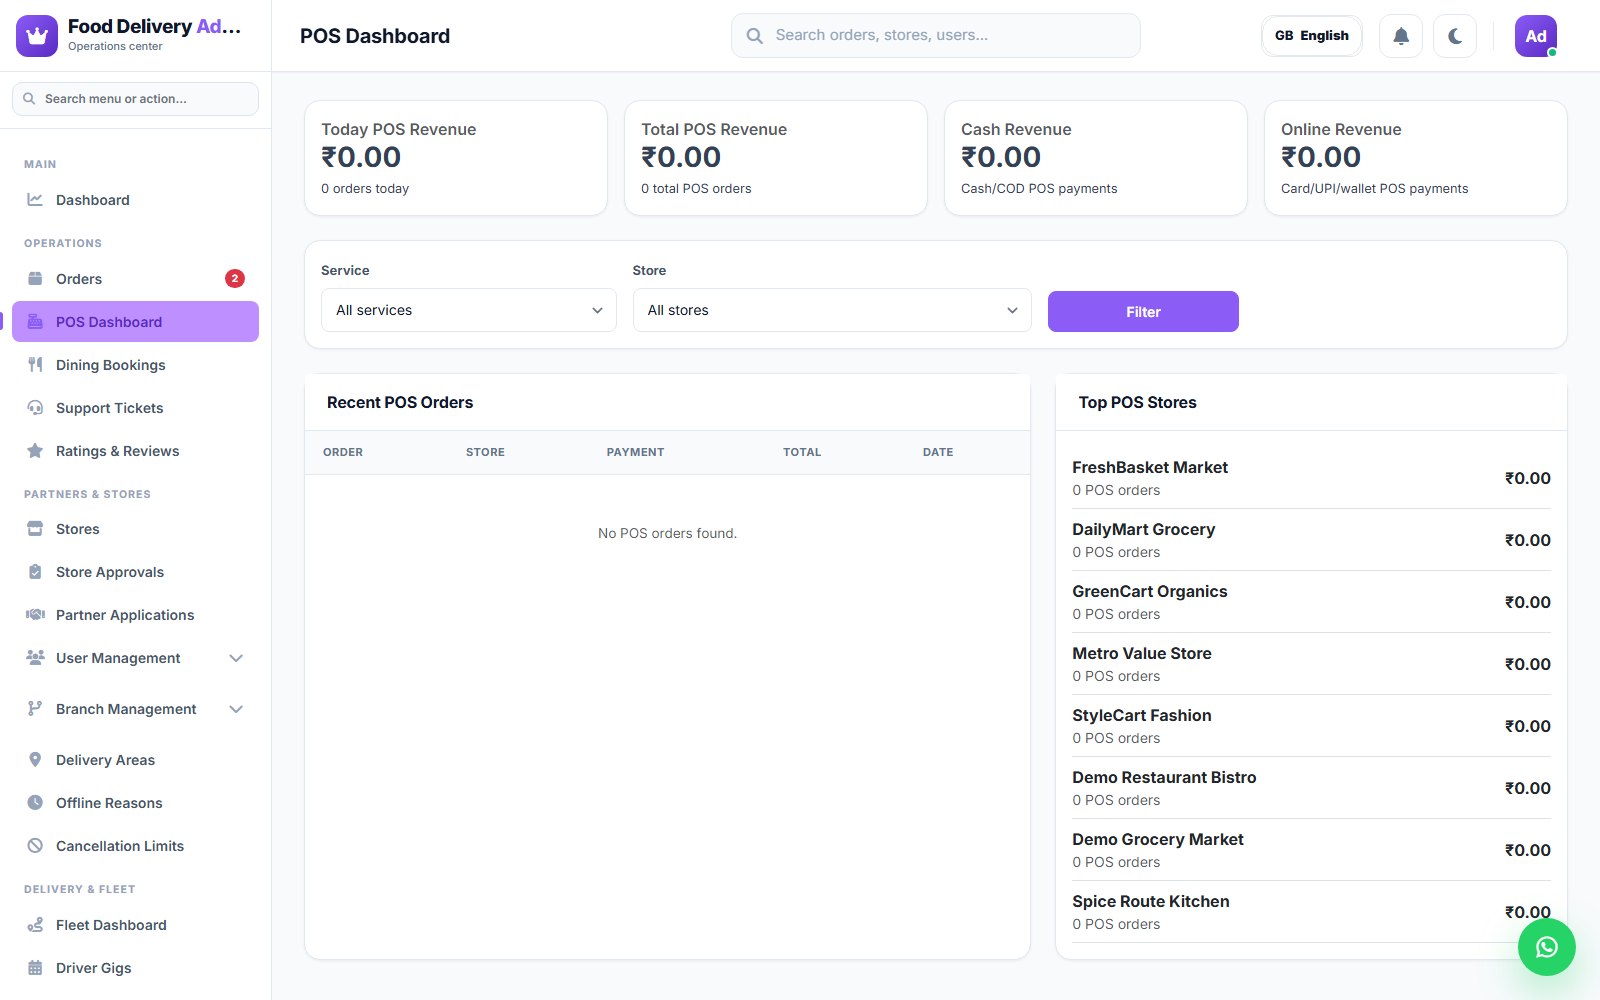
Tracks in-store Point-of-Sale orders taken directly at a store (as opposed to orders placed through the customer app). Filter by Service or Store to see today's POS revenue, cash vs. online split, recent POS orders, and the top-performing POS stores.
Dining Bookings
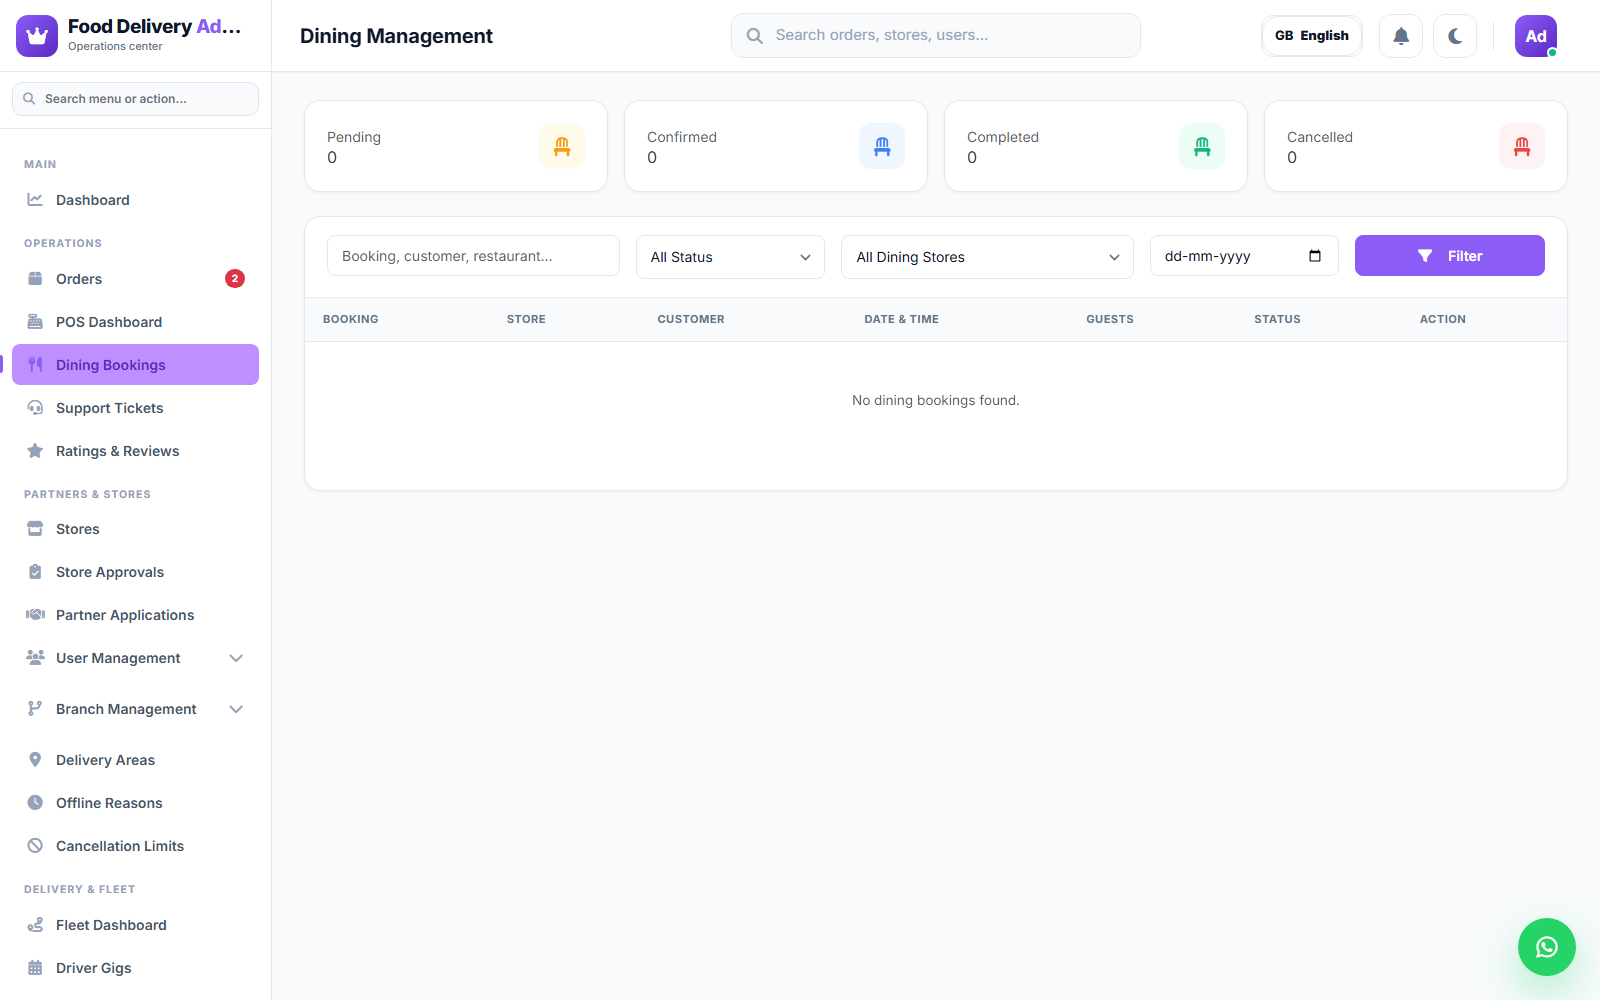
Manages table/dining reservation requests for restaurants that accept bookings. Pending bookings show a badge count in the sidebar.
Support Tickets
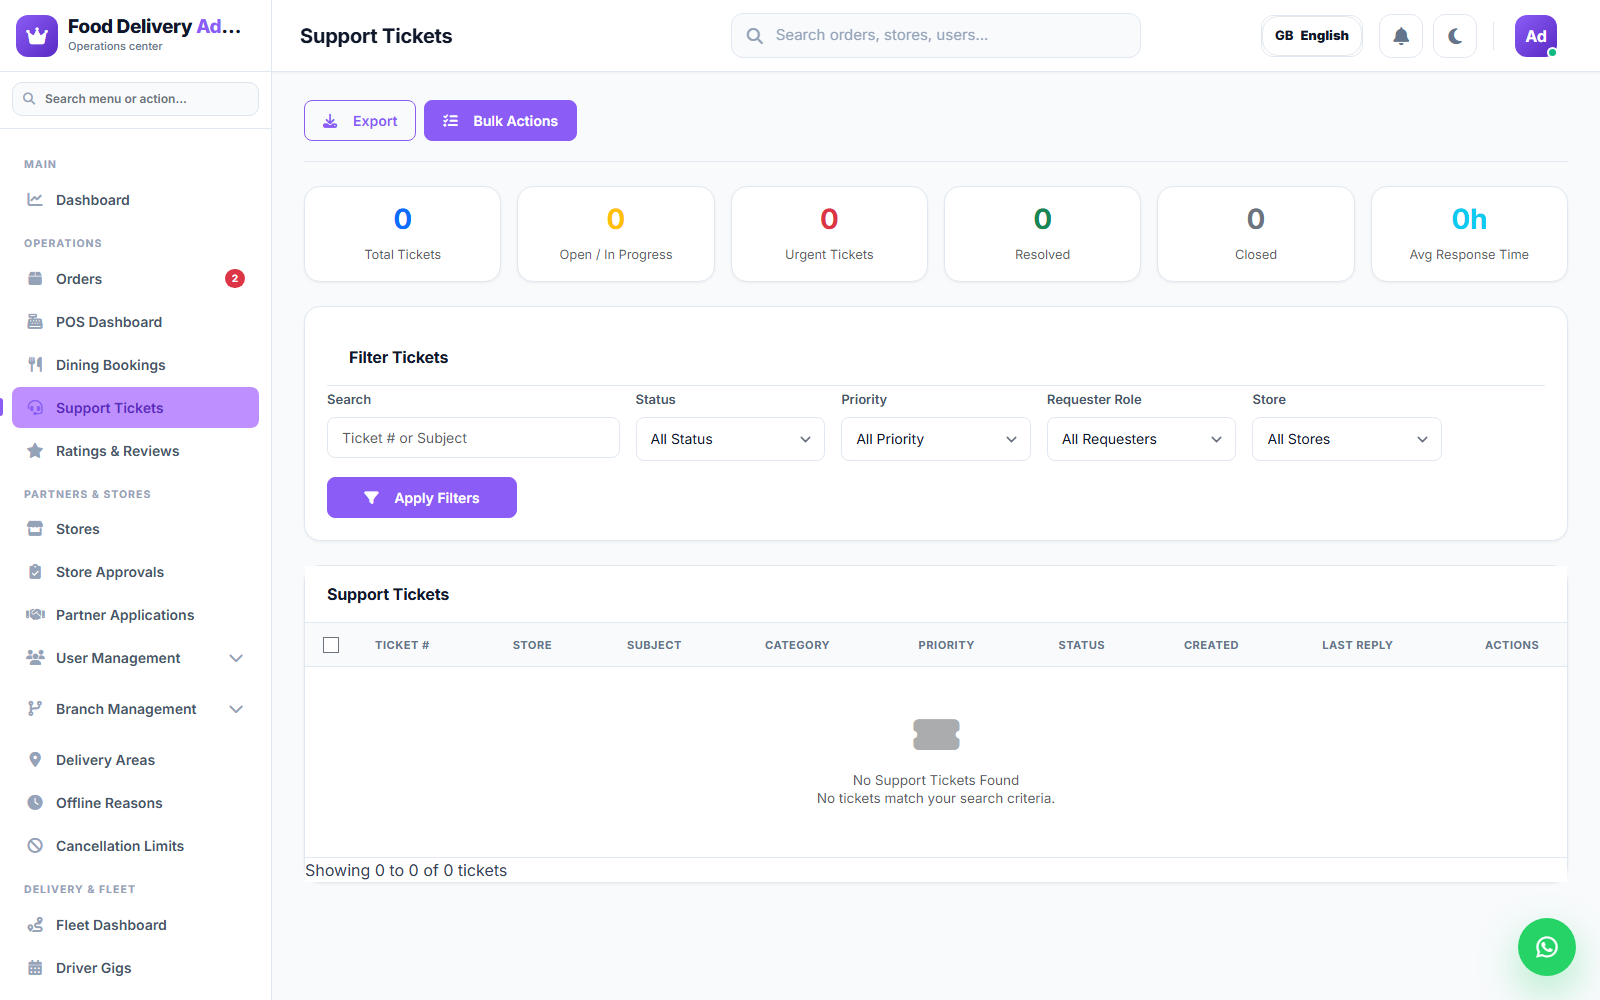
All customer, driver, and restaurant support tickets land here. Open tickets are counted with a red badge. Open a ticket to reply and change its status.
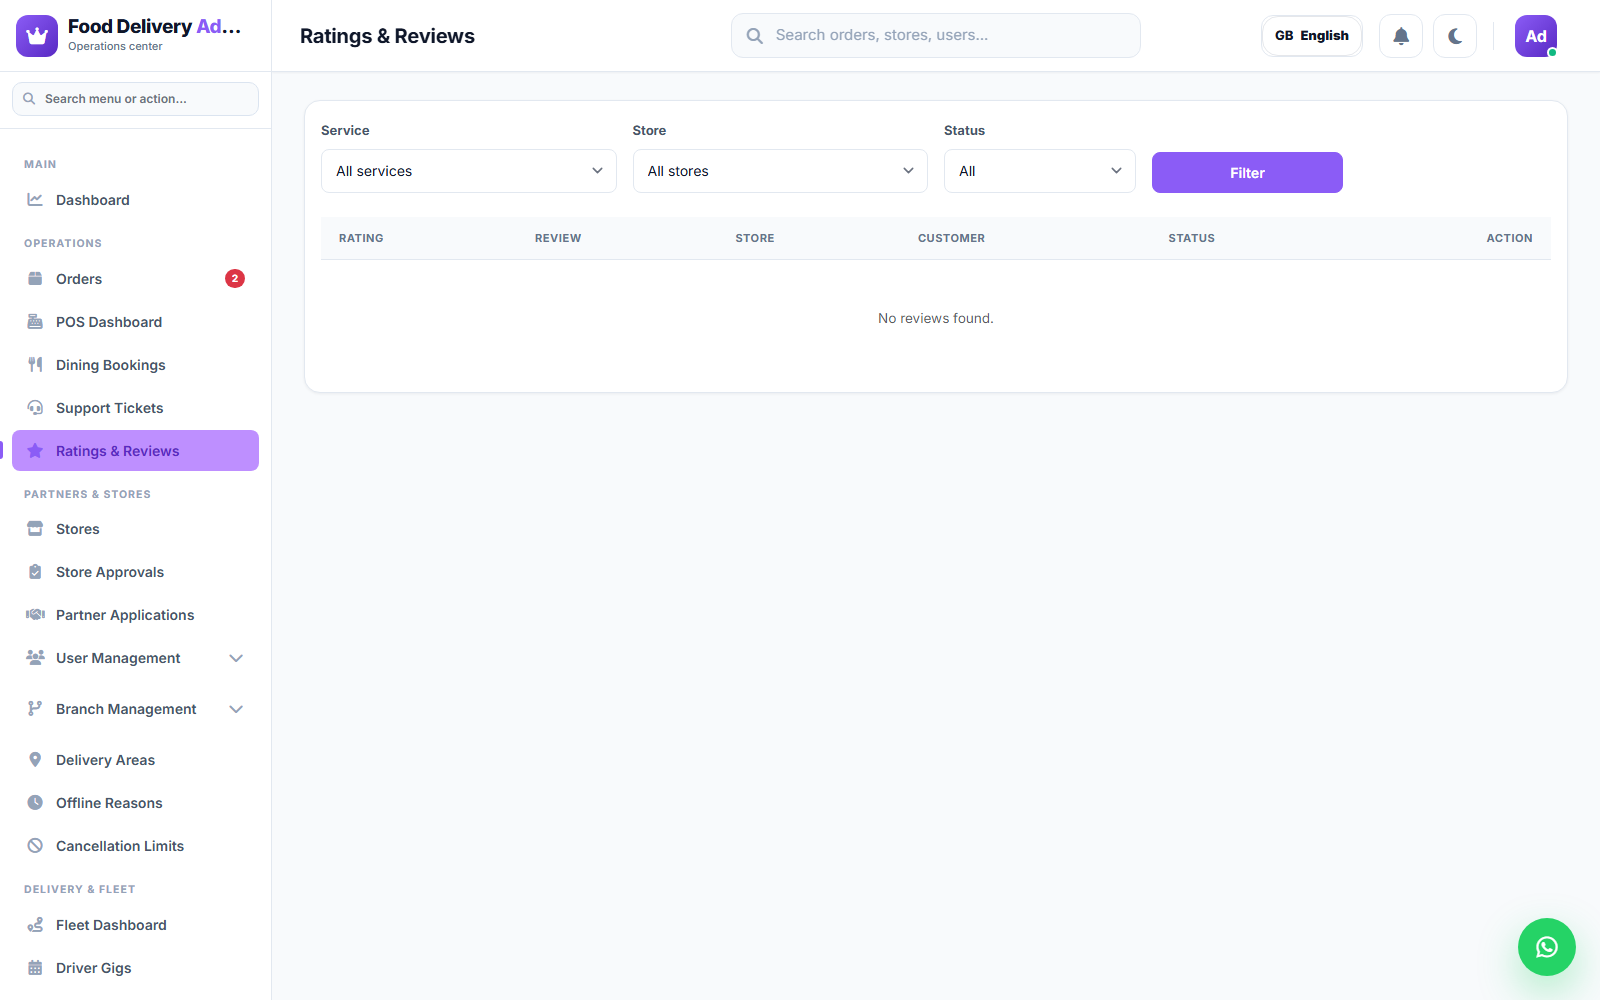
Ratings & Reviews
Browse ratings and reviews left by customers for stores, products, and deliveries.
Partners & Stores
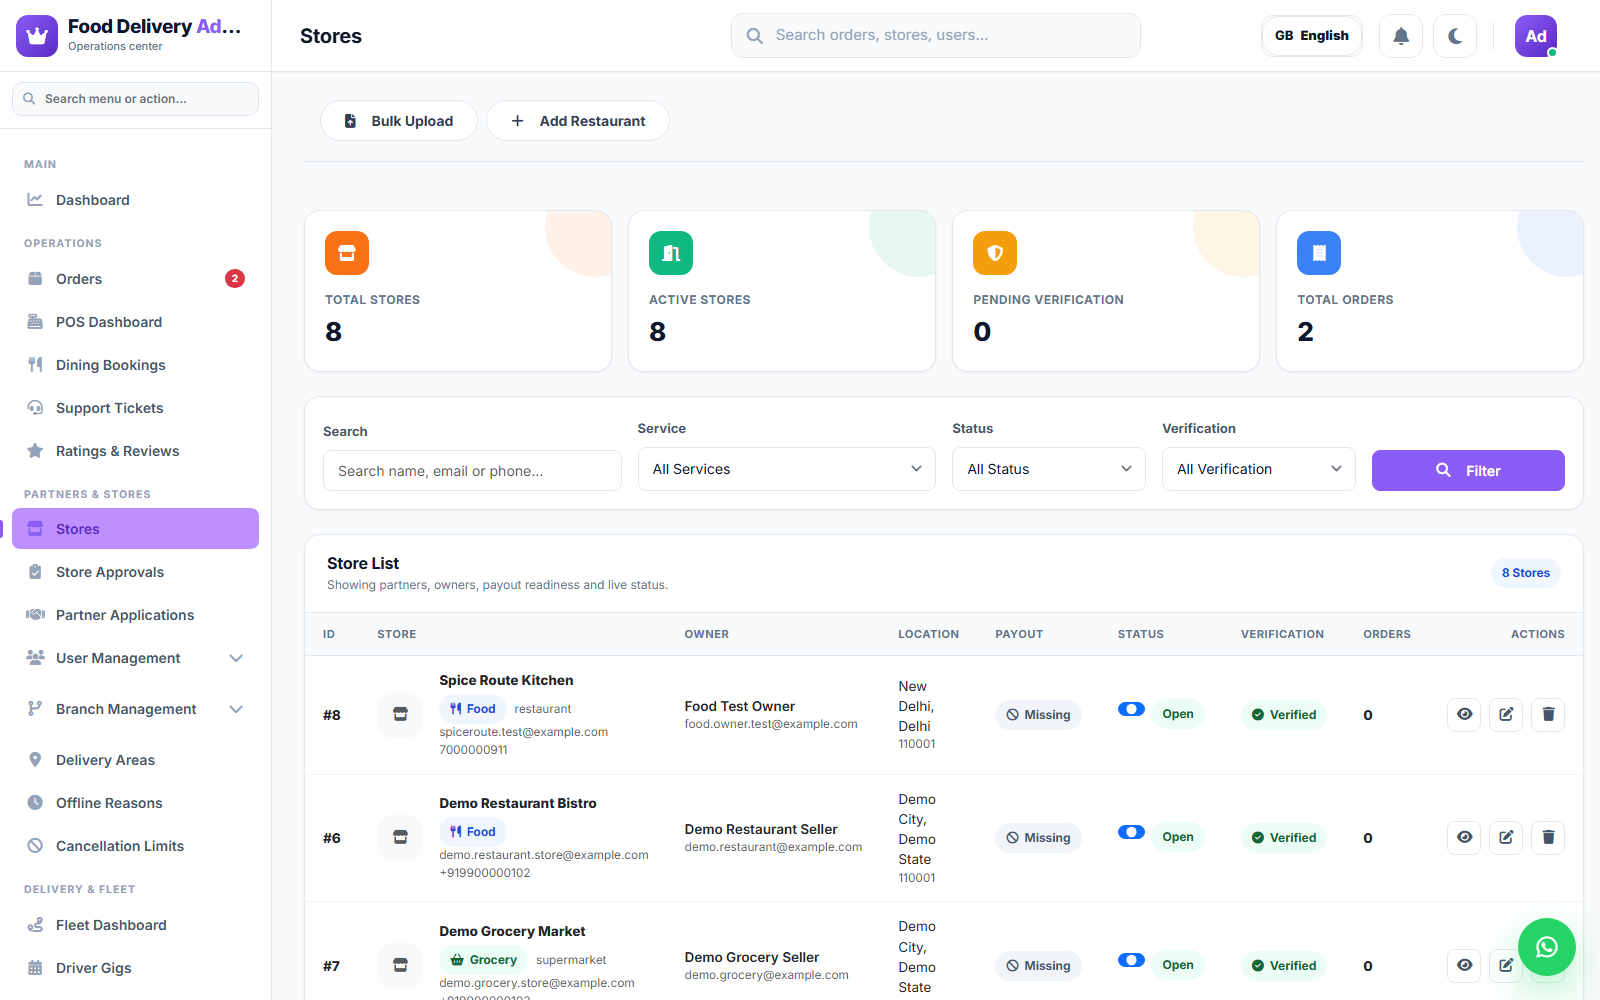
Stores
Every store/restaurant on the platform, regardless of service type. Open a store to view its details, menu, and status.
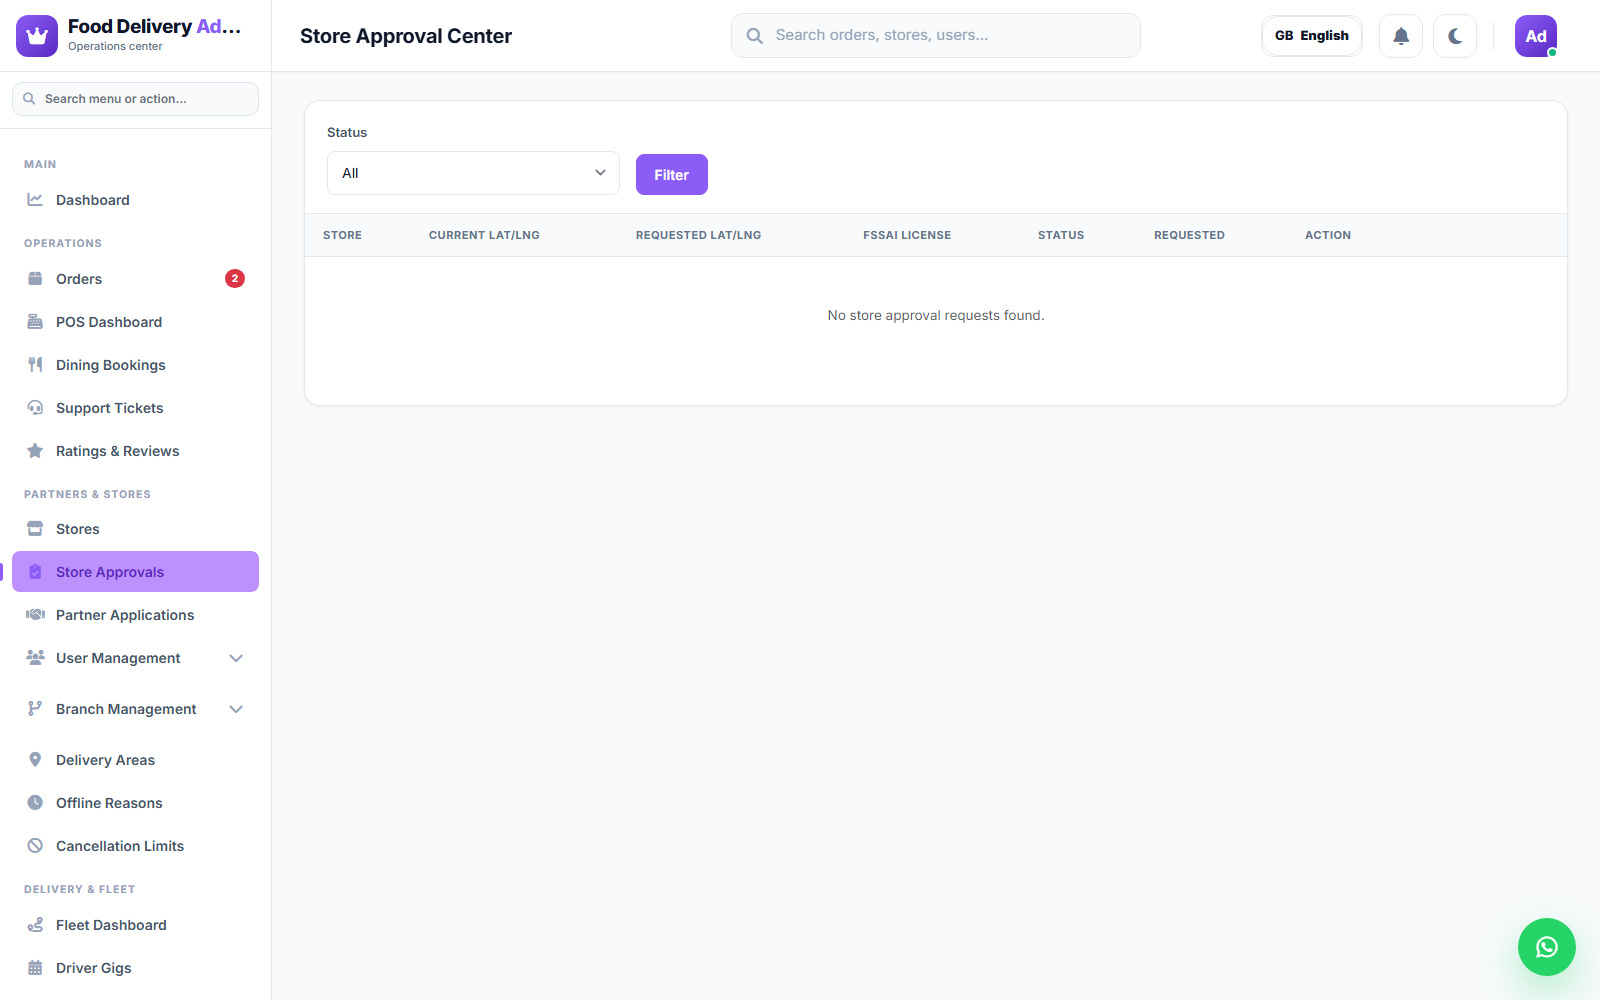
Store Approvals
New store registrations and store-location change requests wait here for admin review before they go live. Pending approvals show a badge count.
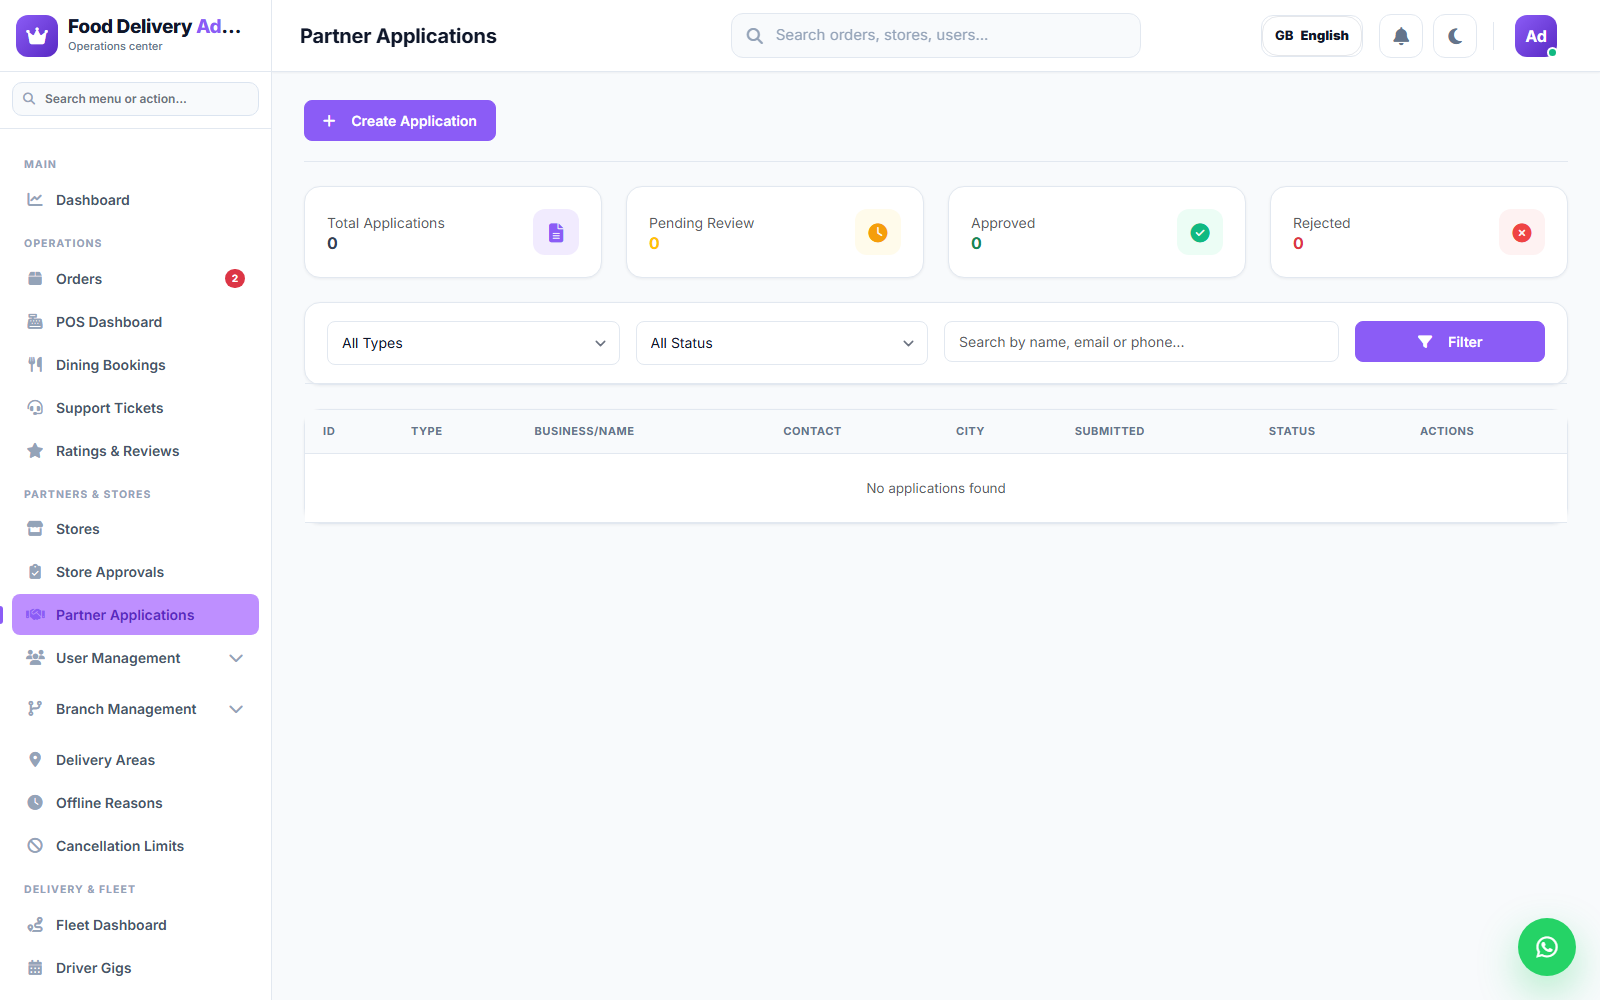
Partner Applications
Inbound applications from people who want to become a store partner or driver partner through the public partner-signup flow. Review and approve/reject from this list.
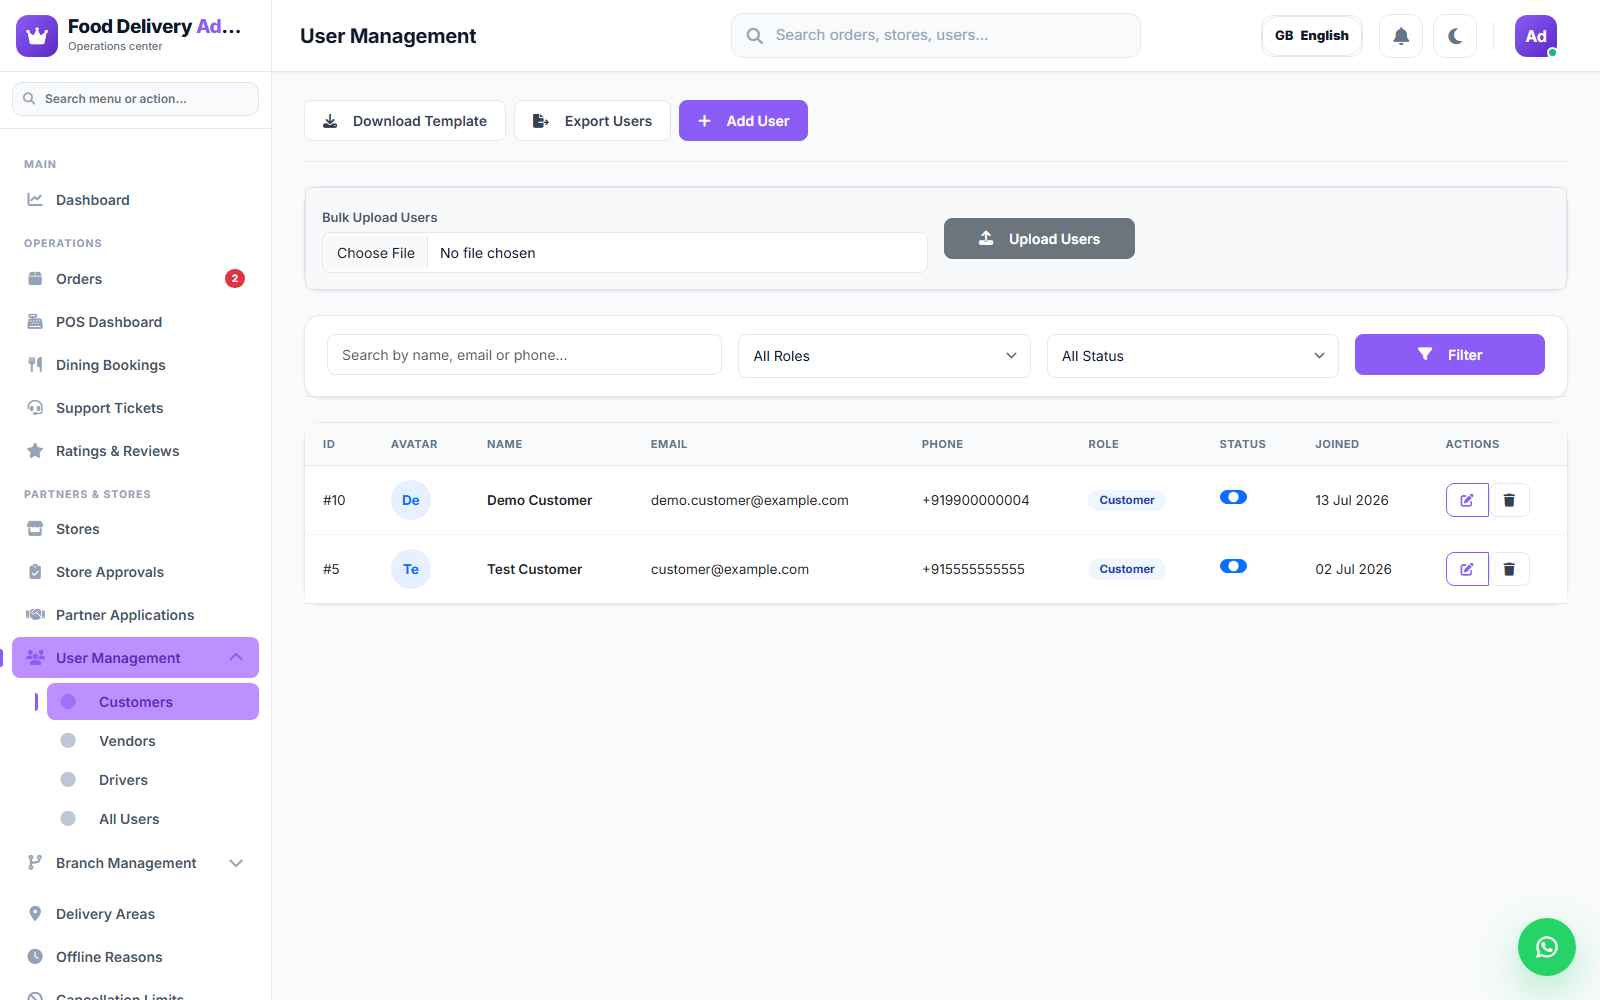
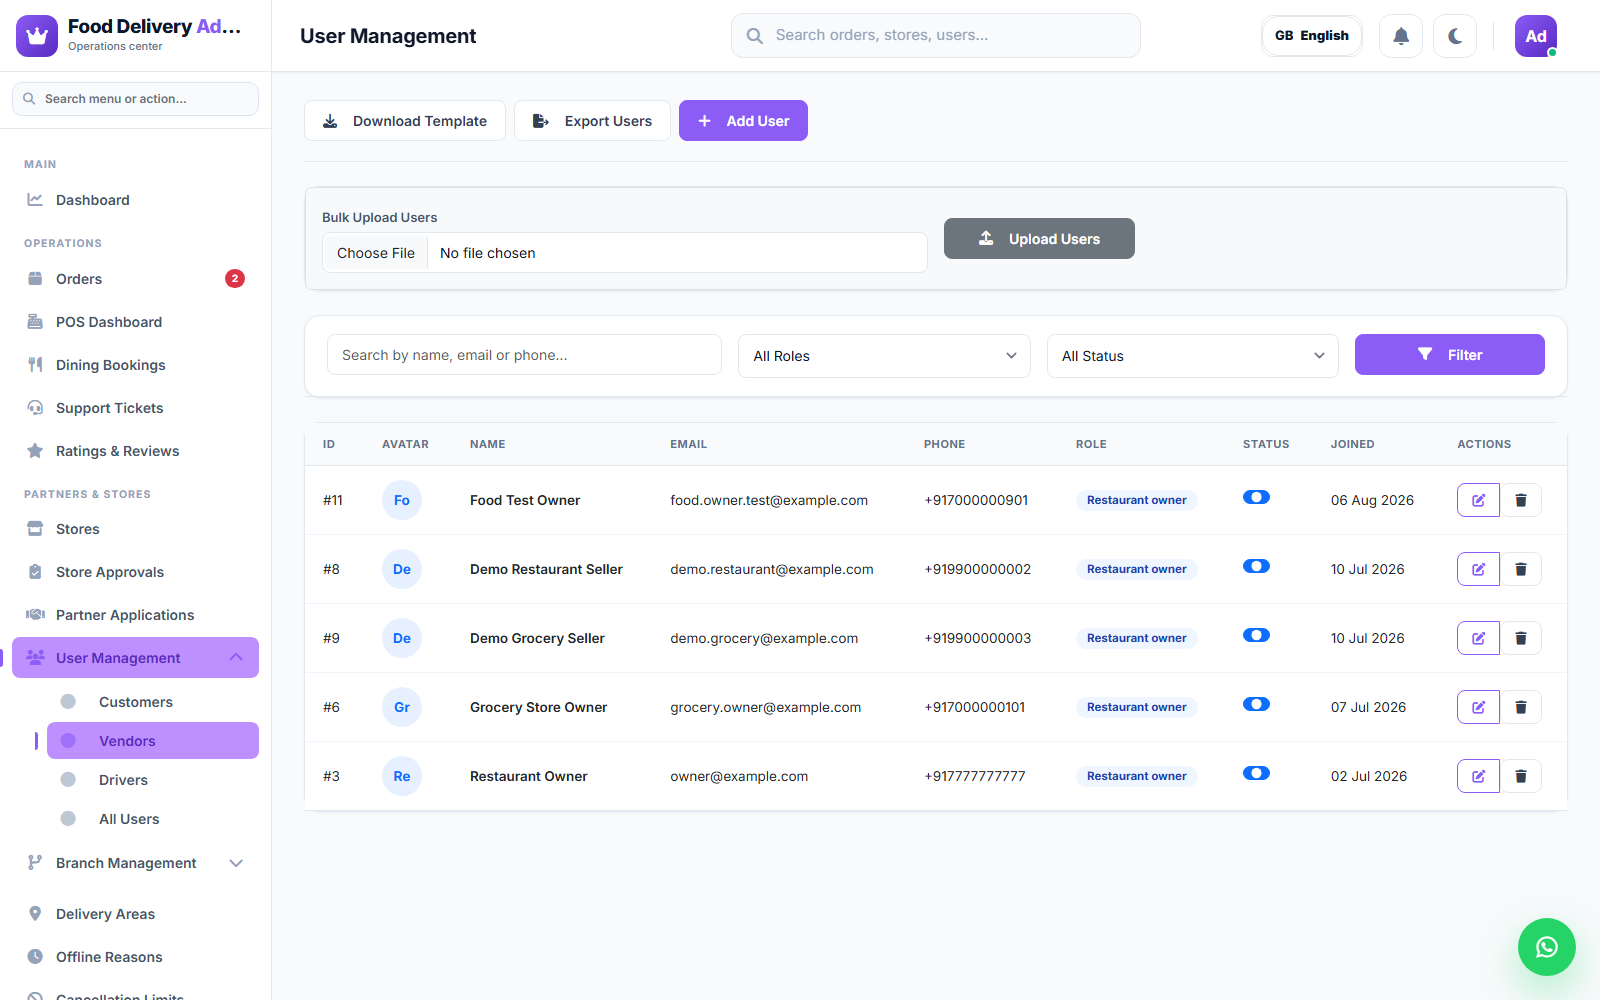
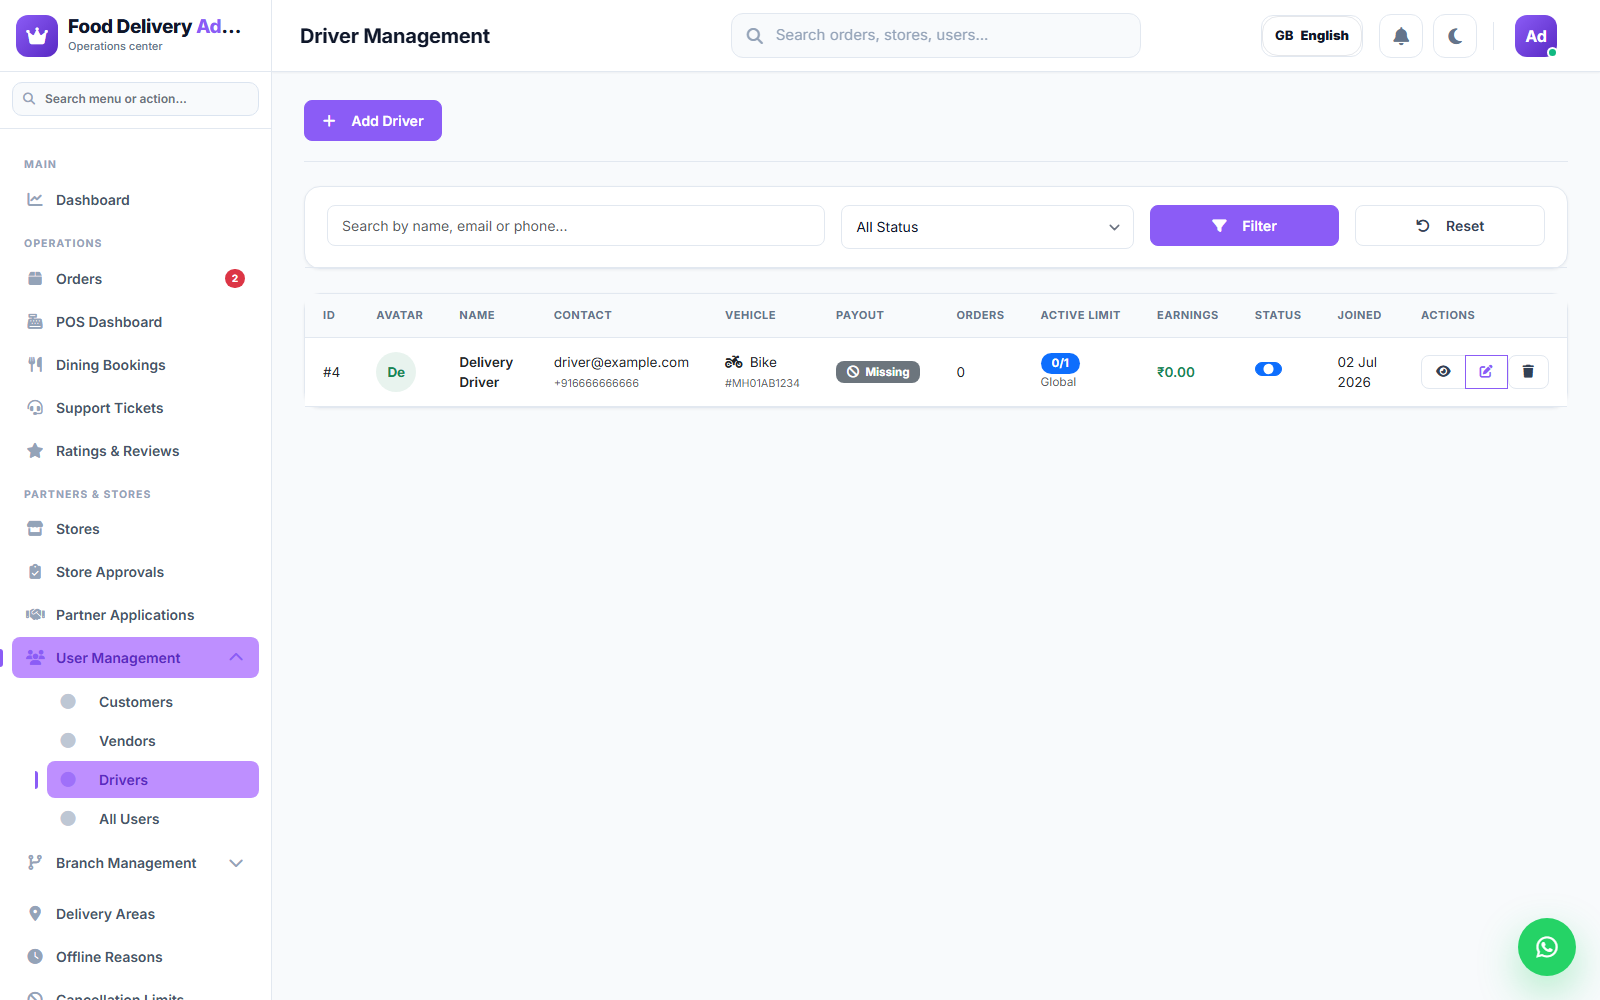
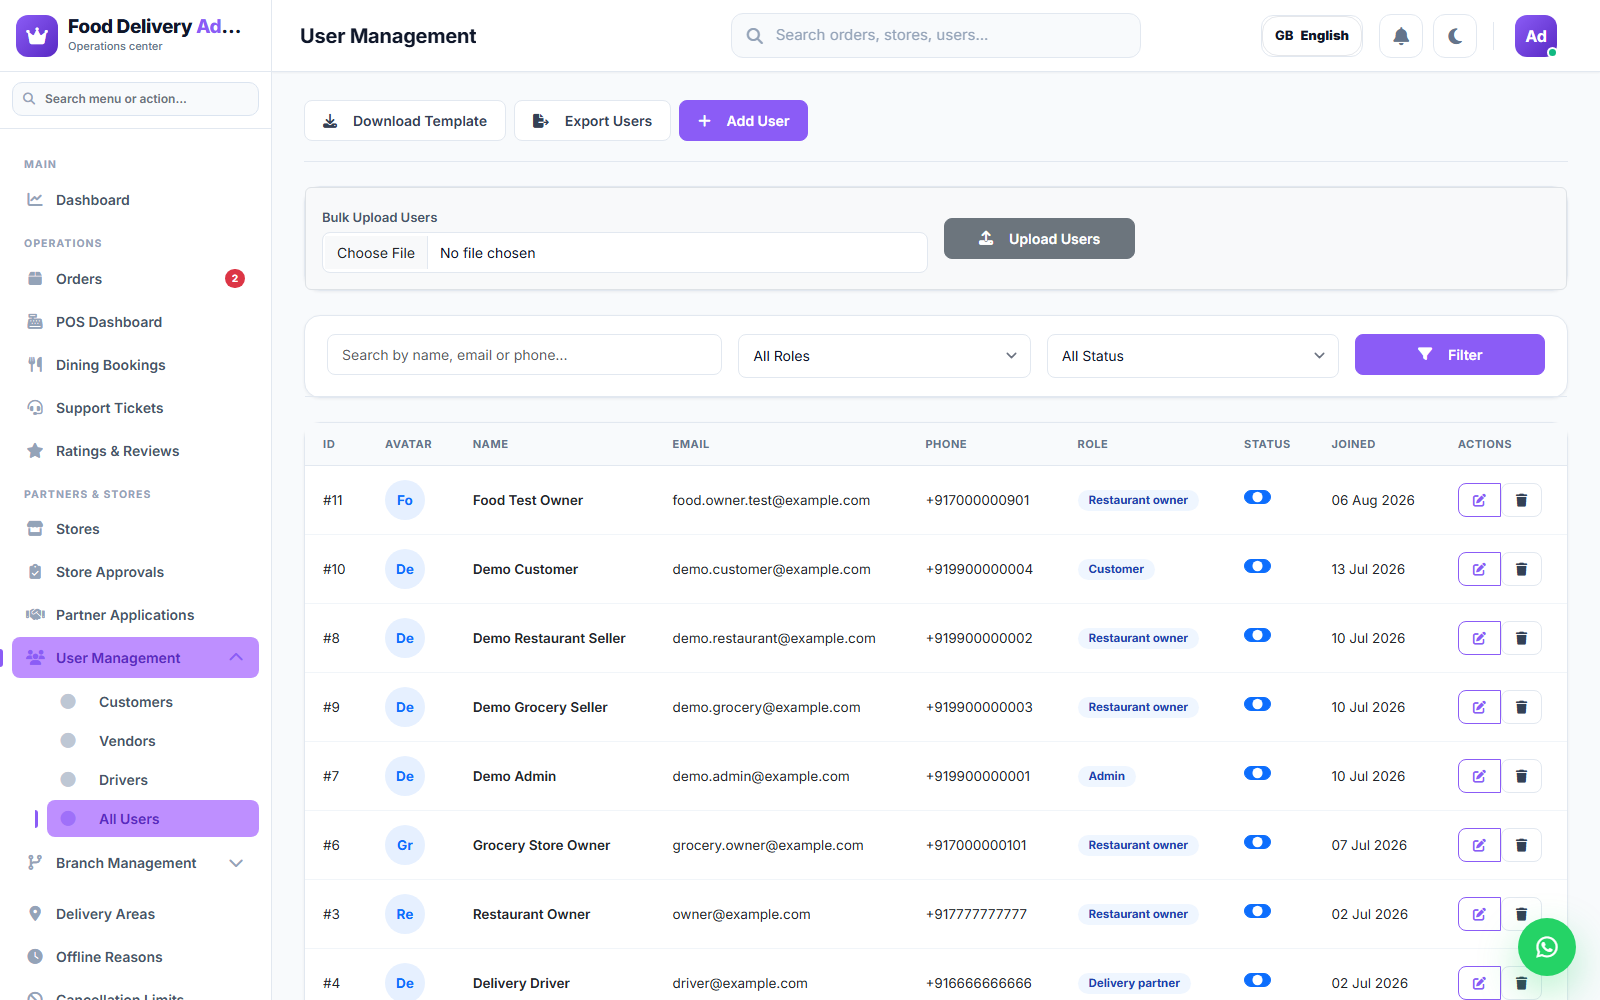
User Management
A grouped submenu for every user type on the platform:
- Customers — all registered customers.
- Vendors — store/restaurant owner accounts.
- Drivers — delivery partner accounts.
- All Users — a combined view across every role, including internal admin/staff accounts.
Branch Management
Hyperdash supports franchise branches — regional operators who run their own slice of the platform (their own stores, drivers, and territory) through a separate Branch Panel (/branch-panel/dashboard), while the Super Admin retains oversight here:
- All Branches — list every branch, its owner, commission split, and status; Create Branch to onboard a new one.
- Branch Users — the owner/manager/staff accounts attached to each branch.
- Branch Wallets — each branch's running wallet balance.
- Branch Settlements — generate and approve periodic settlements between the platform and a branch.
- Branch Payouts — mark branch payouts as paid once transferred.
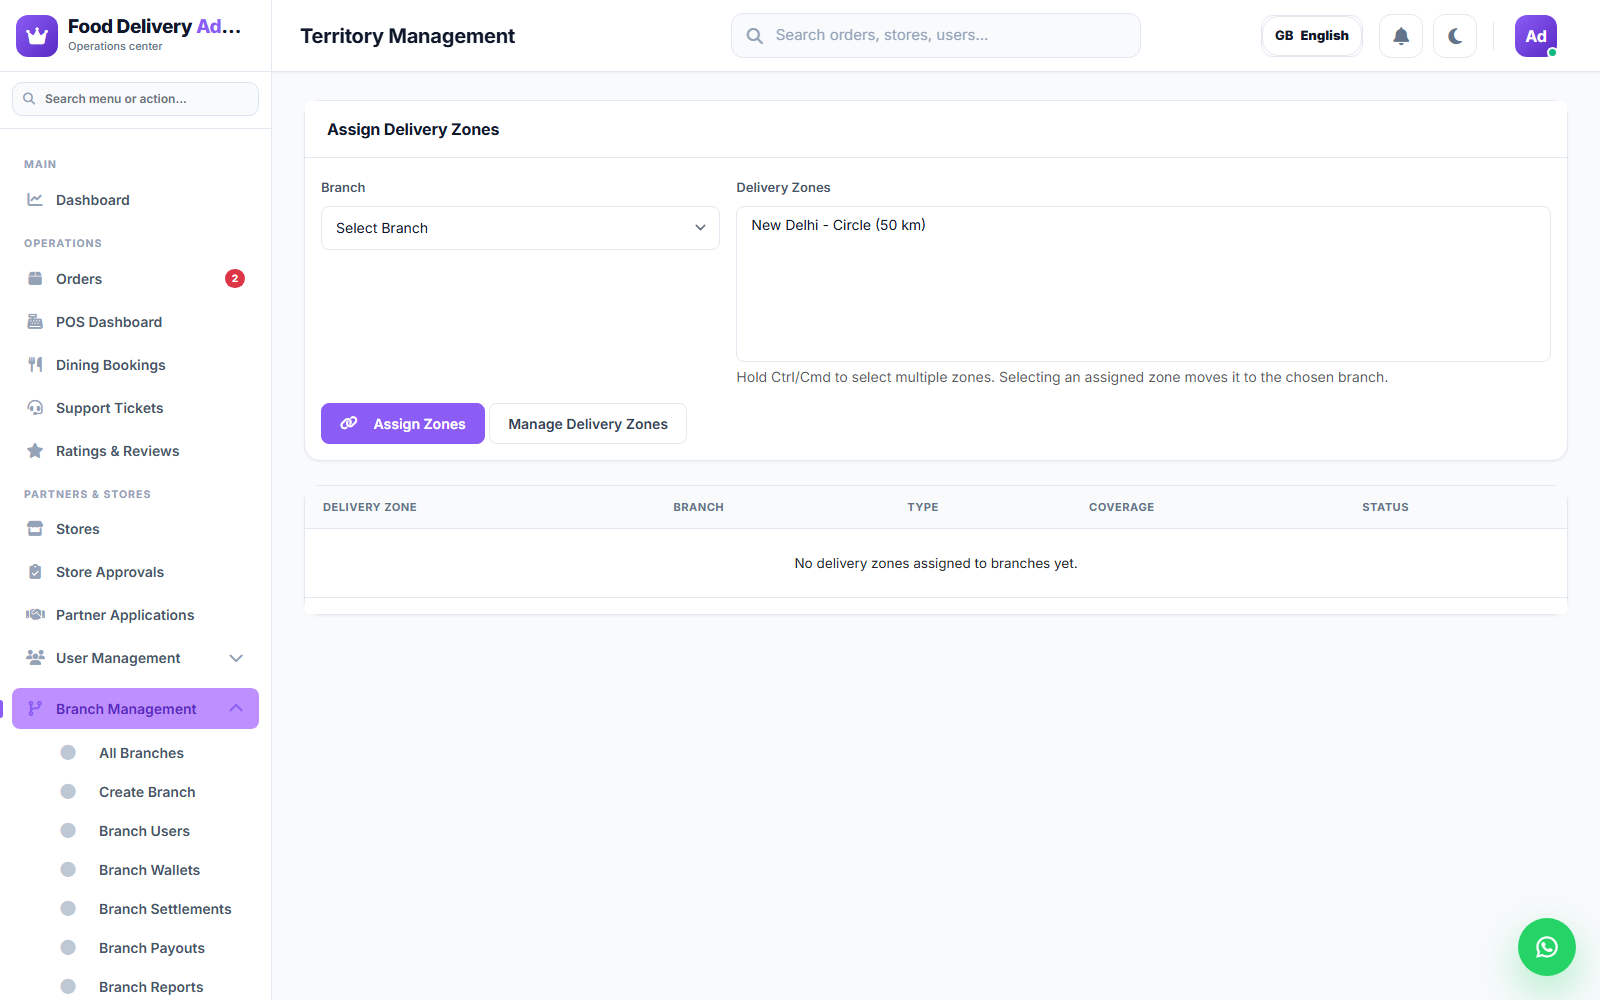
- Territory Management — assign delivery zones to a specific branch so its orders/drivers stay scoped to that territory.
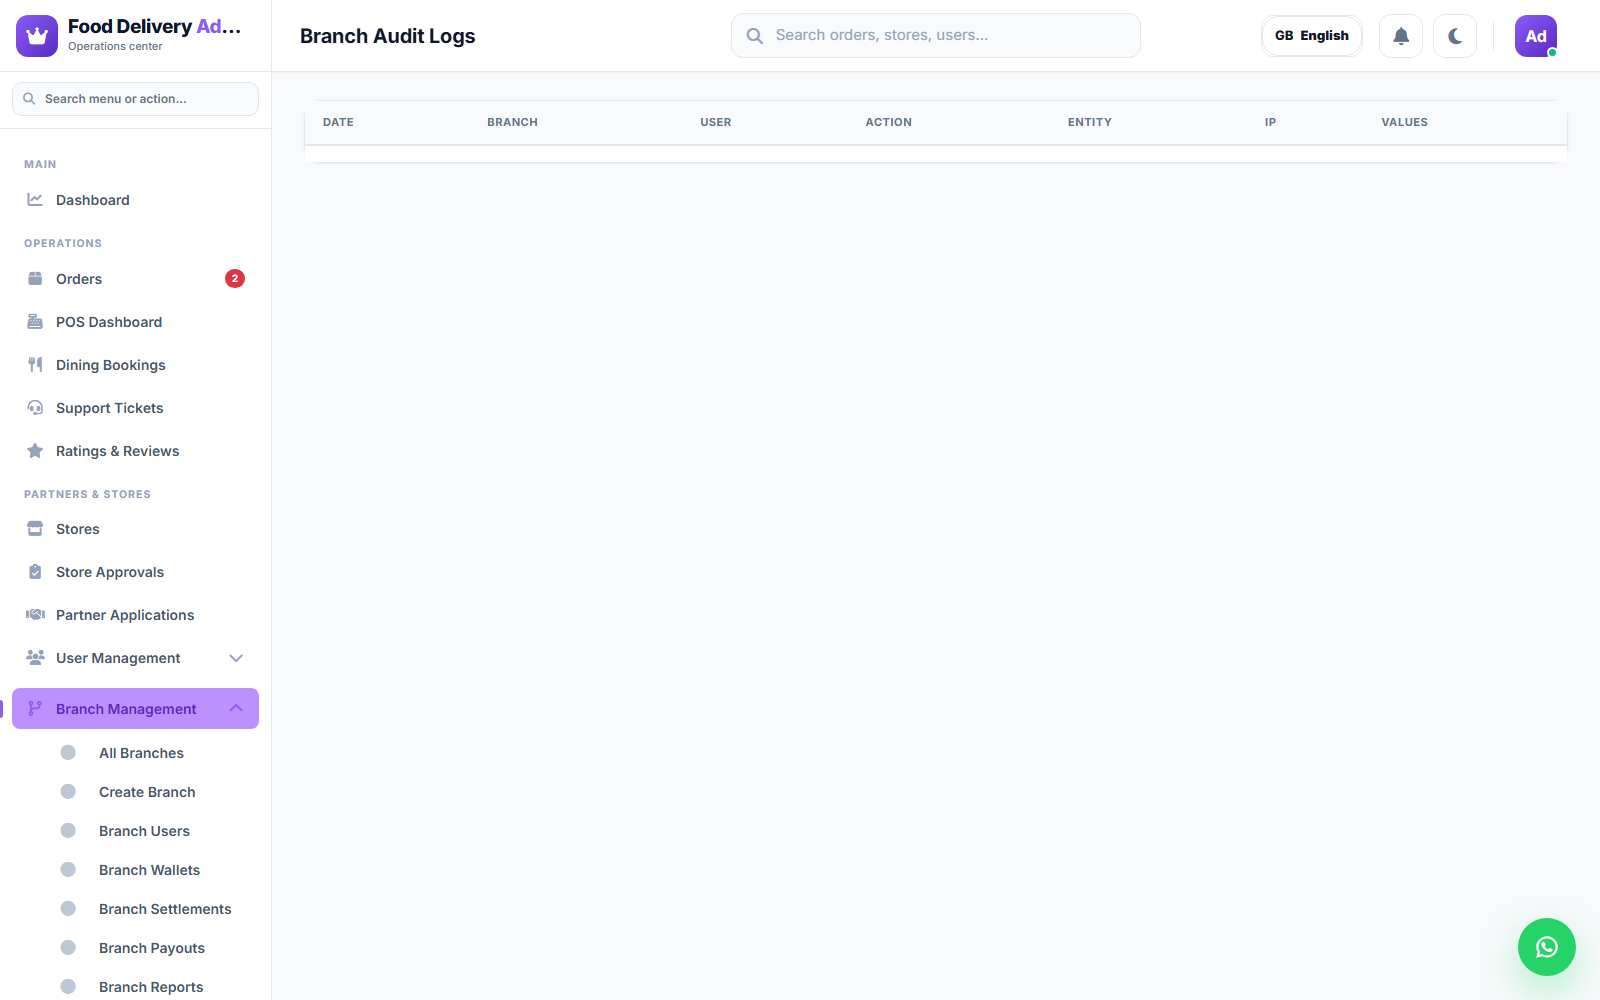
- Audit Logs — a history of branch-related administrative actions.
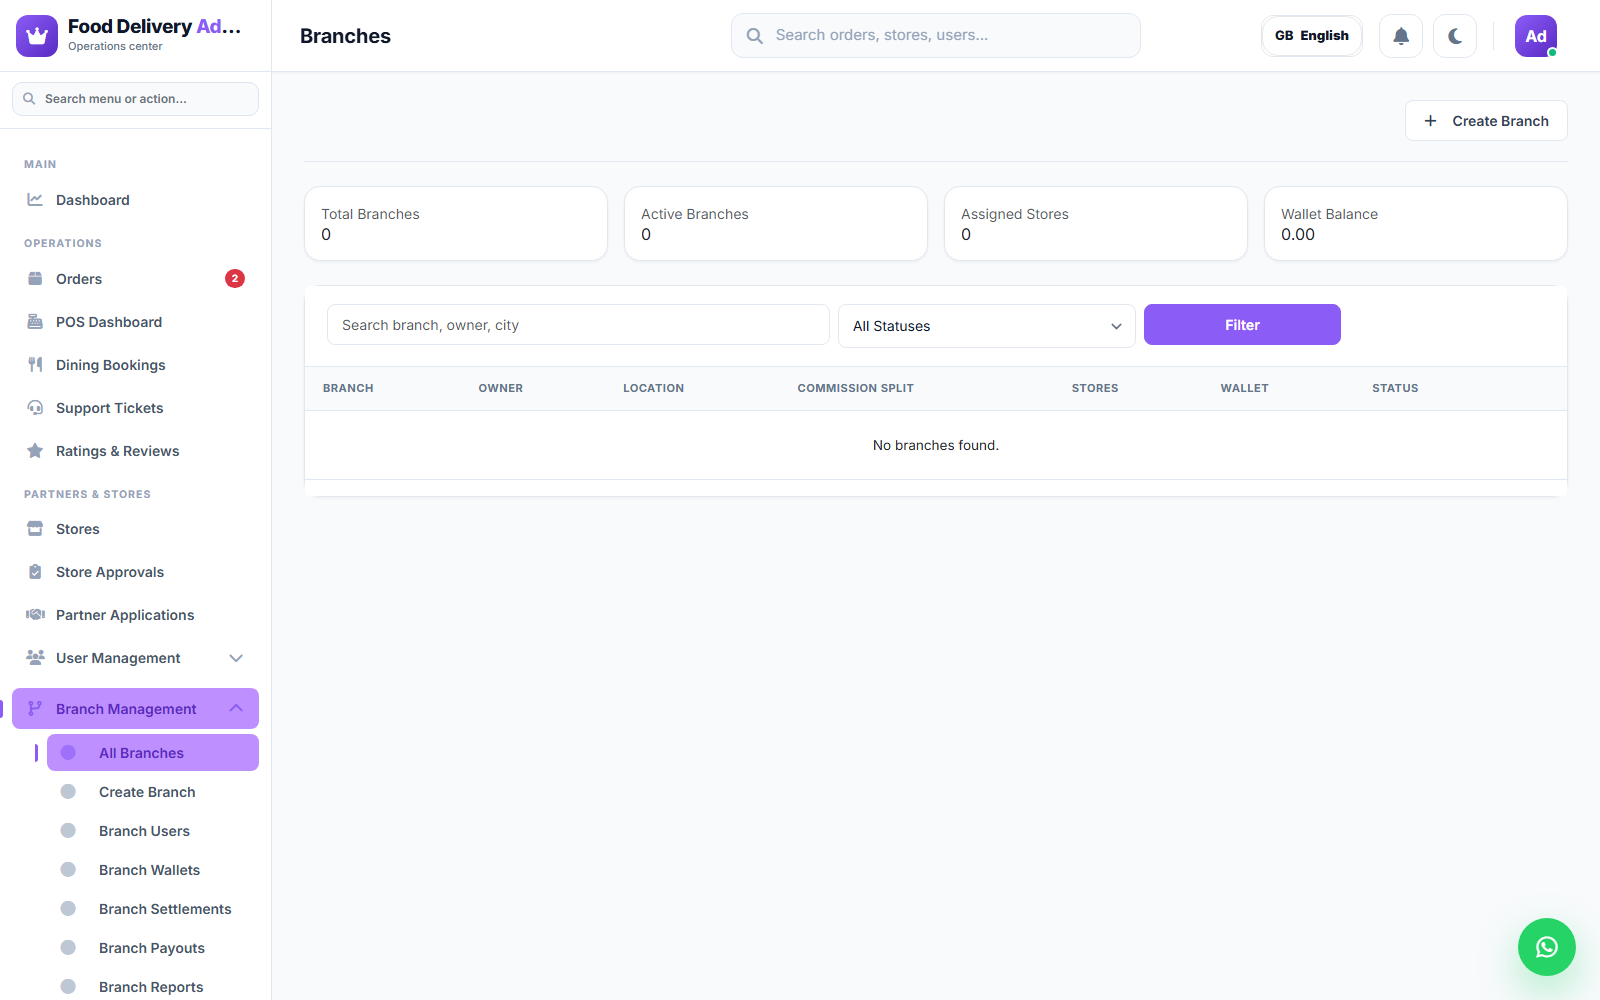
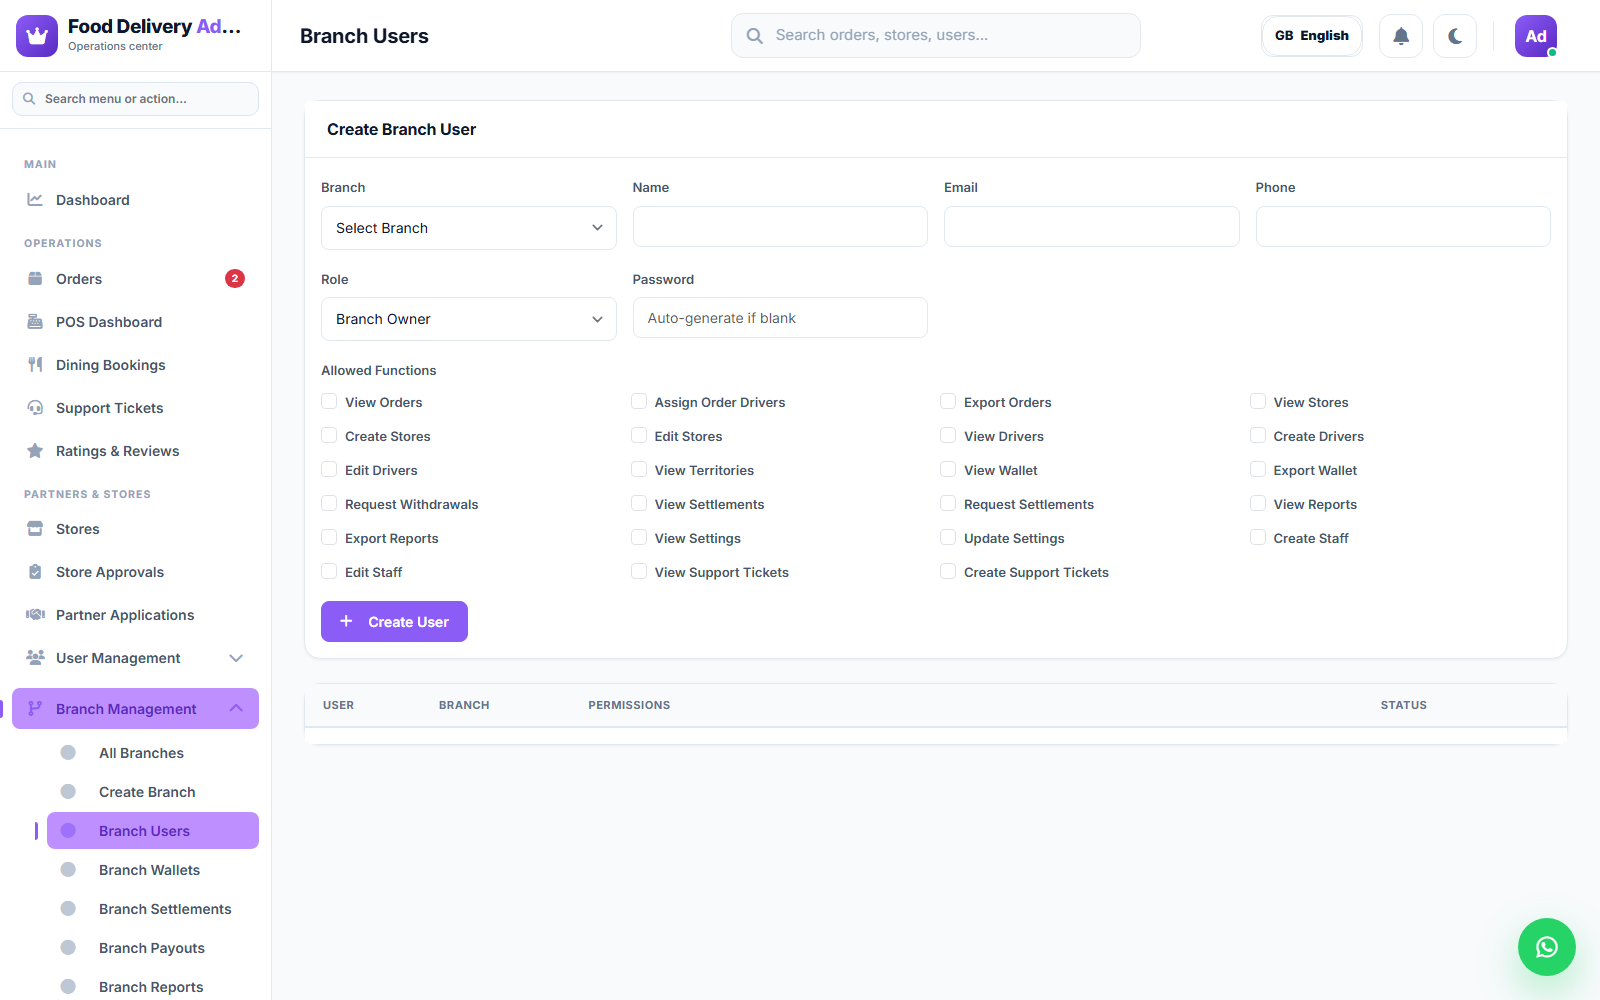
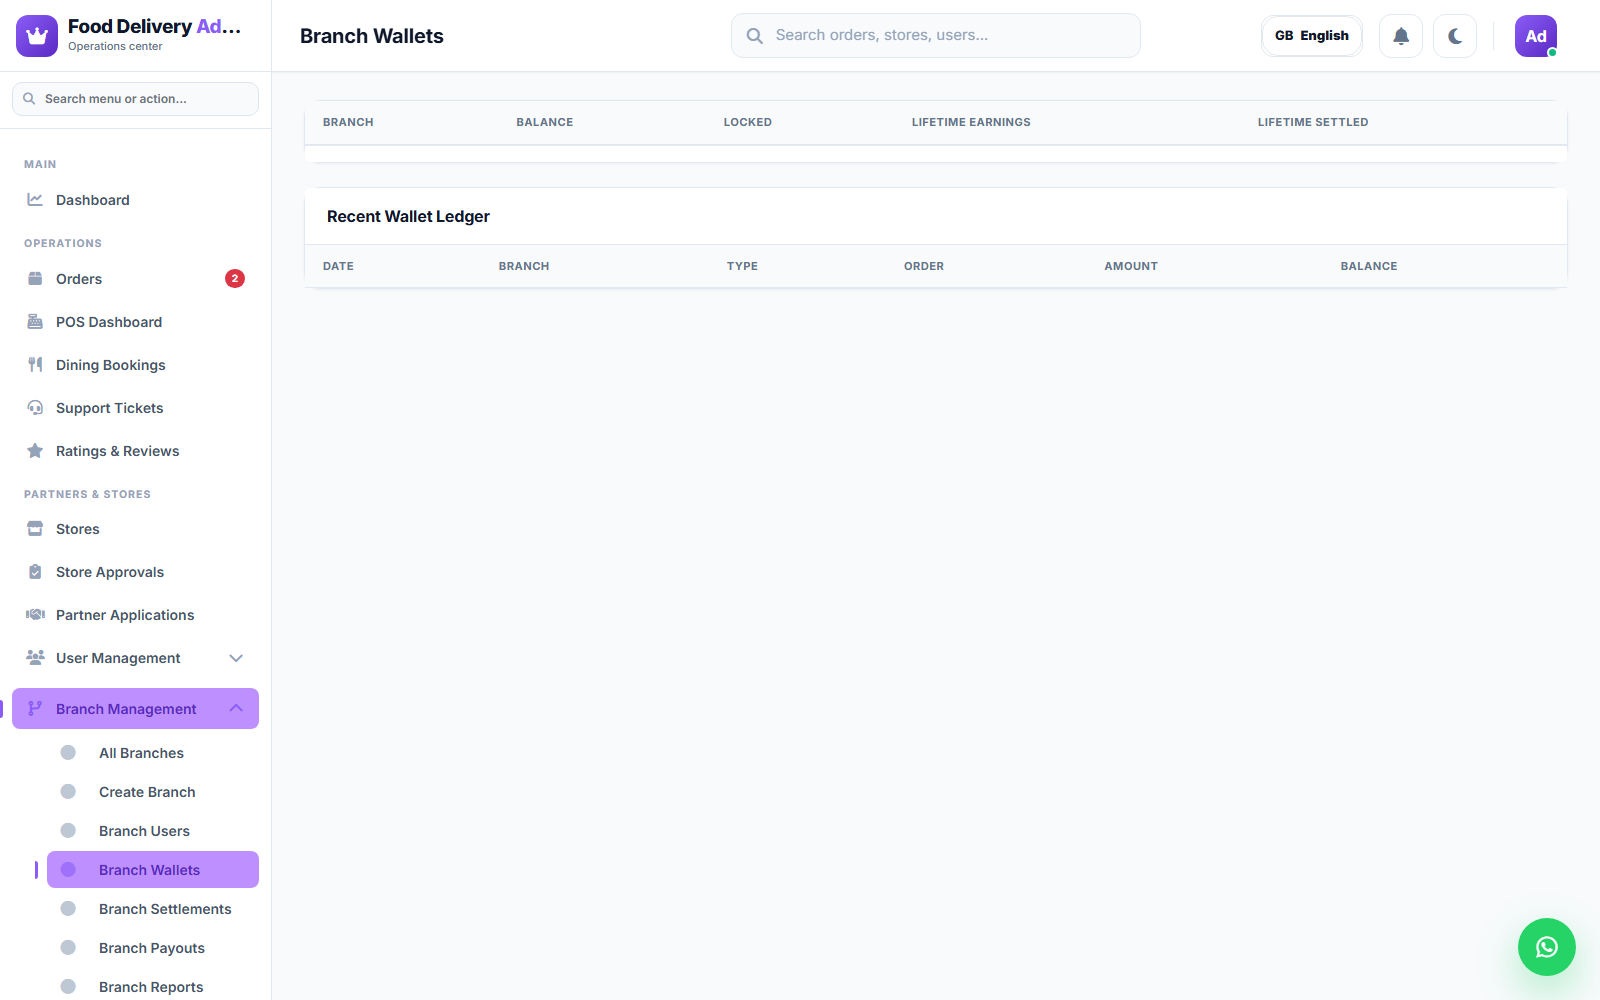
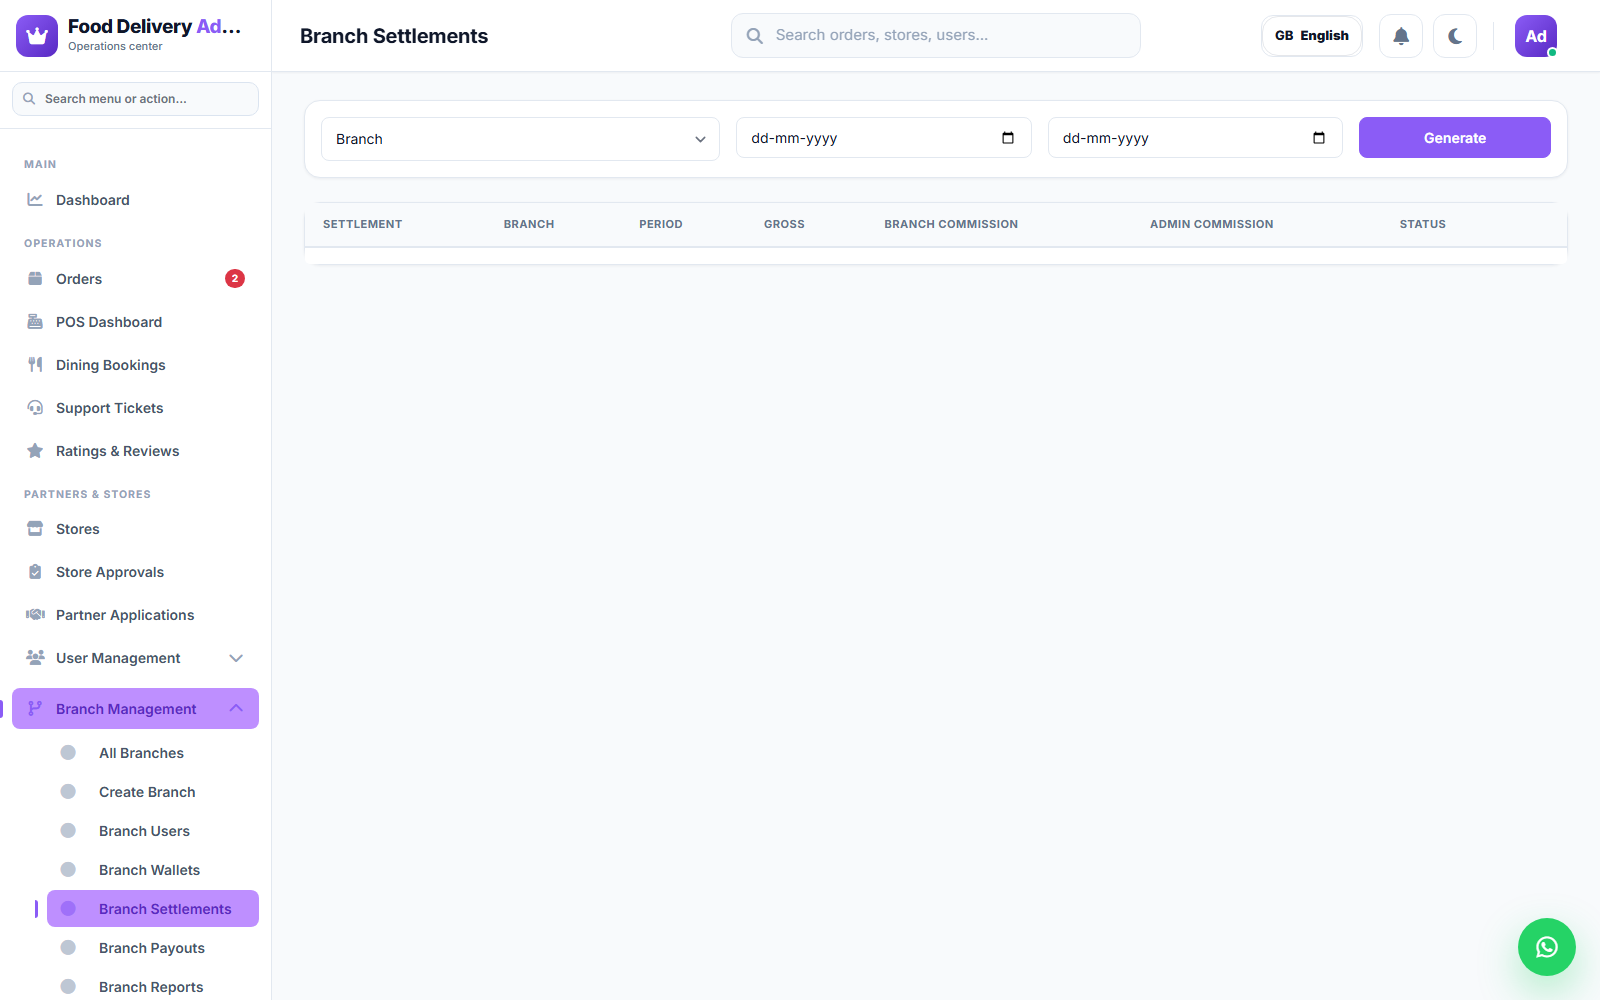
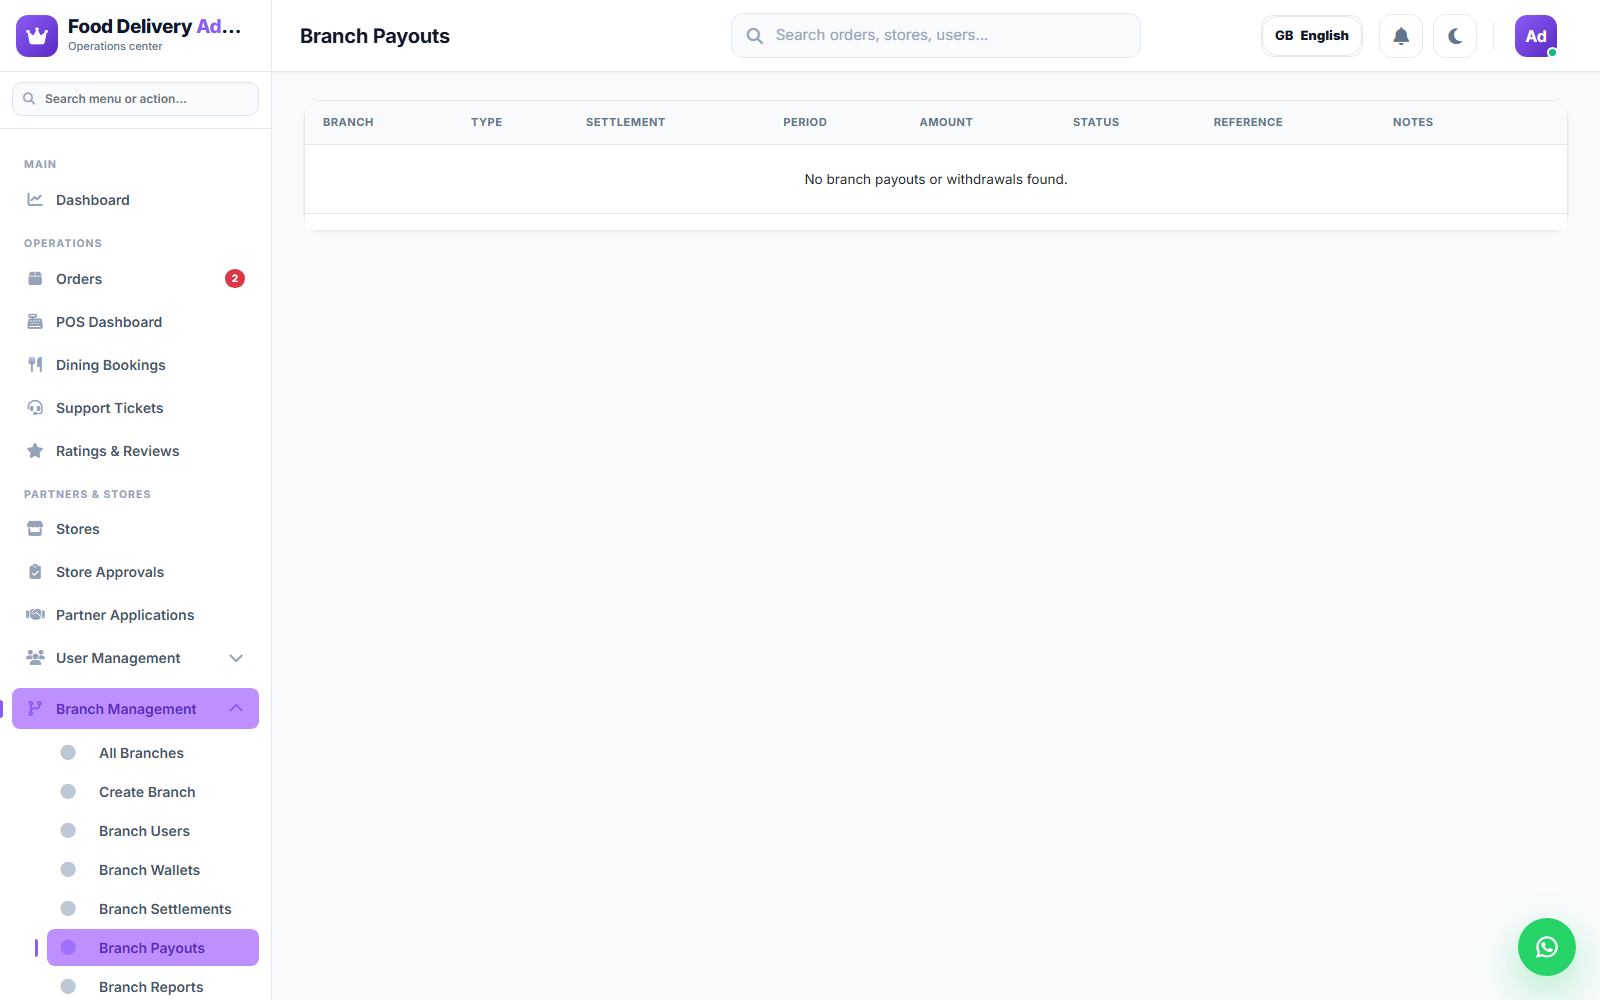
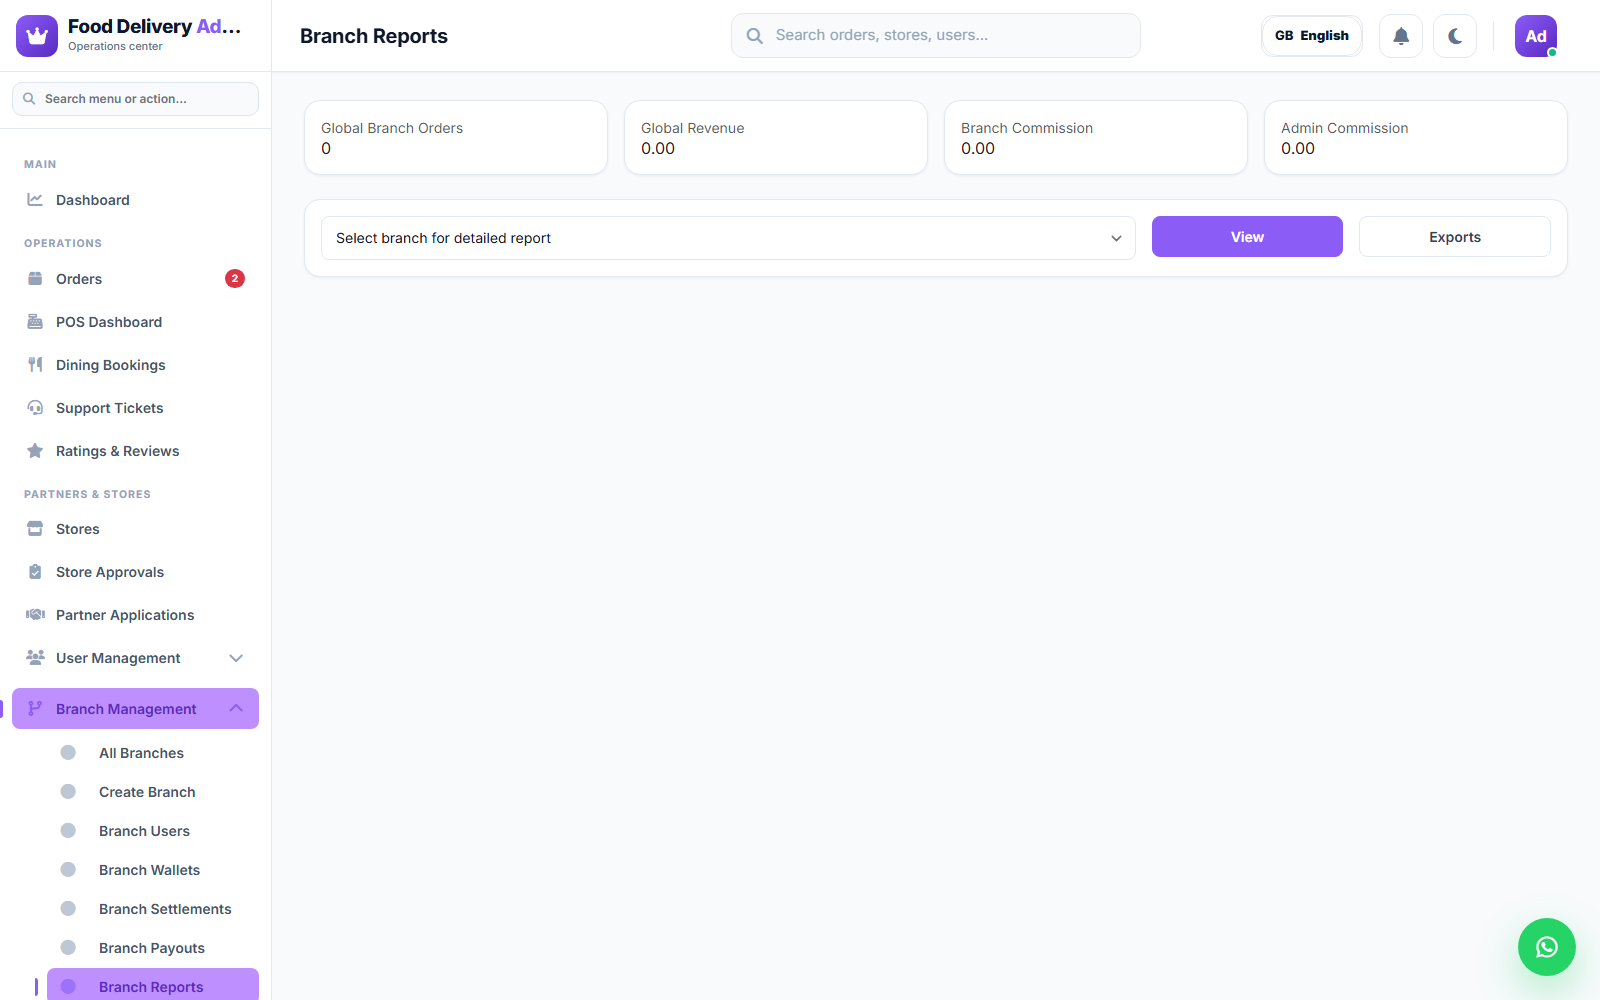
Selecting a branch on Branch Reports computes analytics (peak order hour, average delivery time) live from the orders table — on a fresh install with no orders yet, these simply read as zero/empty.
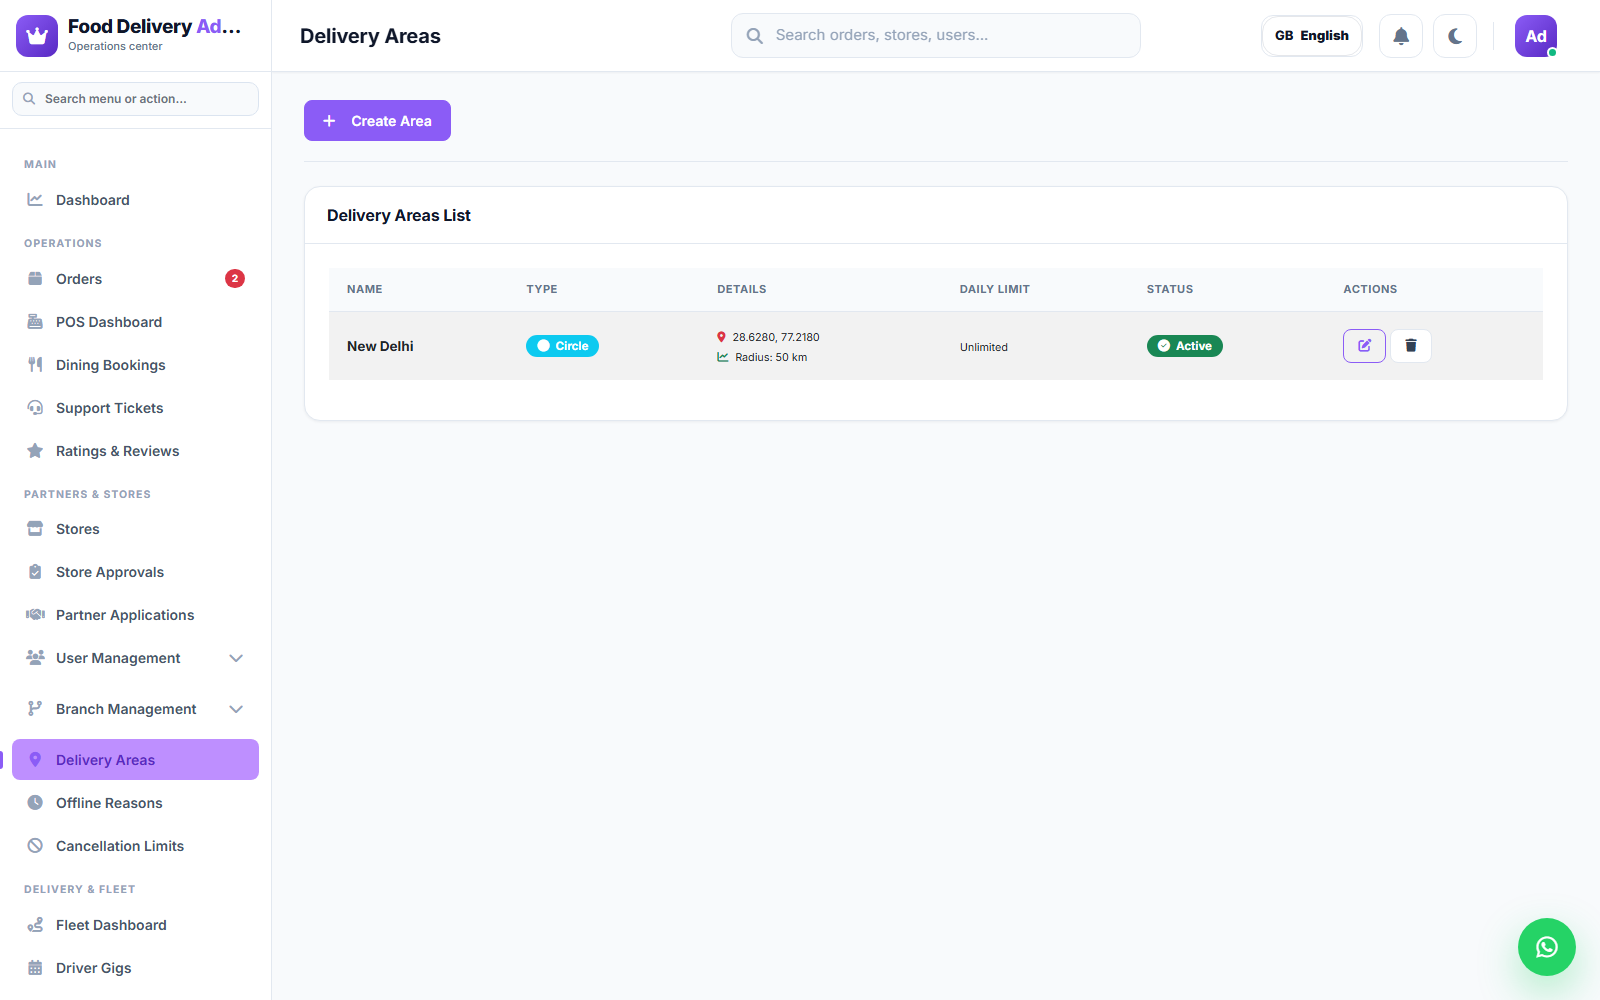
Delivery Areas
Define the geographic delivery zones your platform (or a specific branch) operates in — draw or select the coverage area on the map and save it.
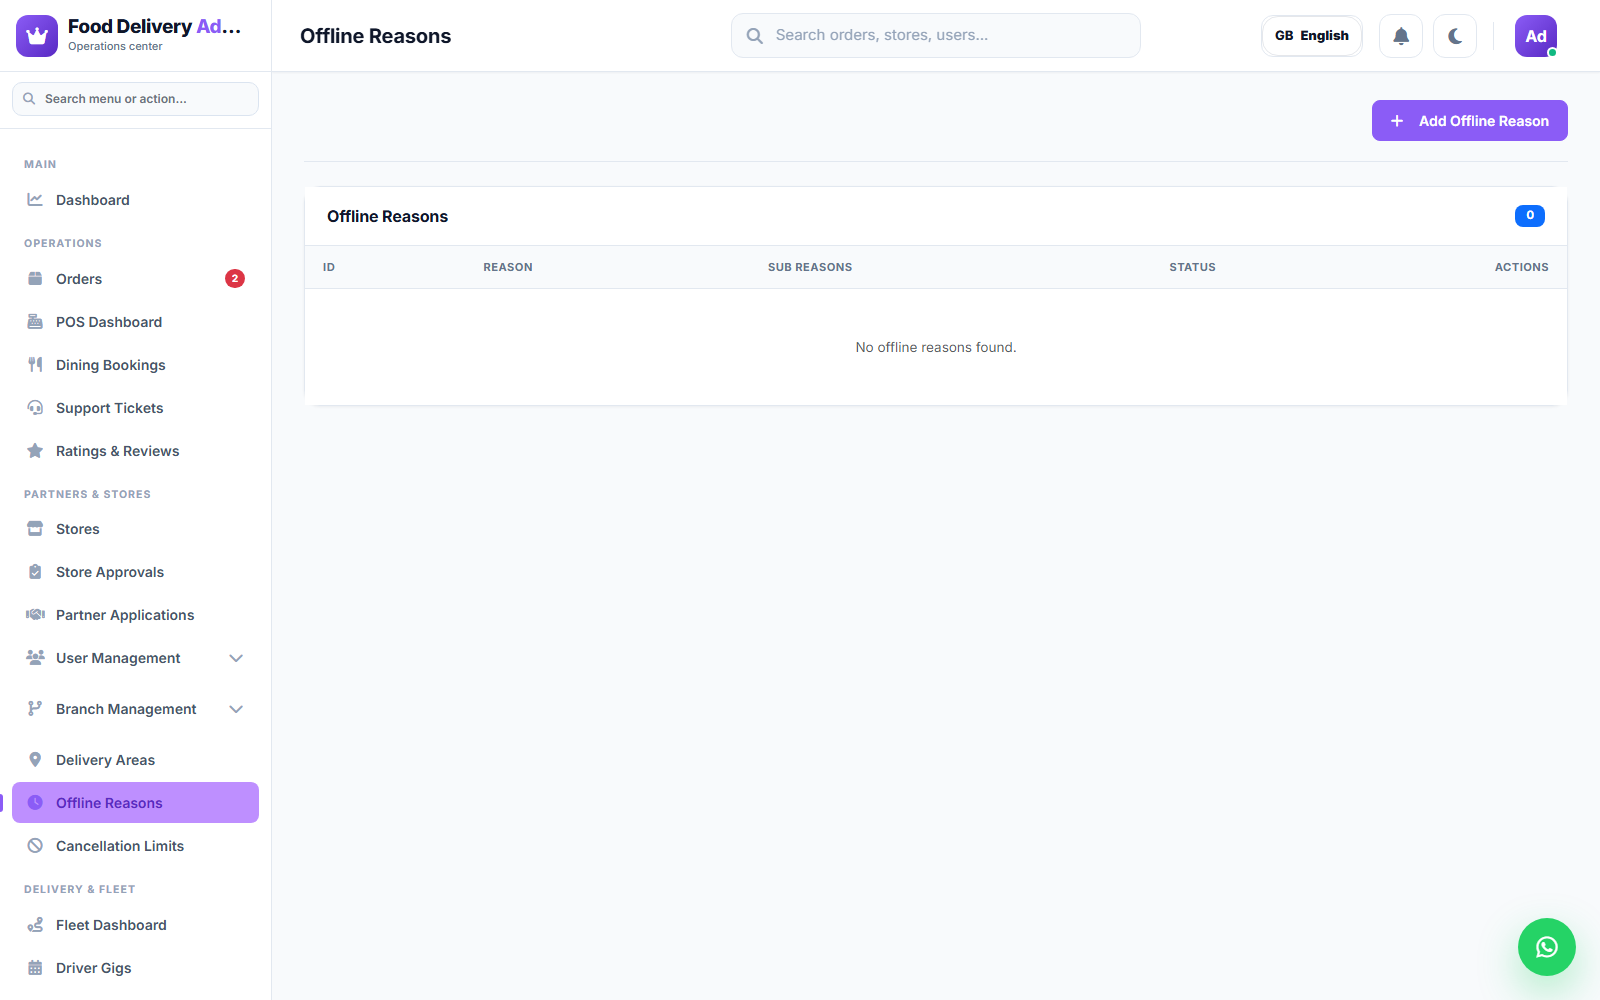
Offline Reasons
The list of reasons a driver can select when they go offline in the Delivery App (e.g. "On a break", "Vehicle issue"). Add, edit, or remove reasons here.
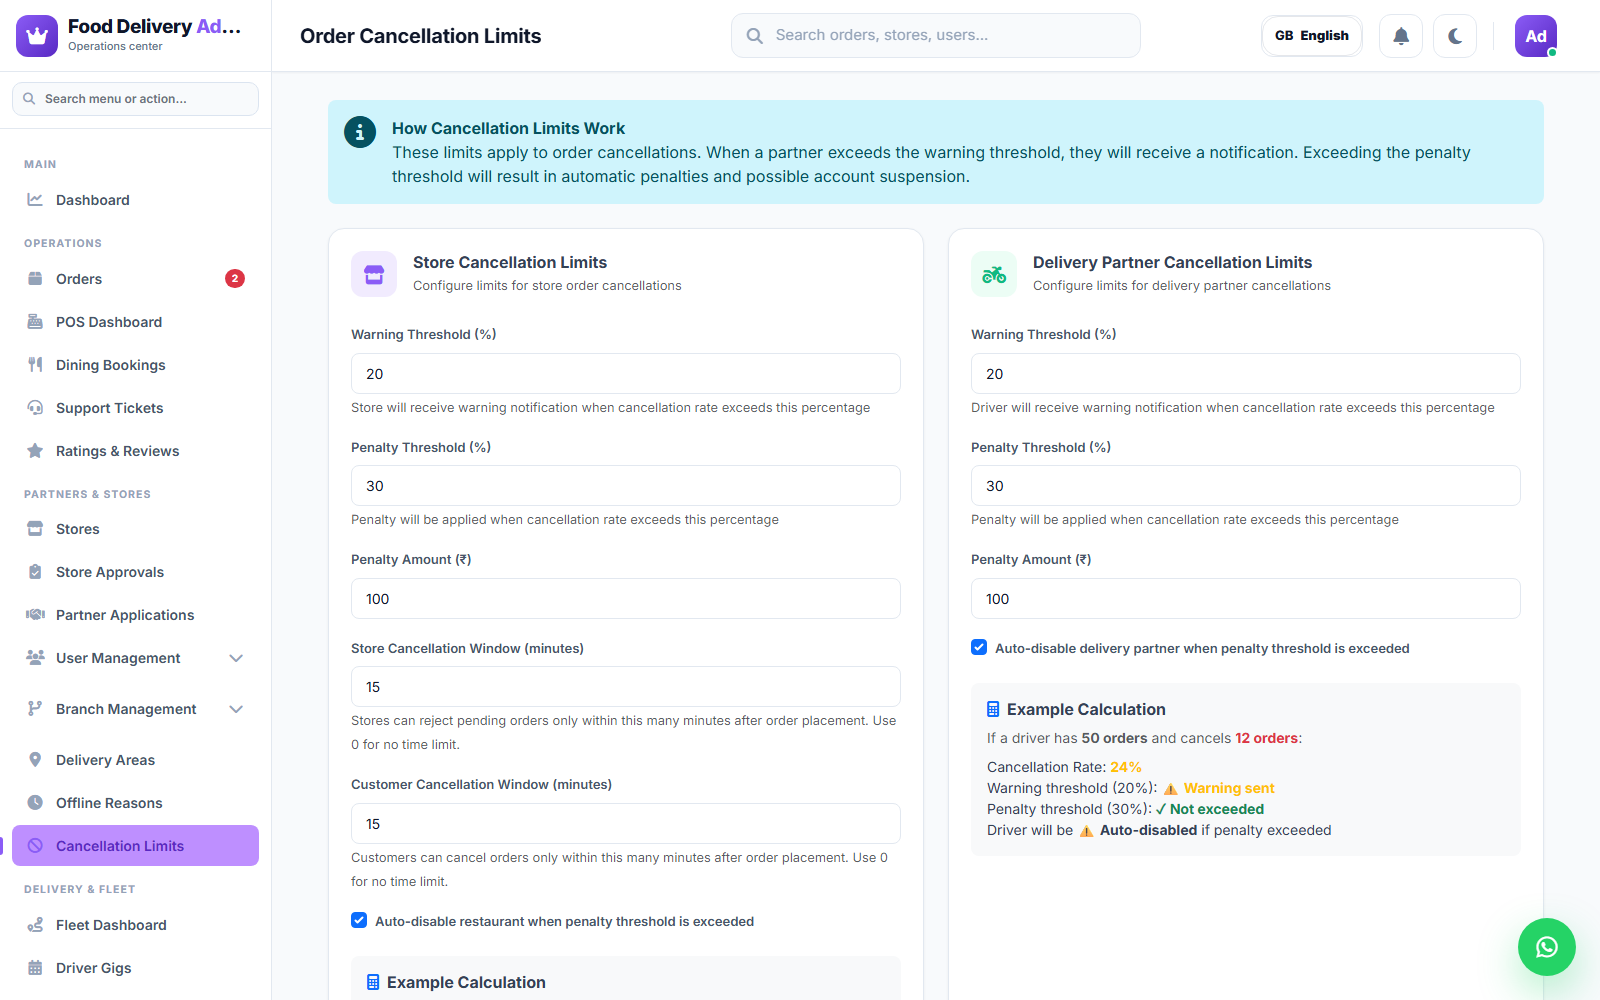
Cancellation Limits
Set how many orders a customer or store can cancel before the platform flags or restricts them, helping control cancellation abuse.
Delivery & Fleet
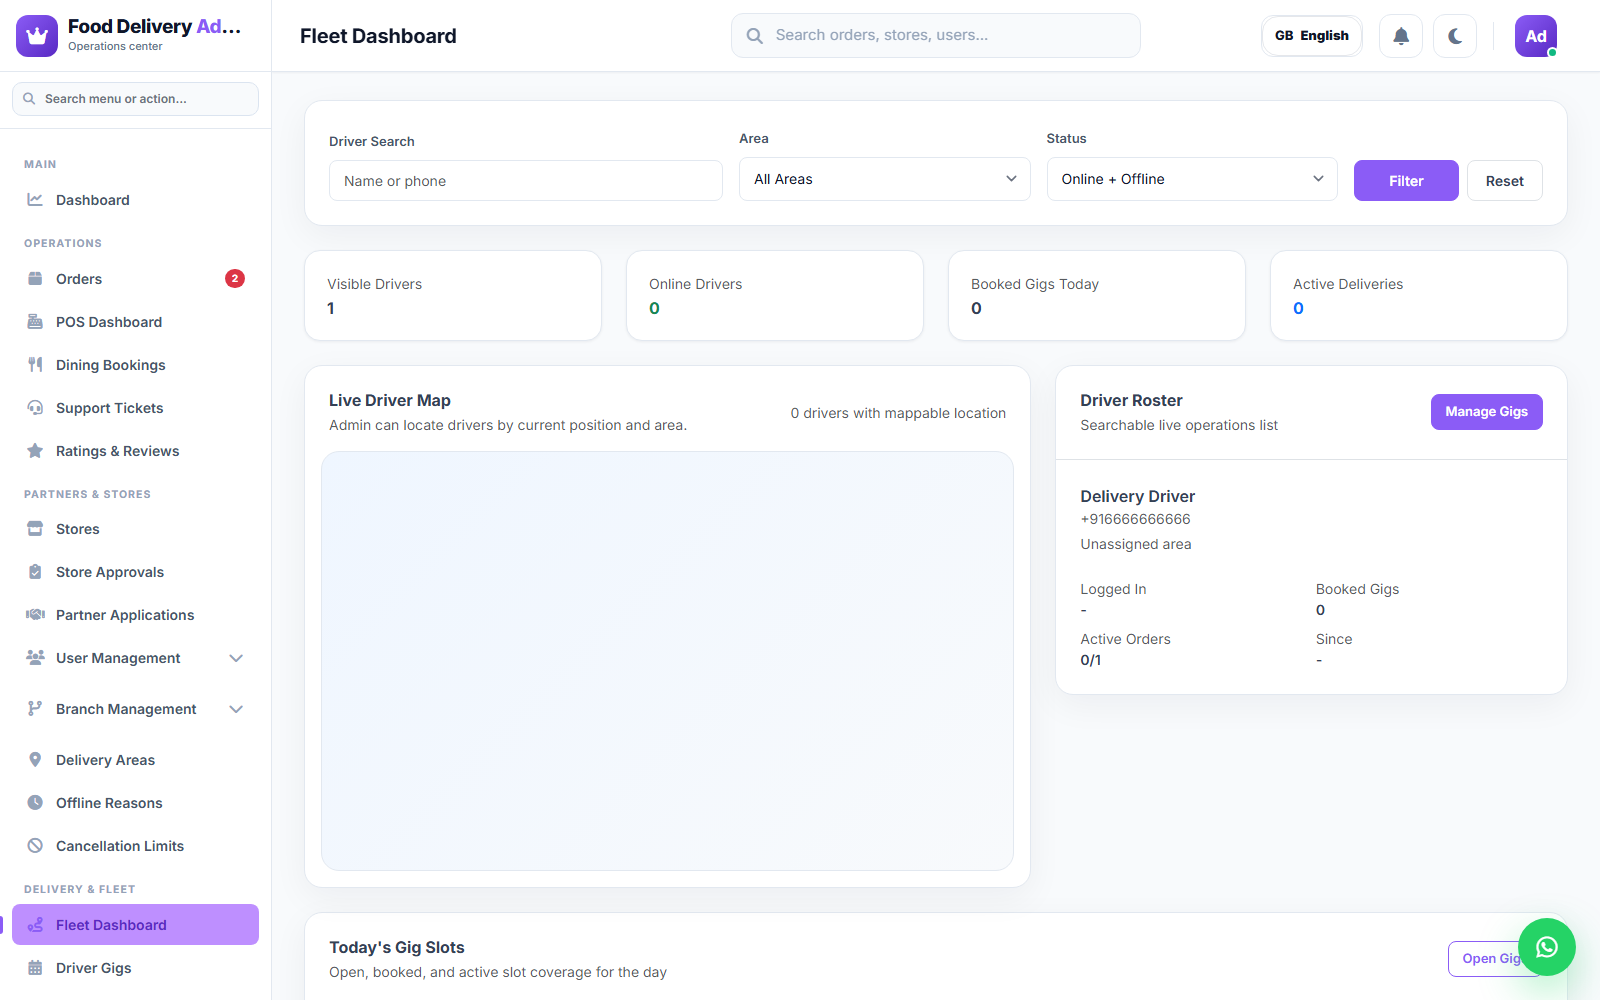
Fleet Dashboard
A live operational view of your delivery fleet — online/offline drivers, active deliveries, and fleet-wide performance at a glance.
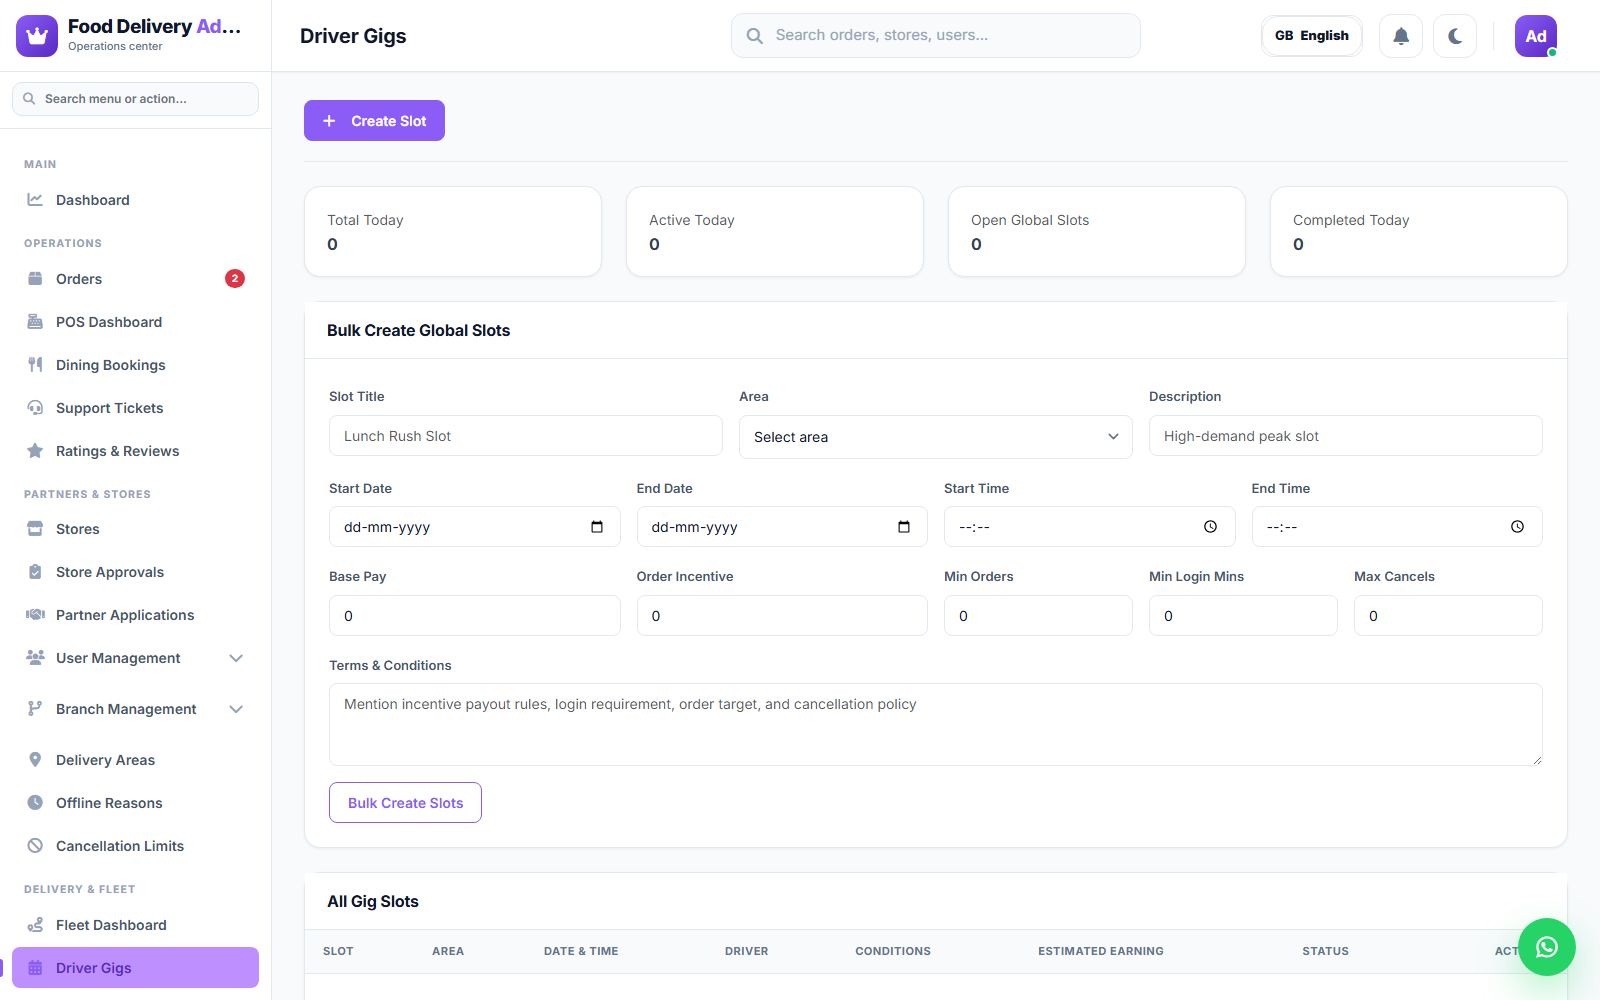
Driver Gigs
Manage scheduled driver "gigs" or shifts — fixed time slots drivers can commit to for guaranteed availability during peak hours.
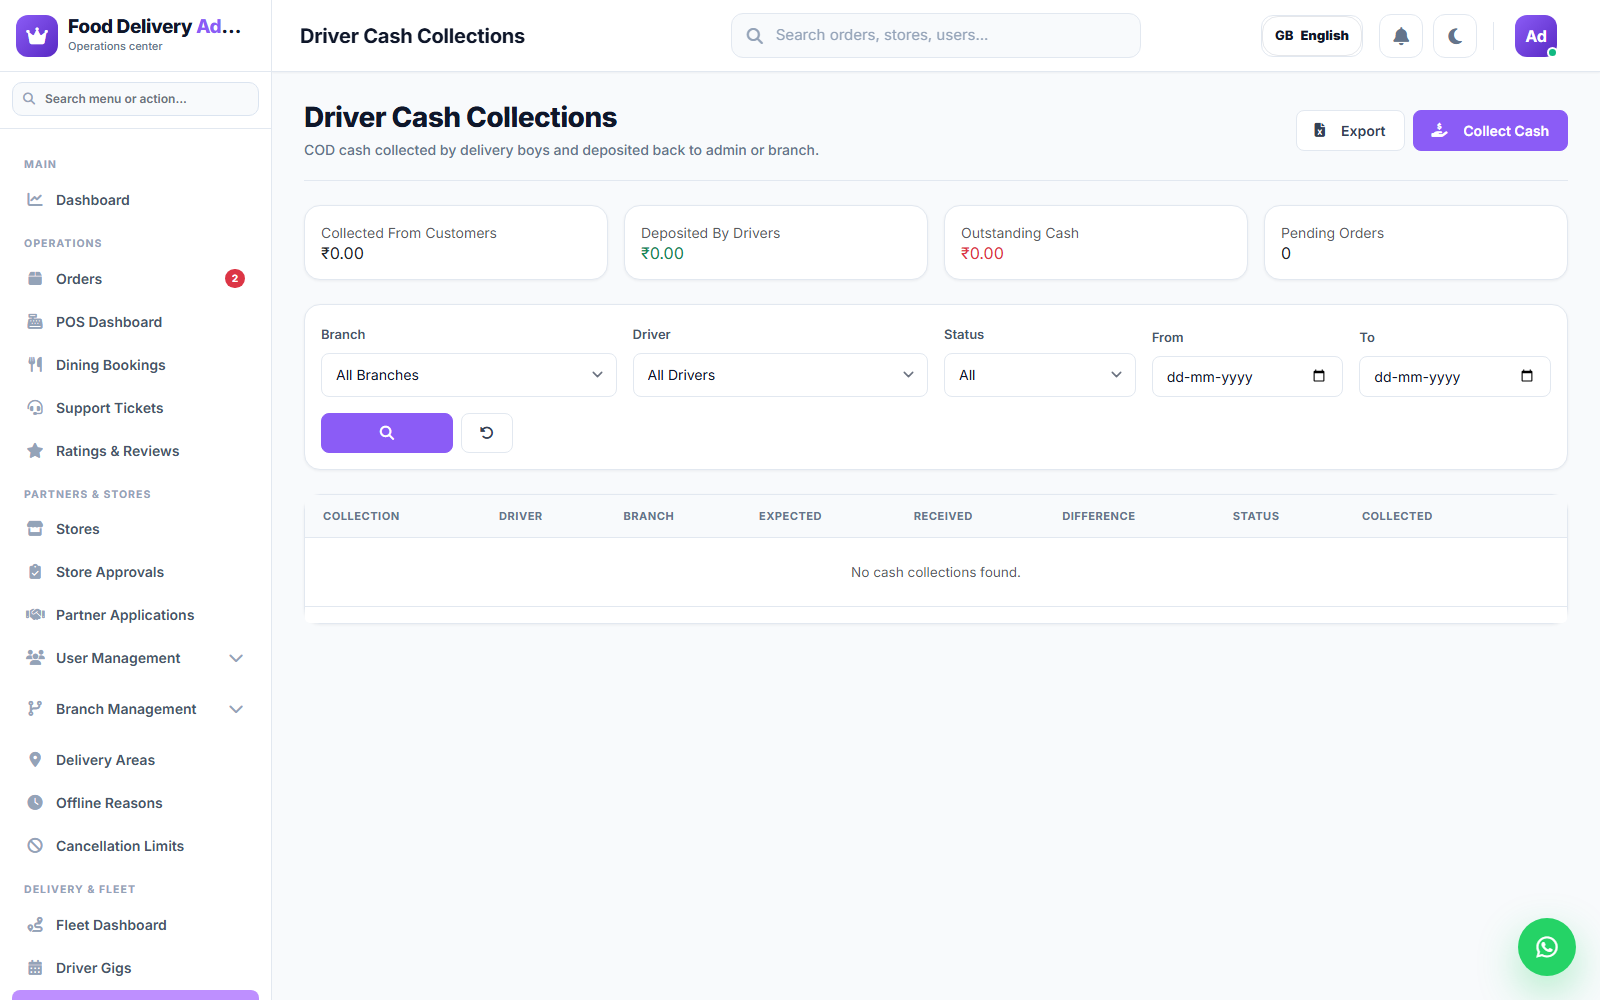
Cash Collections
COD (cash on delivery) cash collected by drivers, waiting to be reconciled and deposited. See Prerequisites & driver cash management for how this flows from the Delivery App.
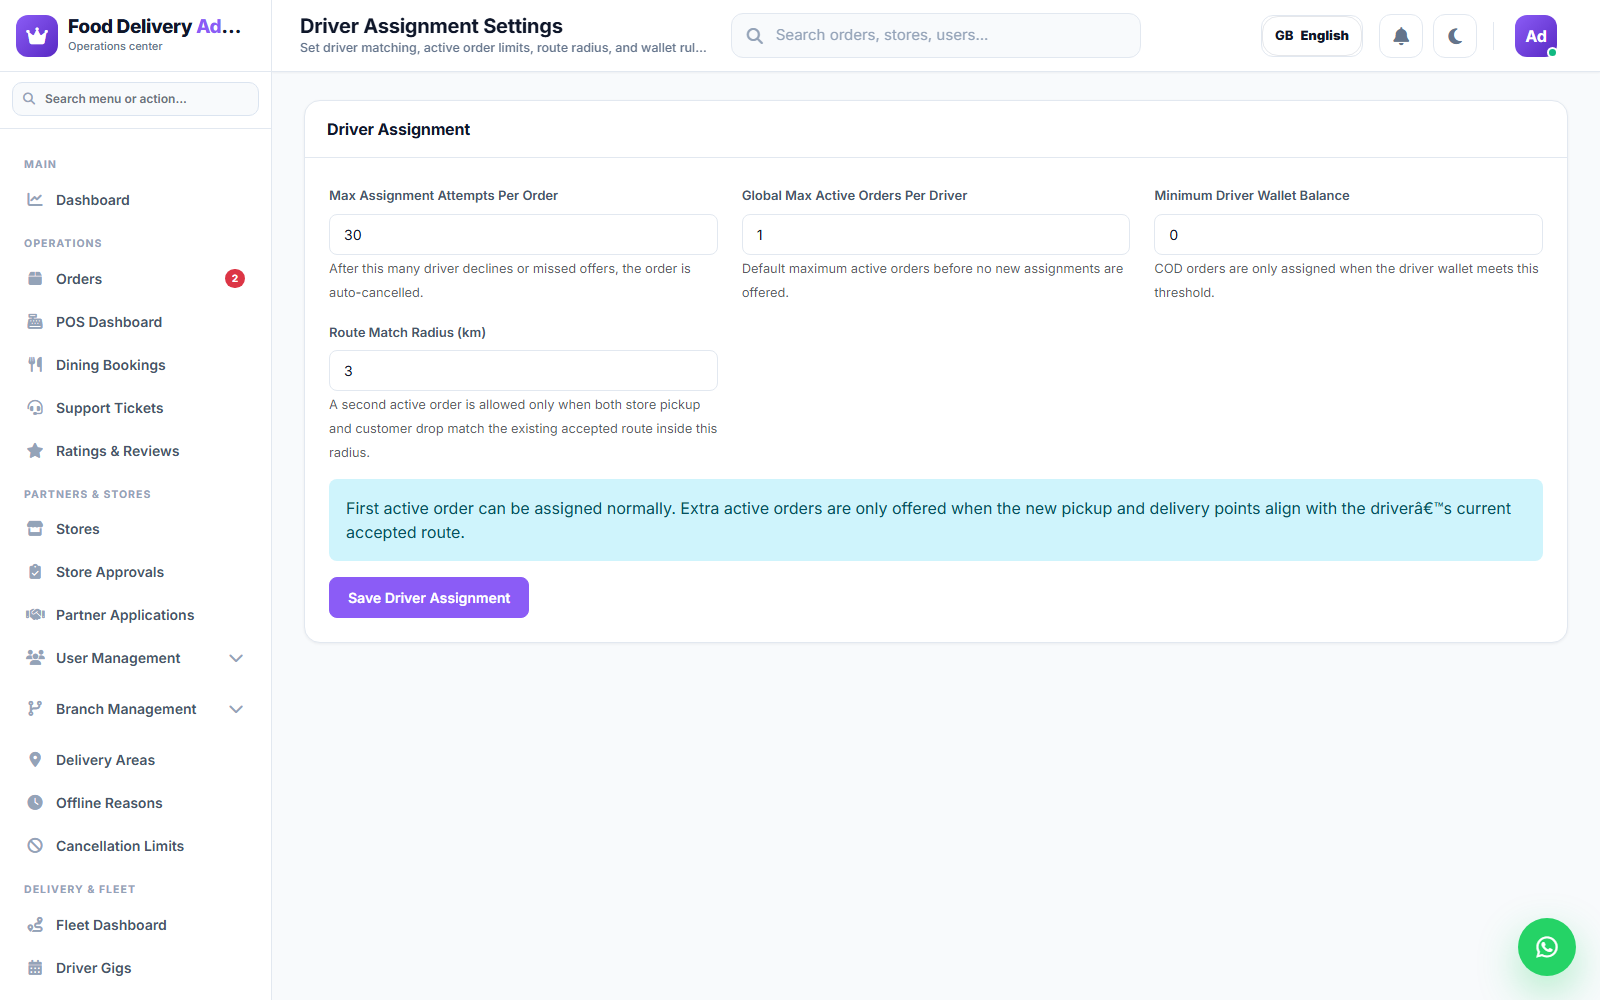
Driver Assignment
Configure how orders are auto-assigned to available drivers (assignment radius, timeout before reassigning, etc.).
Catalog
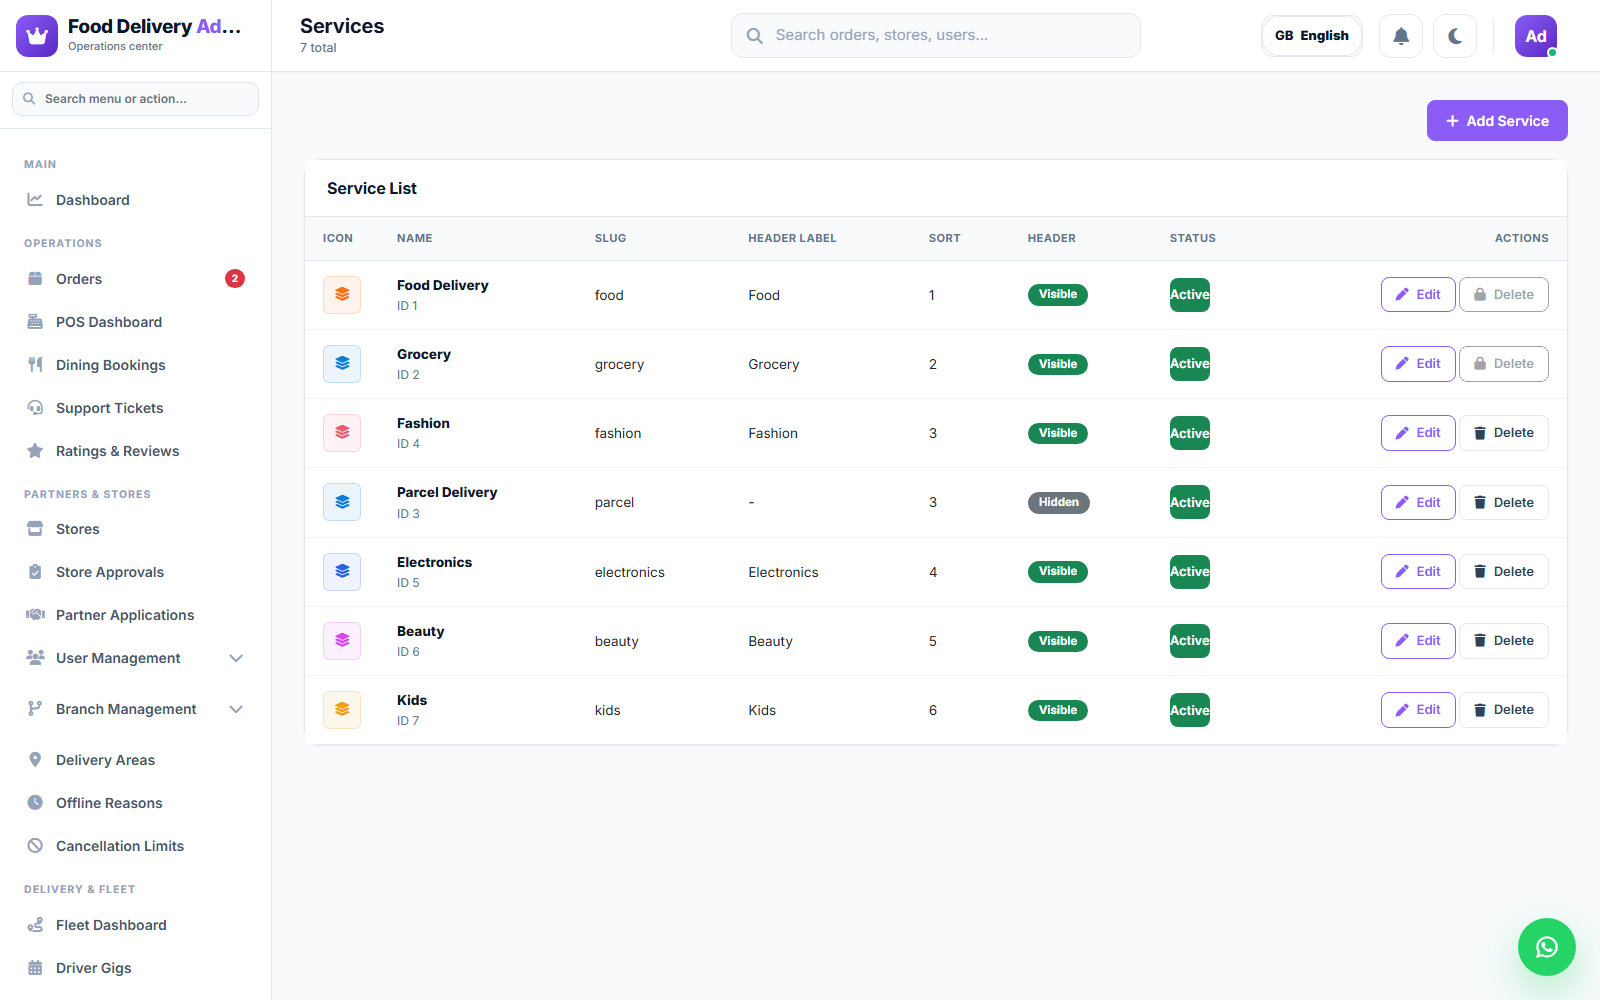
Services
Services are the top-level business lines your platform offers — Food Delivery, Grocery, Fashion, Parcel Delivery, Electronics, Beauty, Kids, and so on. Each service has a slug (used in APIs and URLs), a header label, a sort order controlling where it appears in the app's service switcher, a Visible/Hidden toggle for the header, and an Active/Inactive status. Add a new service, or edit/delete an existing one, from this screen.
Everything else in this Catalog section, and the whole Home Section Management system below, operates per service — categories, brands, and homepage sections are all scoped to a service_type (e.g. food, grocery, parcel).
Food Catalog
A submenu for the shared "food-style" catalog (used by Food Delivery and similar menu-based services):
- Cuisines — the cuisine tags stores can pick from (e.g. Italian, Chinese).
- Global Categories — shared menu categories available to every store on that service.
- Global Menu Items — a master library of menu items stores can import from instead of creating everything from scratch.
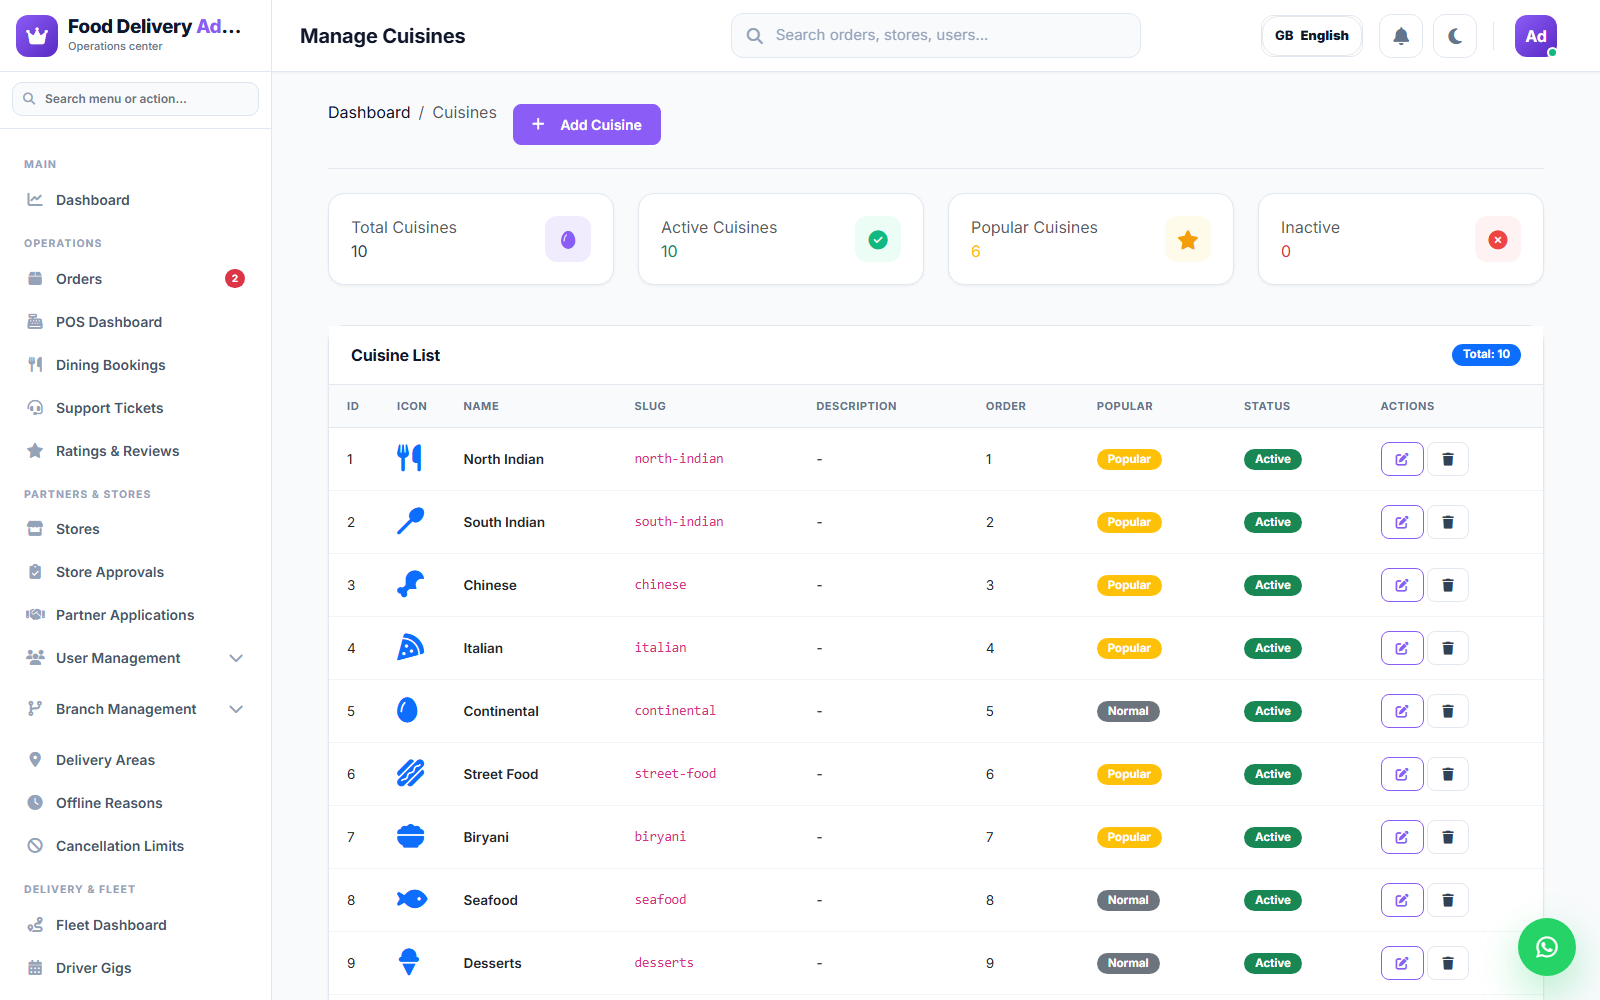
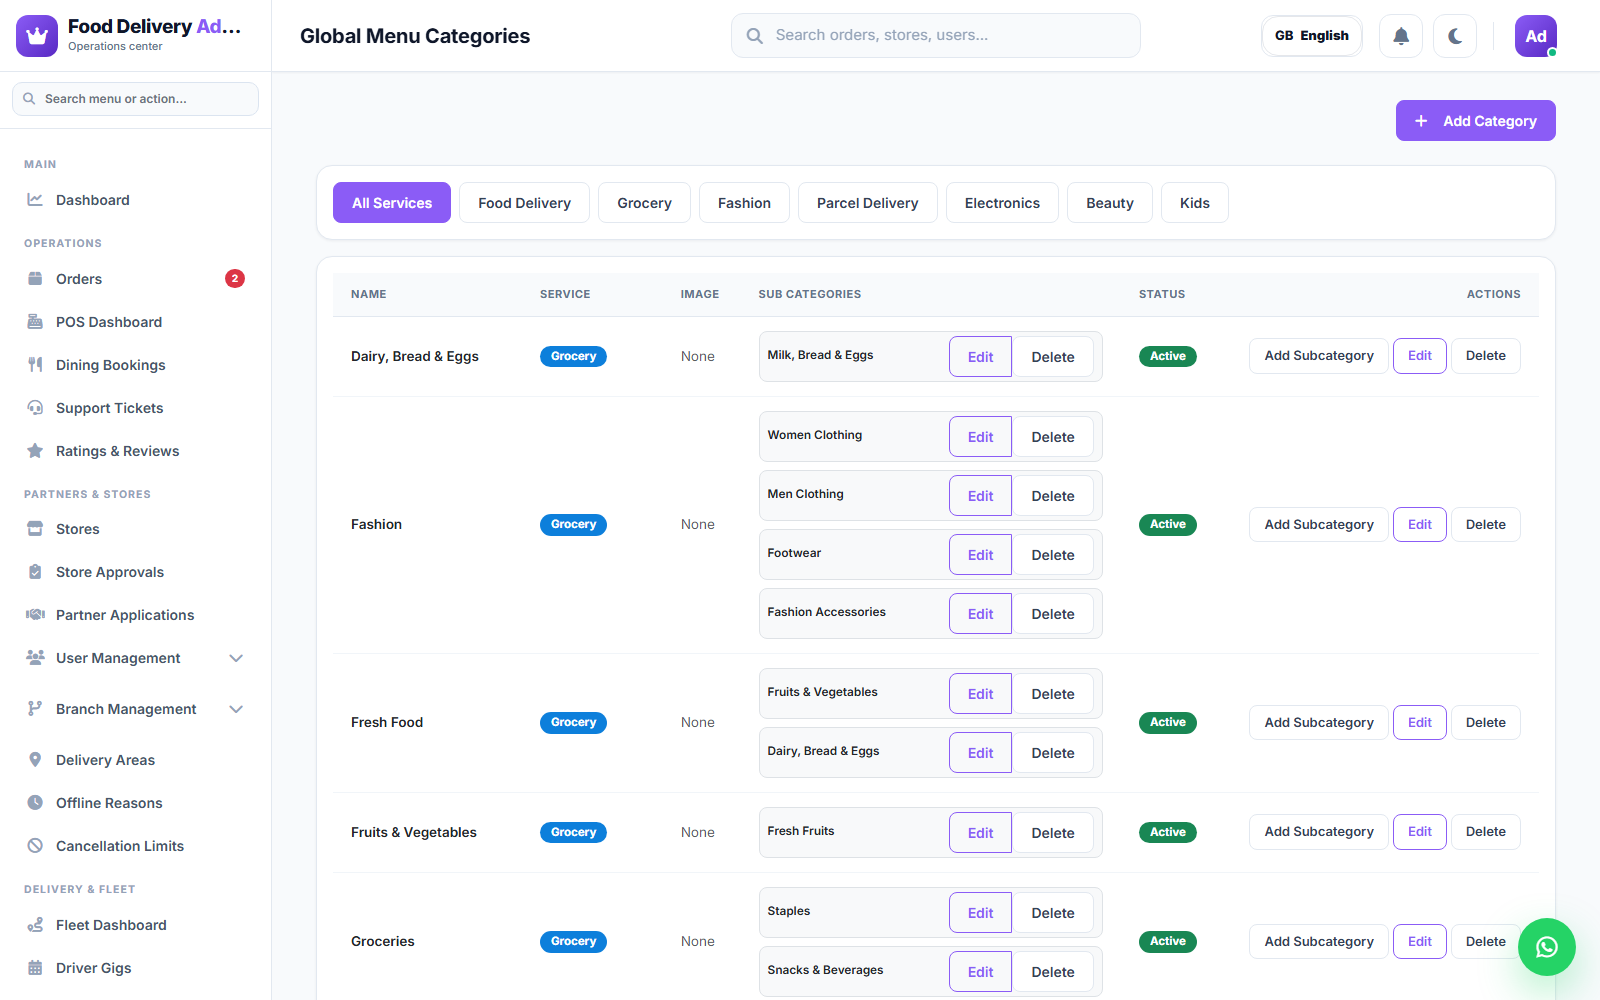
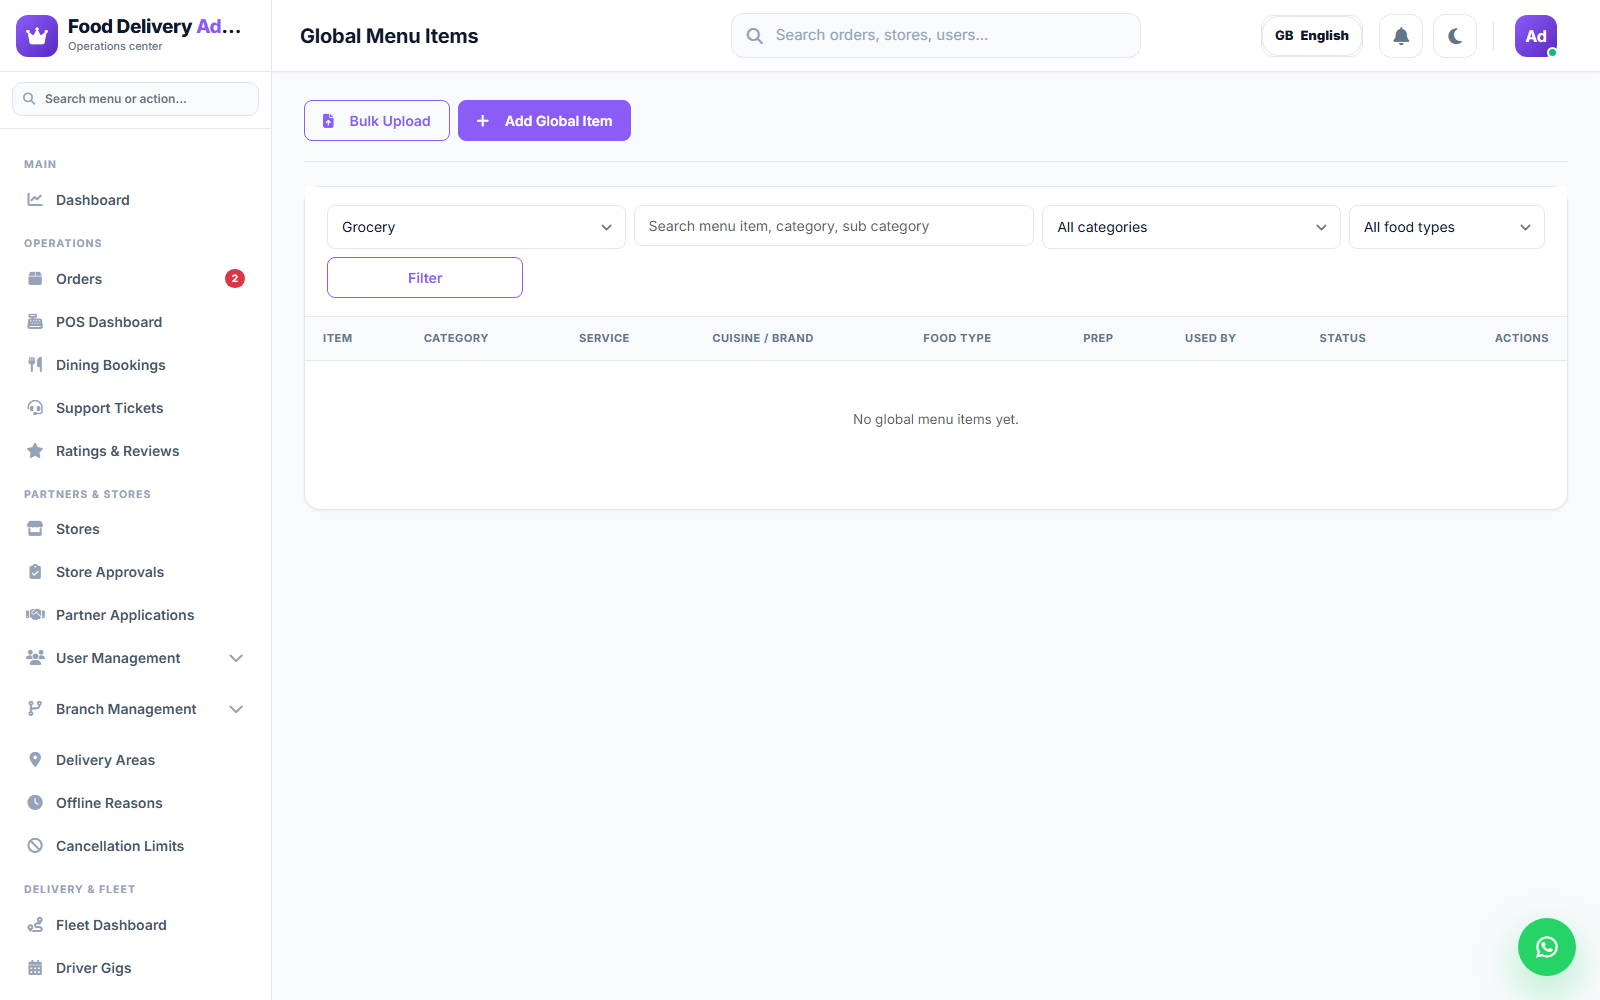
Grocery Catalog
A submenu for the shared "grocery-style" catalog (used by Grocery and similar product-based services):
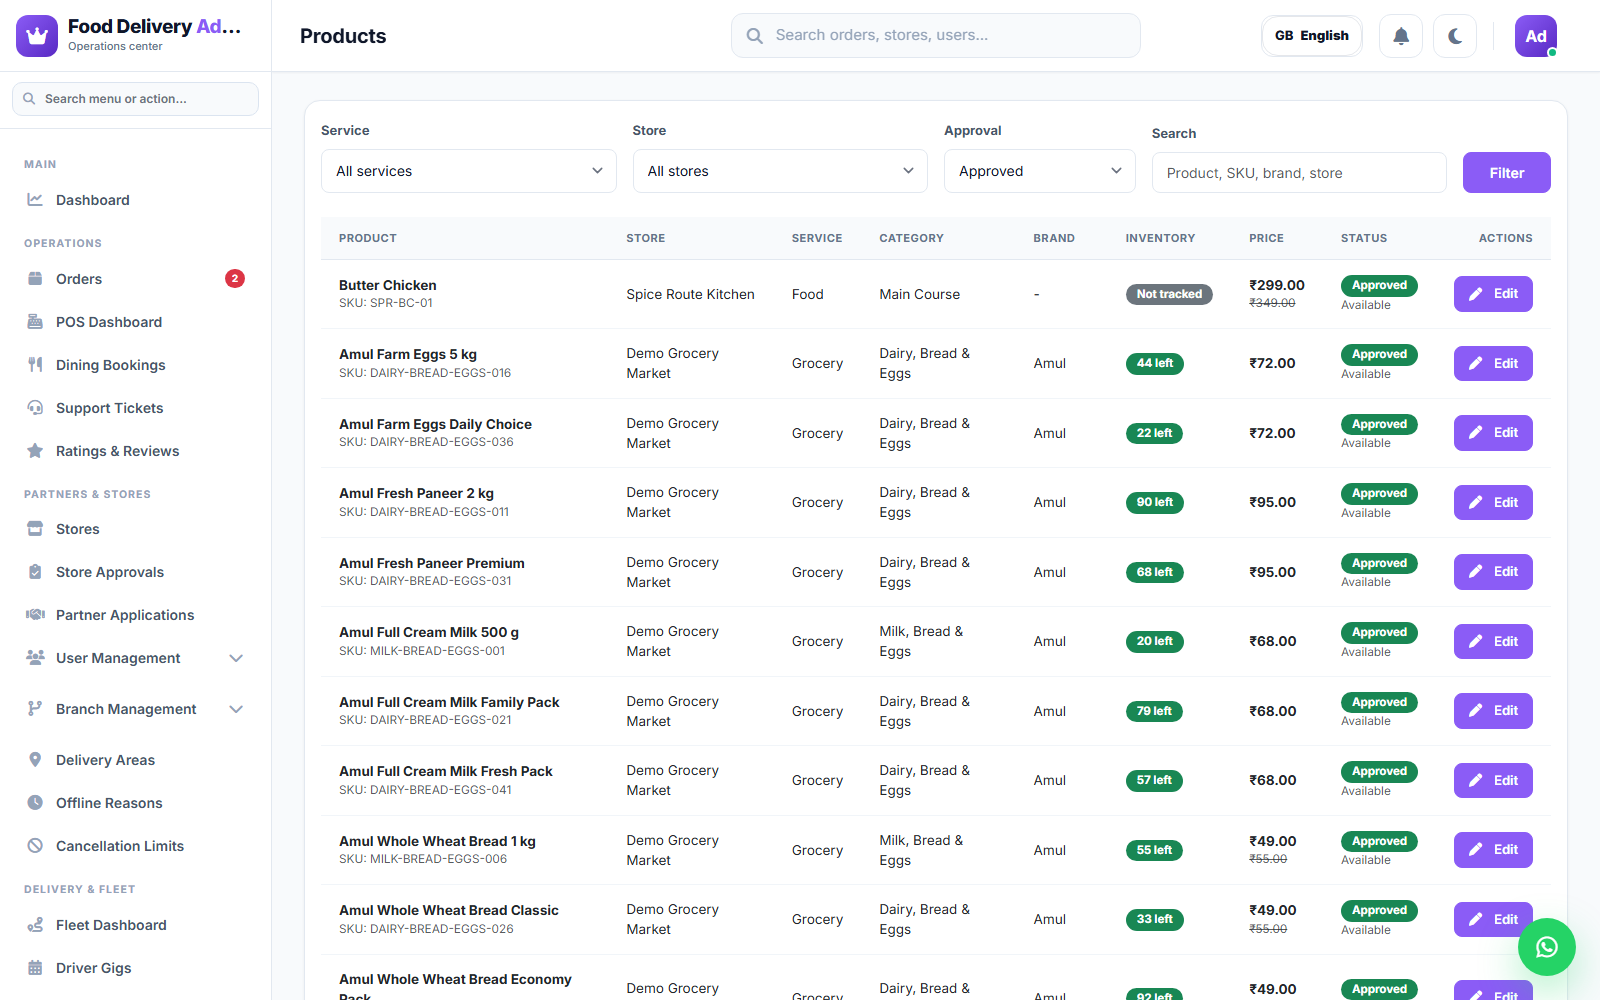
- Products — every product from every seller; if a category has Product Verification enabled, new products appear here as "Pending Verification" until approved.
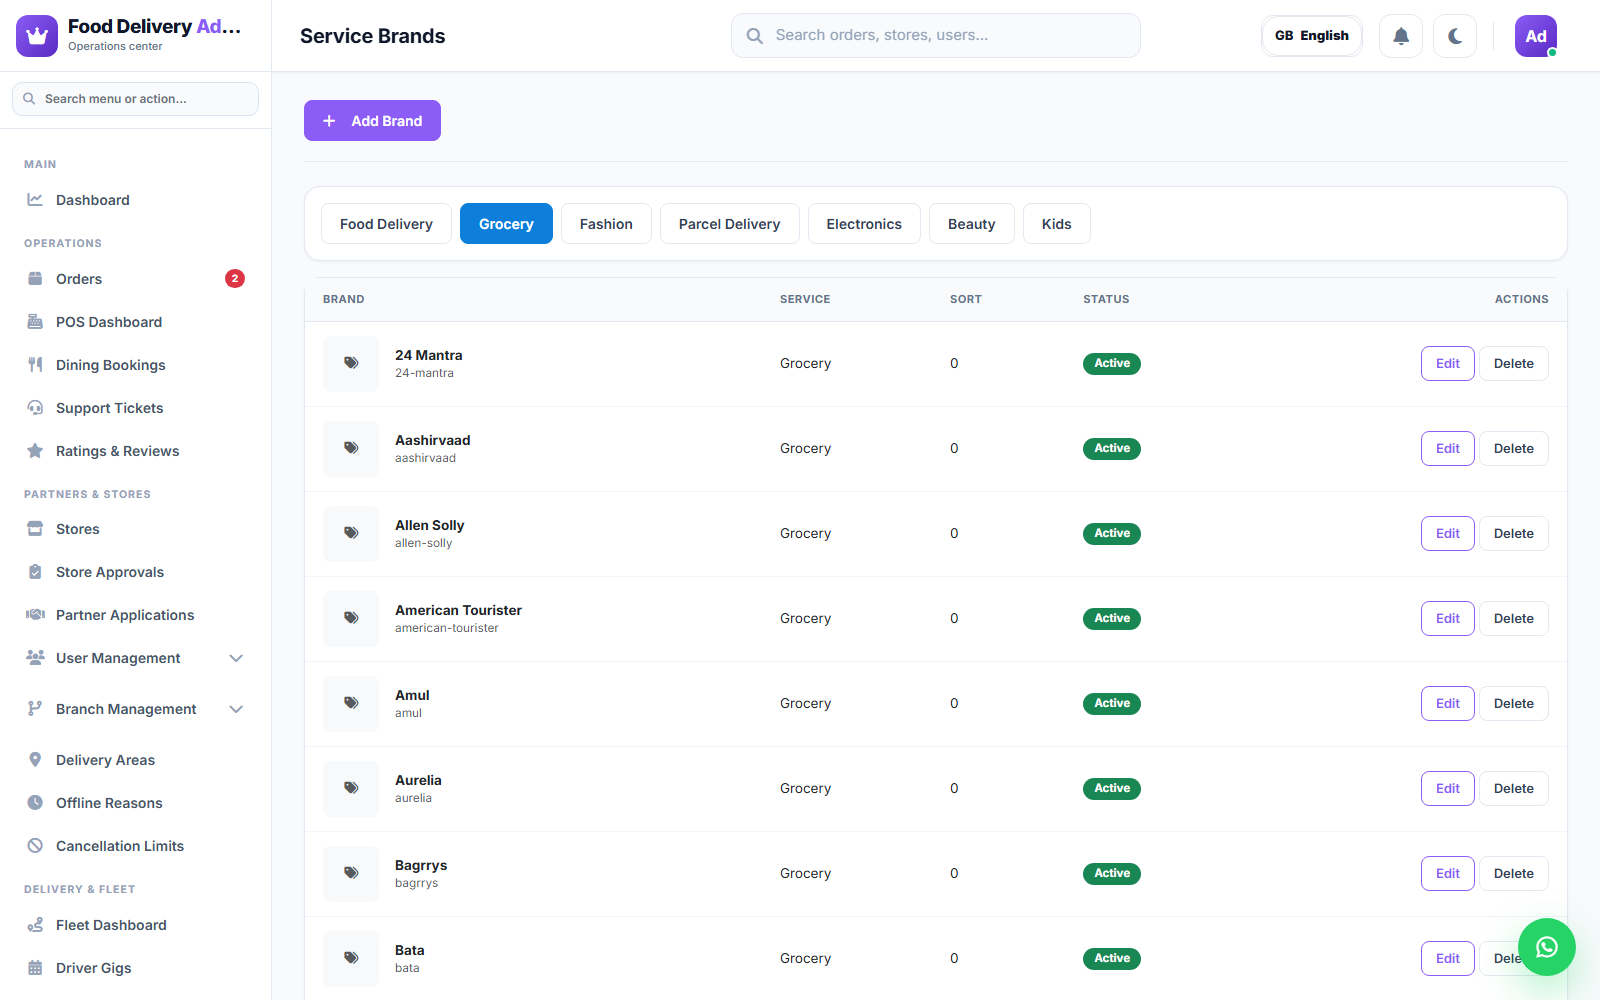
- Hyperdash Brands — brand records products can be tagged with, either globally or scoped to specific categories.
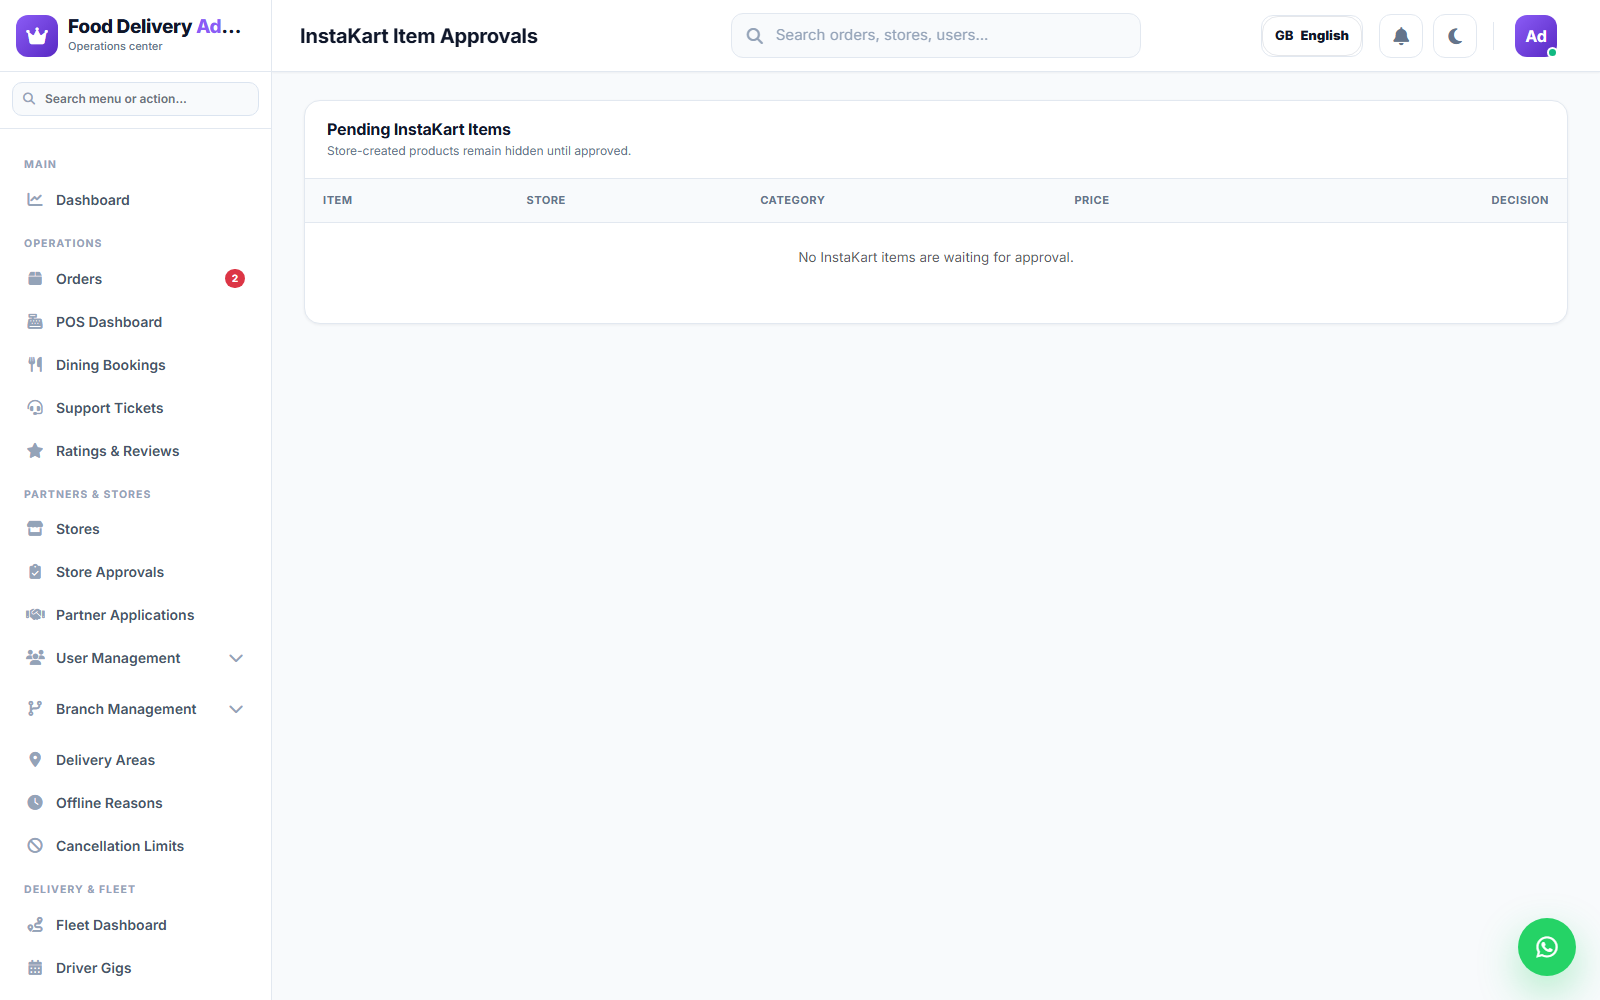
- Hyperdash Approvals — the queue of pending product approvals waiting on admin review.
Marketing & Content
Banners
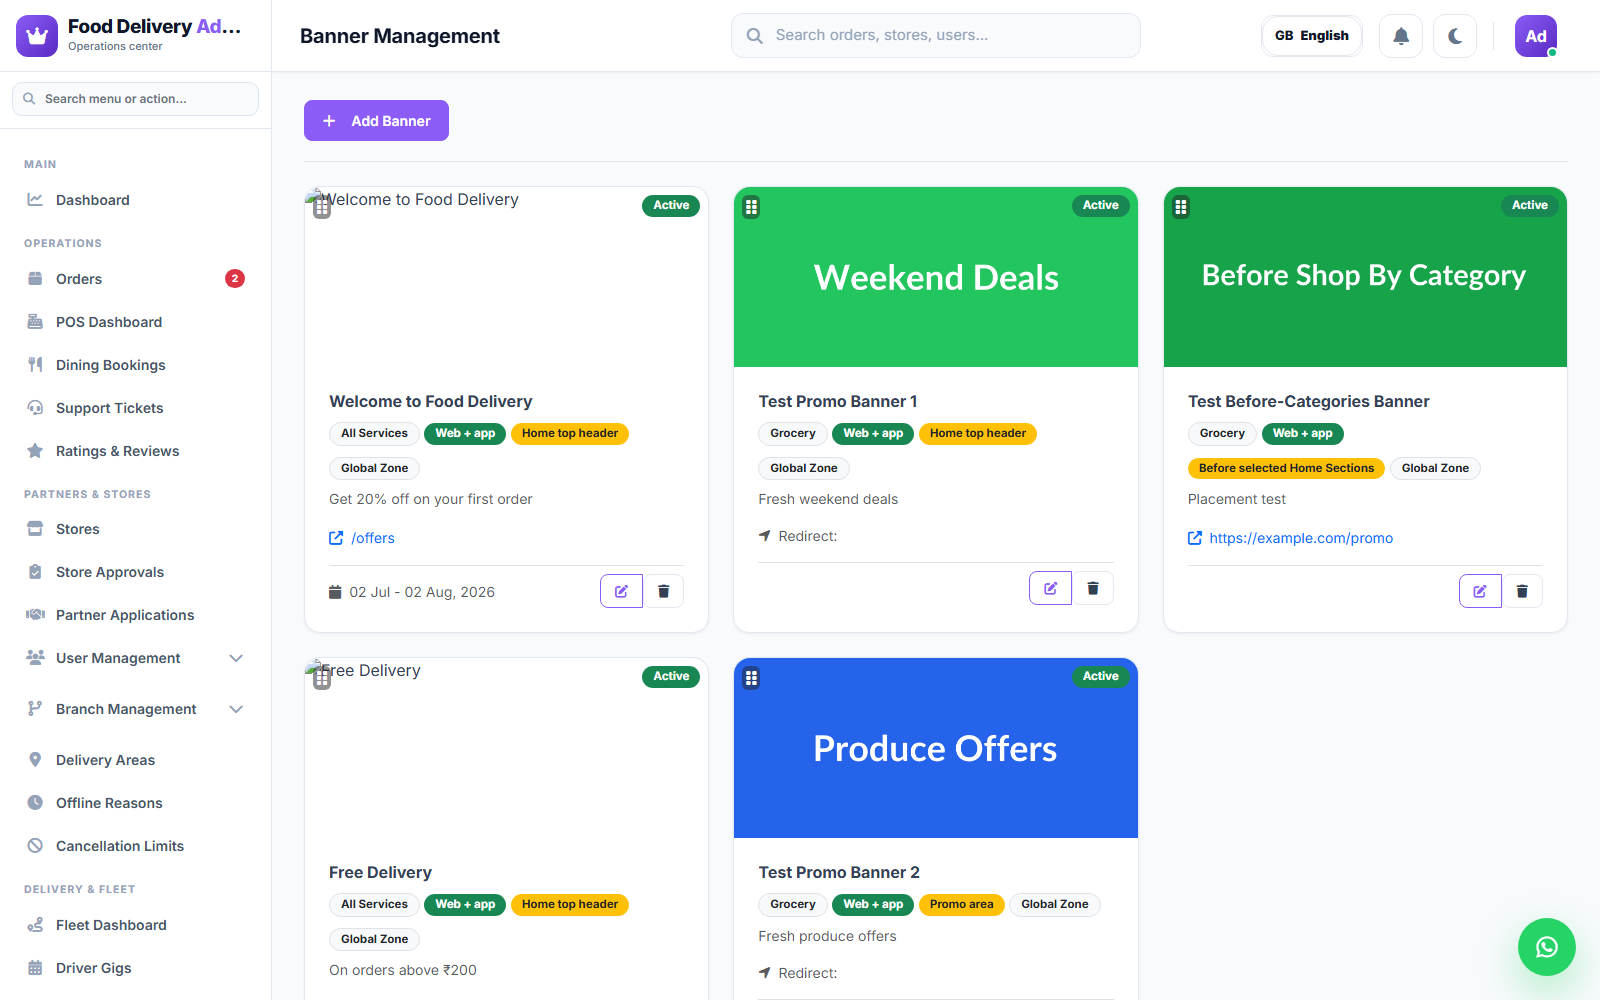
Promotional banner images shown on the storefront home screen or specific sections. Add a banner with an image, an optional link/action, and a position.
Promotion Engine
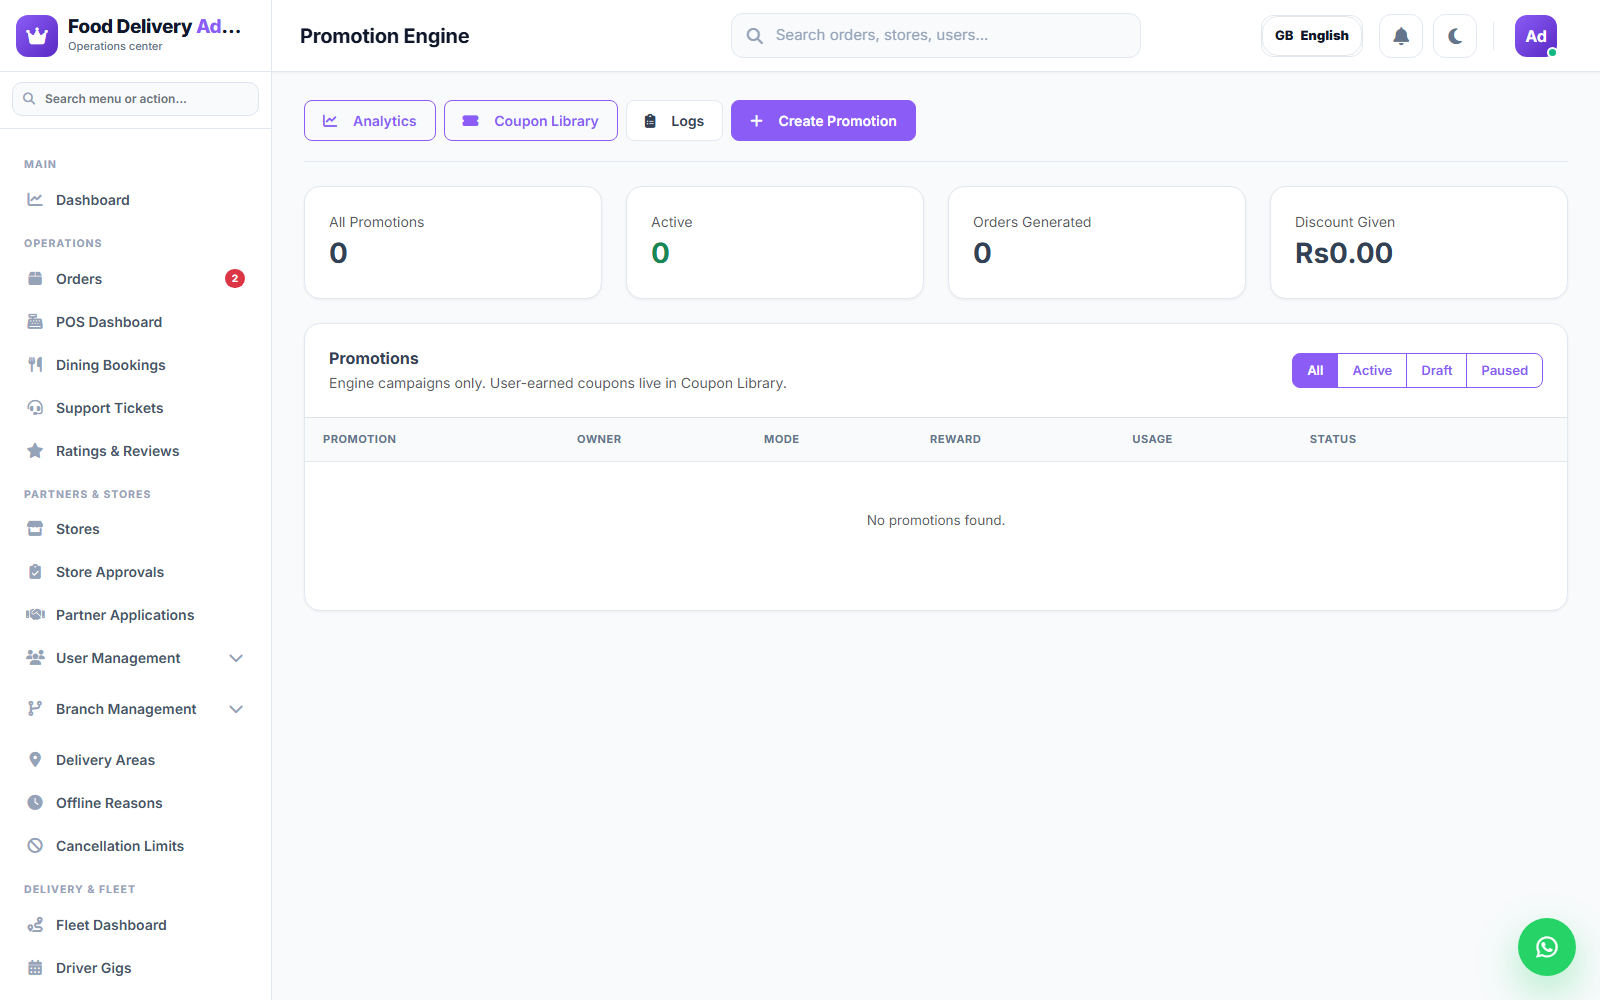
A full discount/coupon rules engine, separate from the simpler flat Promos of earlier versions:
- All Promotions — every promotion campaign, filterable by All / Active / Draft / Paused.
- Create Promotion — build a new campaign (percentage/flat discount, usage limits, validity window, ownership by platform or a specific store).
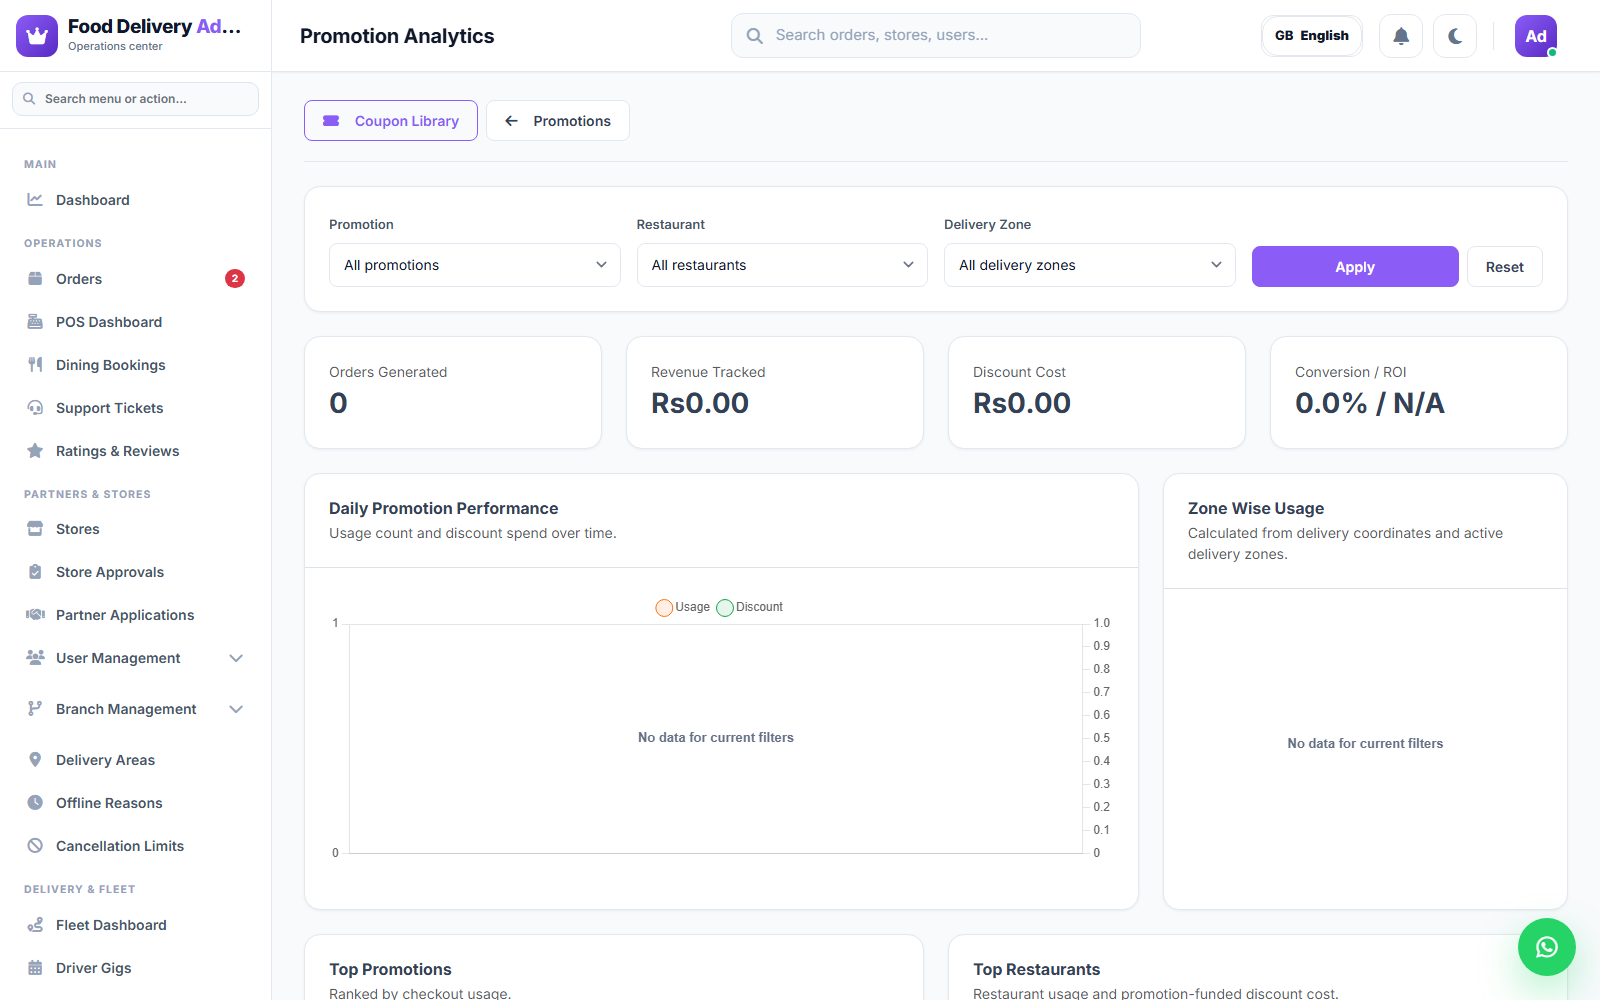
- Promotion Analytics — orders generated and discount value given per campaign.
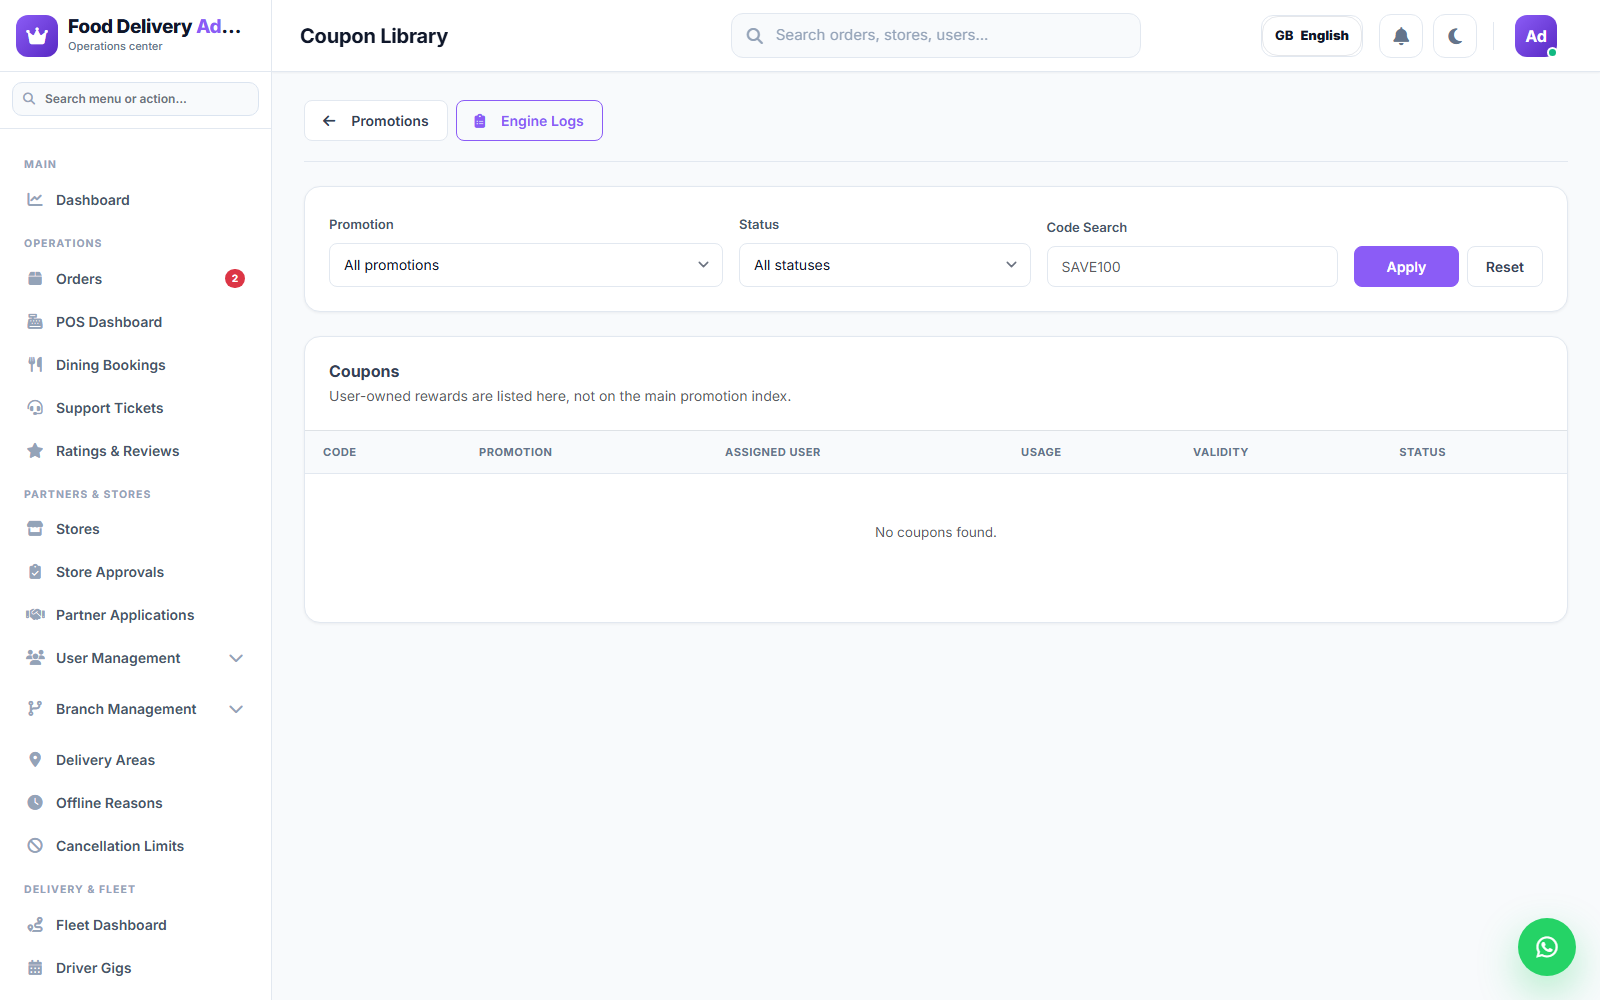
- Coupon Library — user-facing coupon codes generated from promotions.
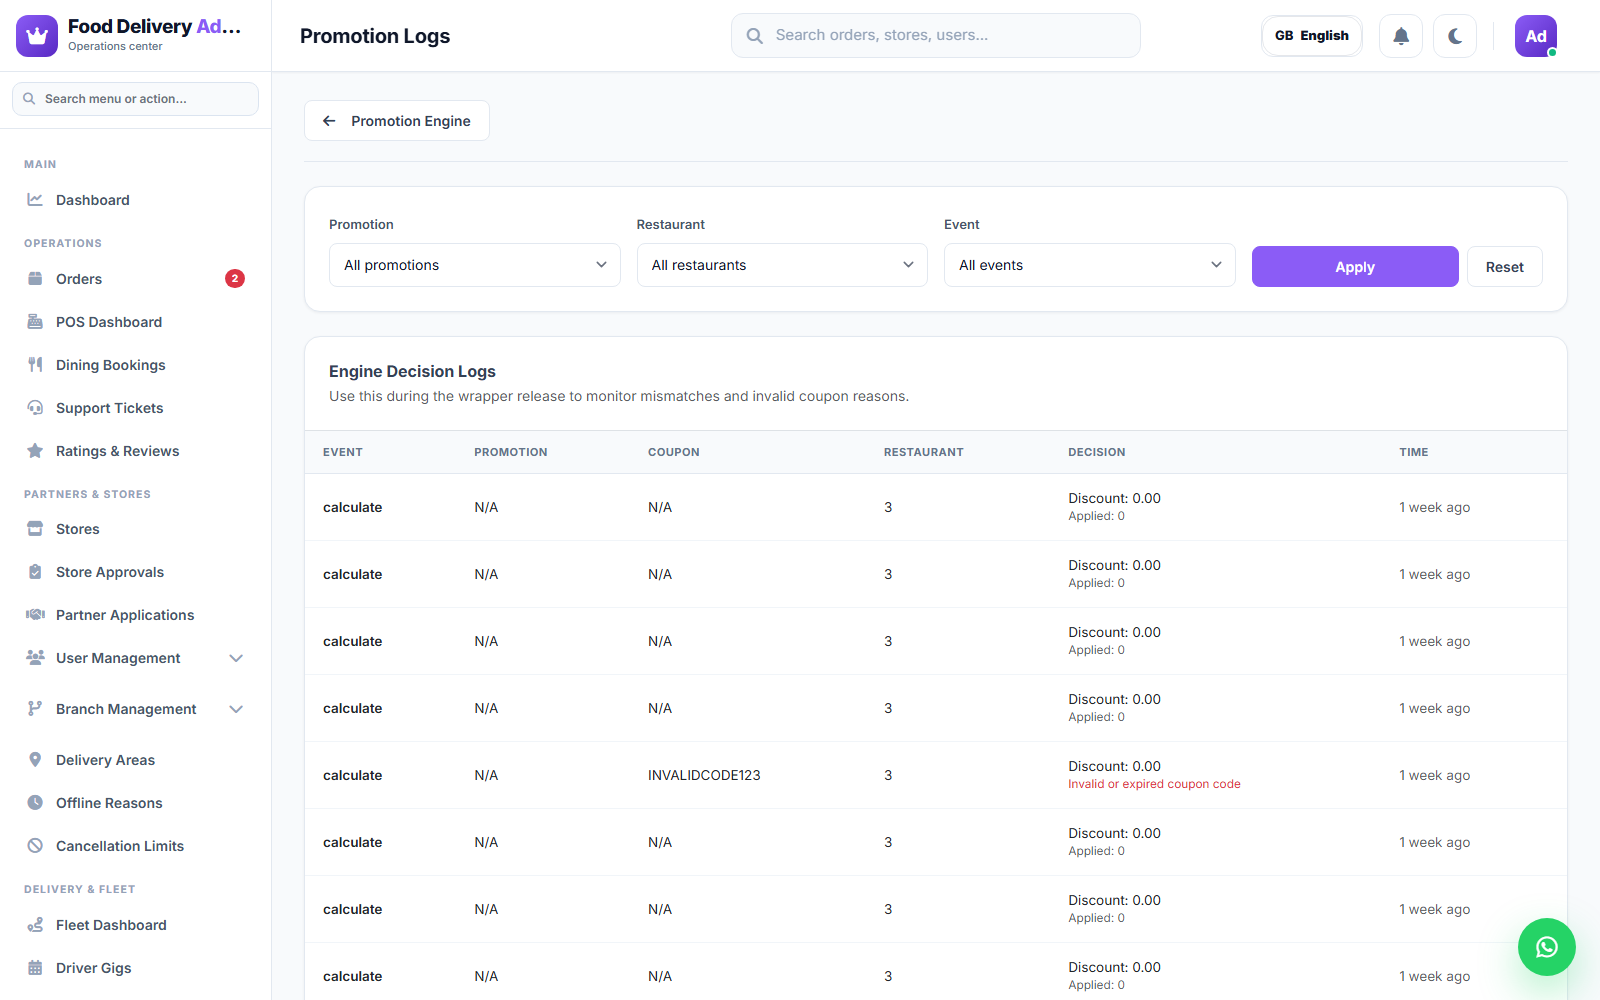
- Promotion Logs — an audit trail of promotion activity.
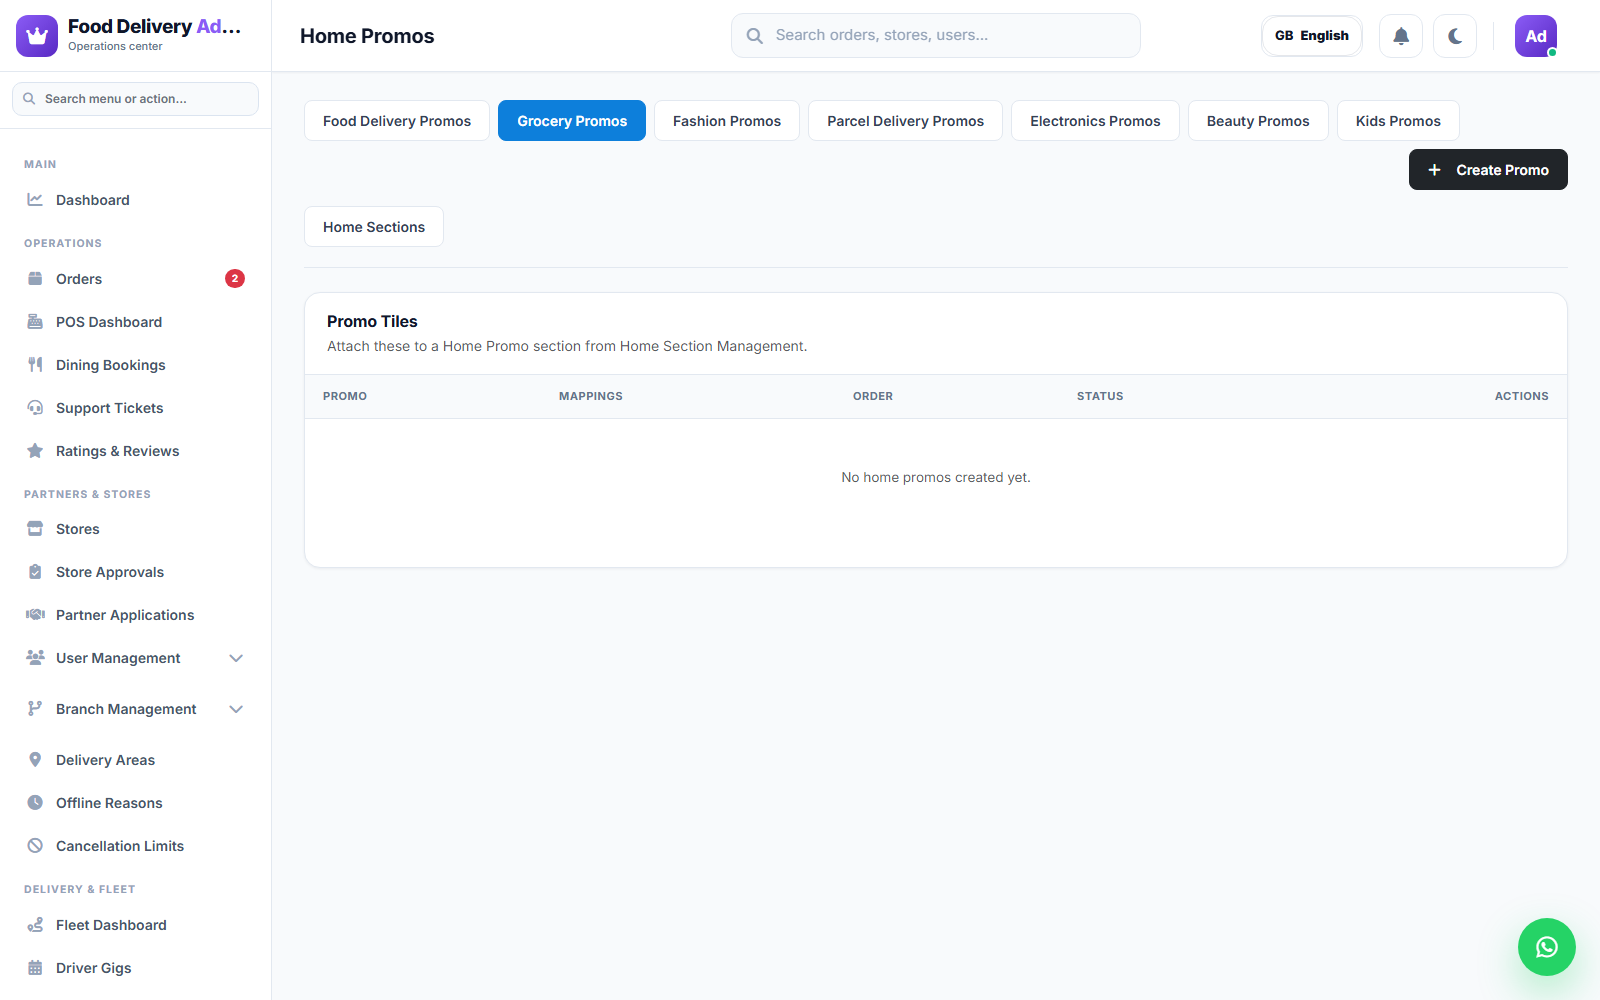
- Home Promos — promo tiles used specifically inside the Promo Picks home section (see Home Section Management below).
Home Section Management
This is where you build the actual home screen layout that customers see in the storefront and apps — a completely different, more powerful system than the old flat "Featured Sections" list, and it works independently for every service.
- Navigate to Home Sections in the sidebar.
- Across the top, pick which service's homepage you're editing: Food Delivery Home, Grocery Home, Fashion Home, Parcel Delivery Home, Electronics Home, Beauty Home, Kids Home — plus a separate Promo Index tab. Each tab is a completely independent homepage layout.
- The Homepage Order list shows every section currently on that service's home screen, top to bottom exactly as customers see it. Each row shows:
- Its position number and drag handle (⠿) to reorder.
- Built-in (a section type the platform ships, like Explore Categories or Stores Near You) vs. a Curated/dynamic section you created yourself.
- Live / hidden status.
- Edit and Hide actions.
- Click Save Section Order after dragging to persist the new order.
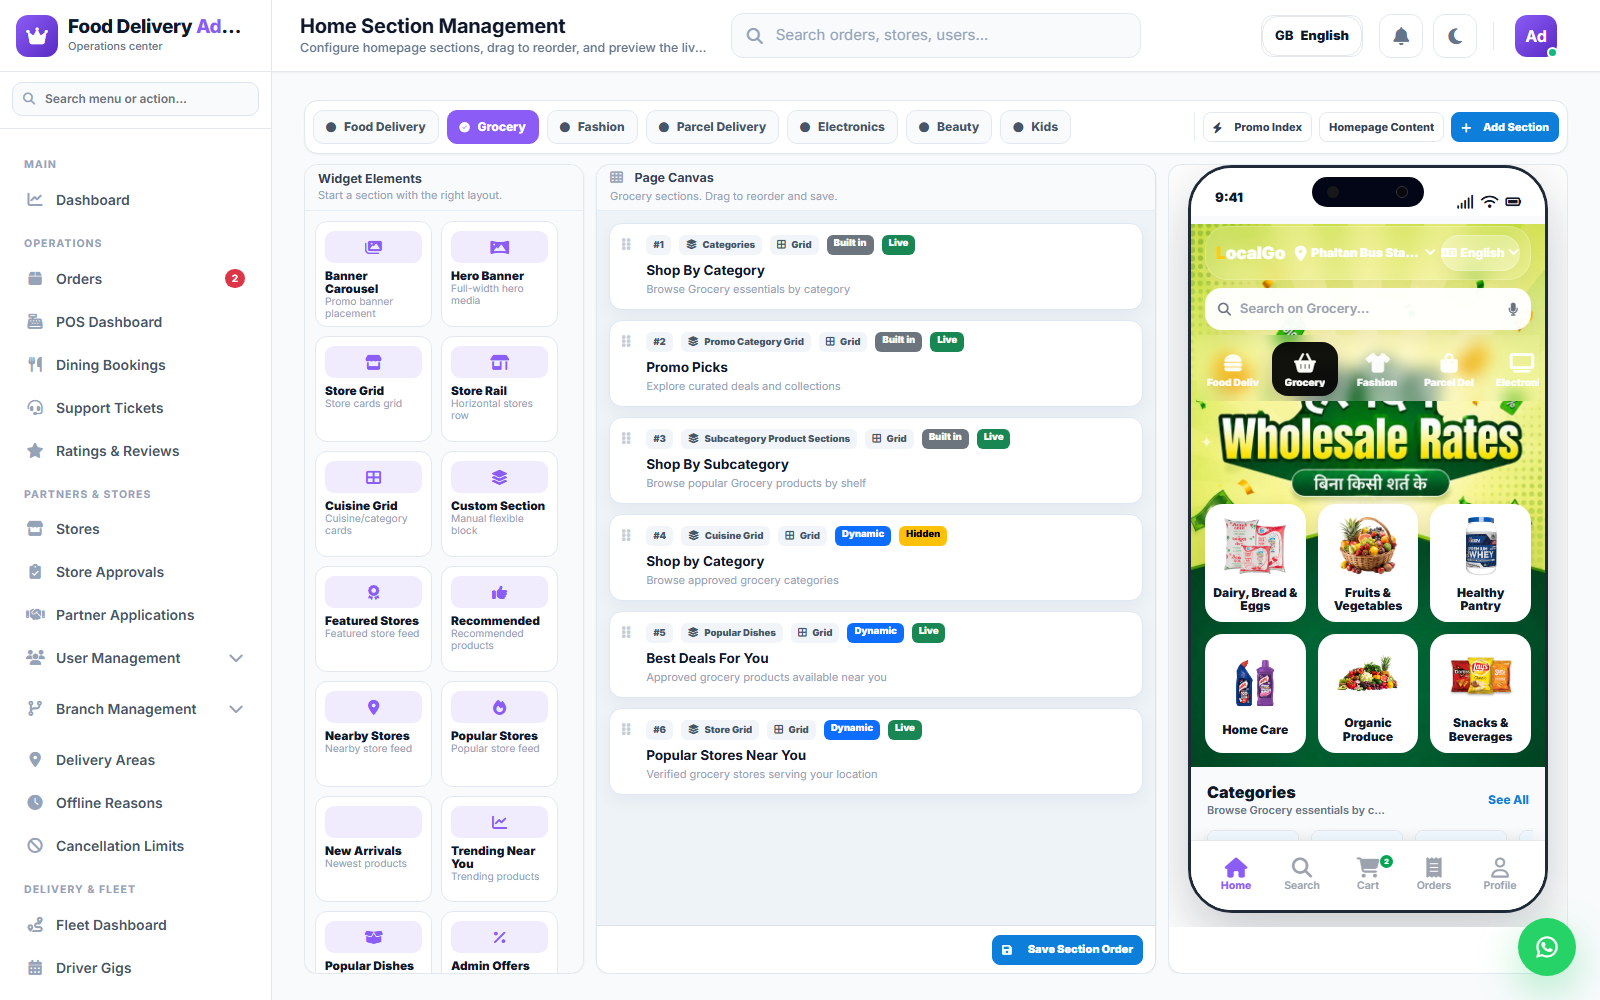
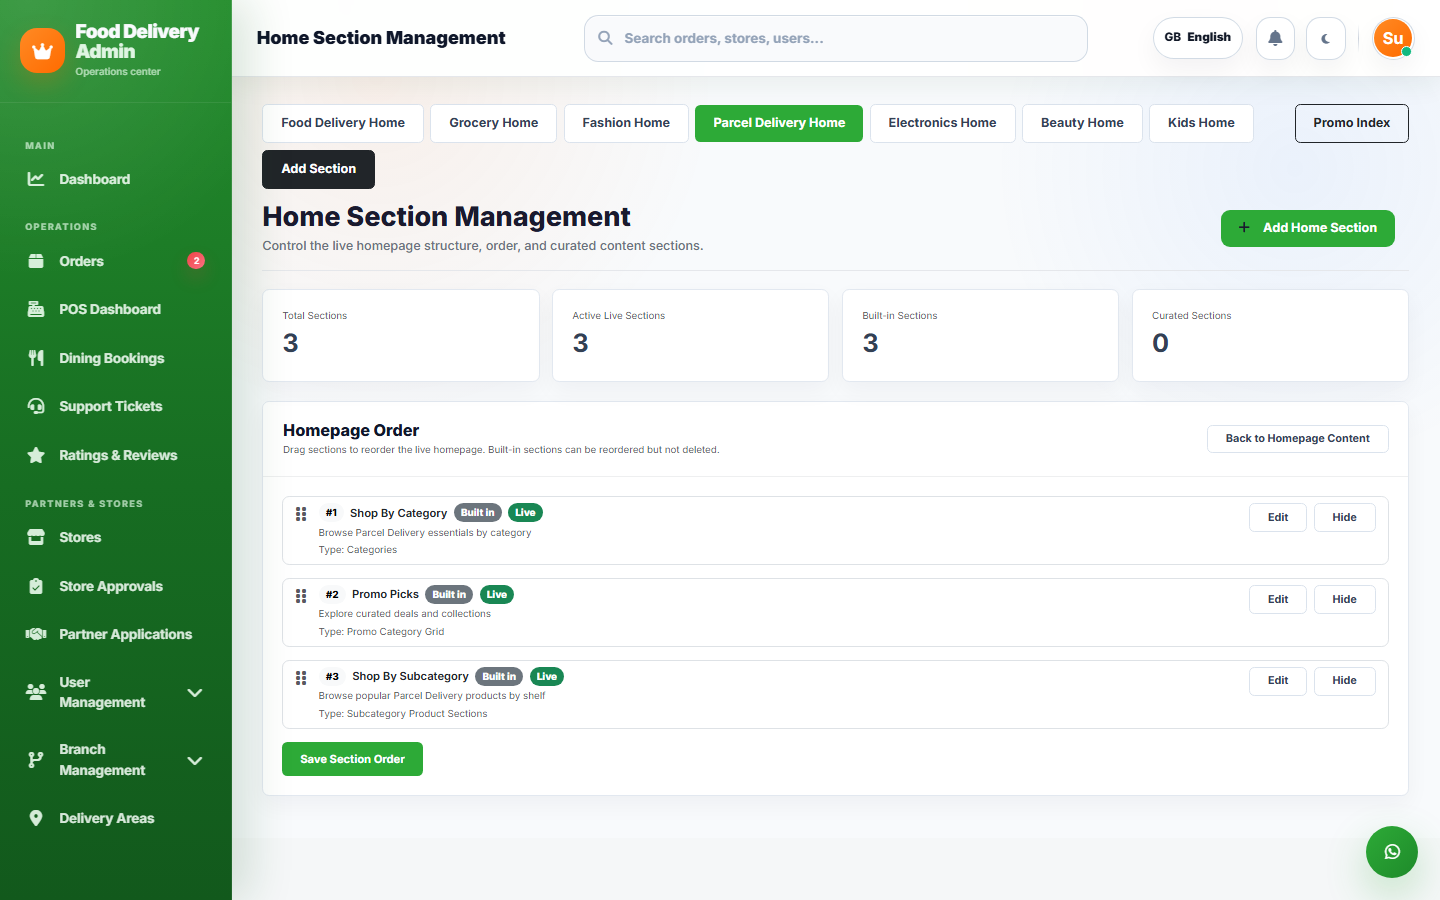
Editing a built-in section — click Edit on a built-in row (e.g. Explore Categories, Promo Picks, Stores Near You, Shop By Subcategory) to configure its content: which categories/subcategories to feature, background color and opacity, an optional background image, and a hero media banner.
Adding a custom section — click + Add Home Section to create a brand-new curated section for the current service. You can configure:
- Section type (e.g. a restaurant/store grid) and data source —
auto(platform picks content automatically) or manually curated. - Content target & scope — e.g.
featuredstores only, or a manual list of specific Restaurant IDs. - Manual content pools: Banner IDs, Cuisine IDs, Global Category IDs, Menu Item IDs, Brand IDs, Promotion IDs, and Home Promo IDs — pick exactly which records should populate the section.
- A Popular only filter, a result limit, and the same background color/opacity/image/hero-media styling options as built-in sections.
- Display order and Active status.
Because every field above is scoped to one service_type at a time, remember to switch to the correct service tab before clicking Add Home Section — a section created while on the Grocery Home tab will only ever appear on the grocery homepage.
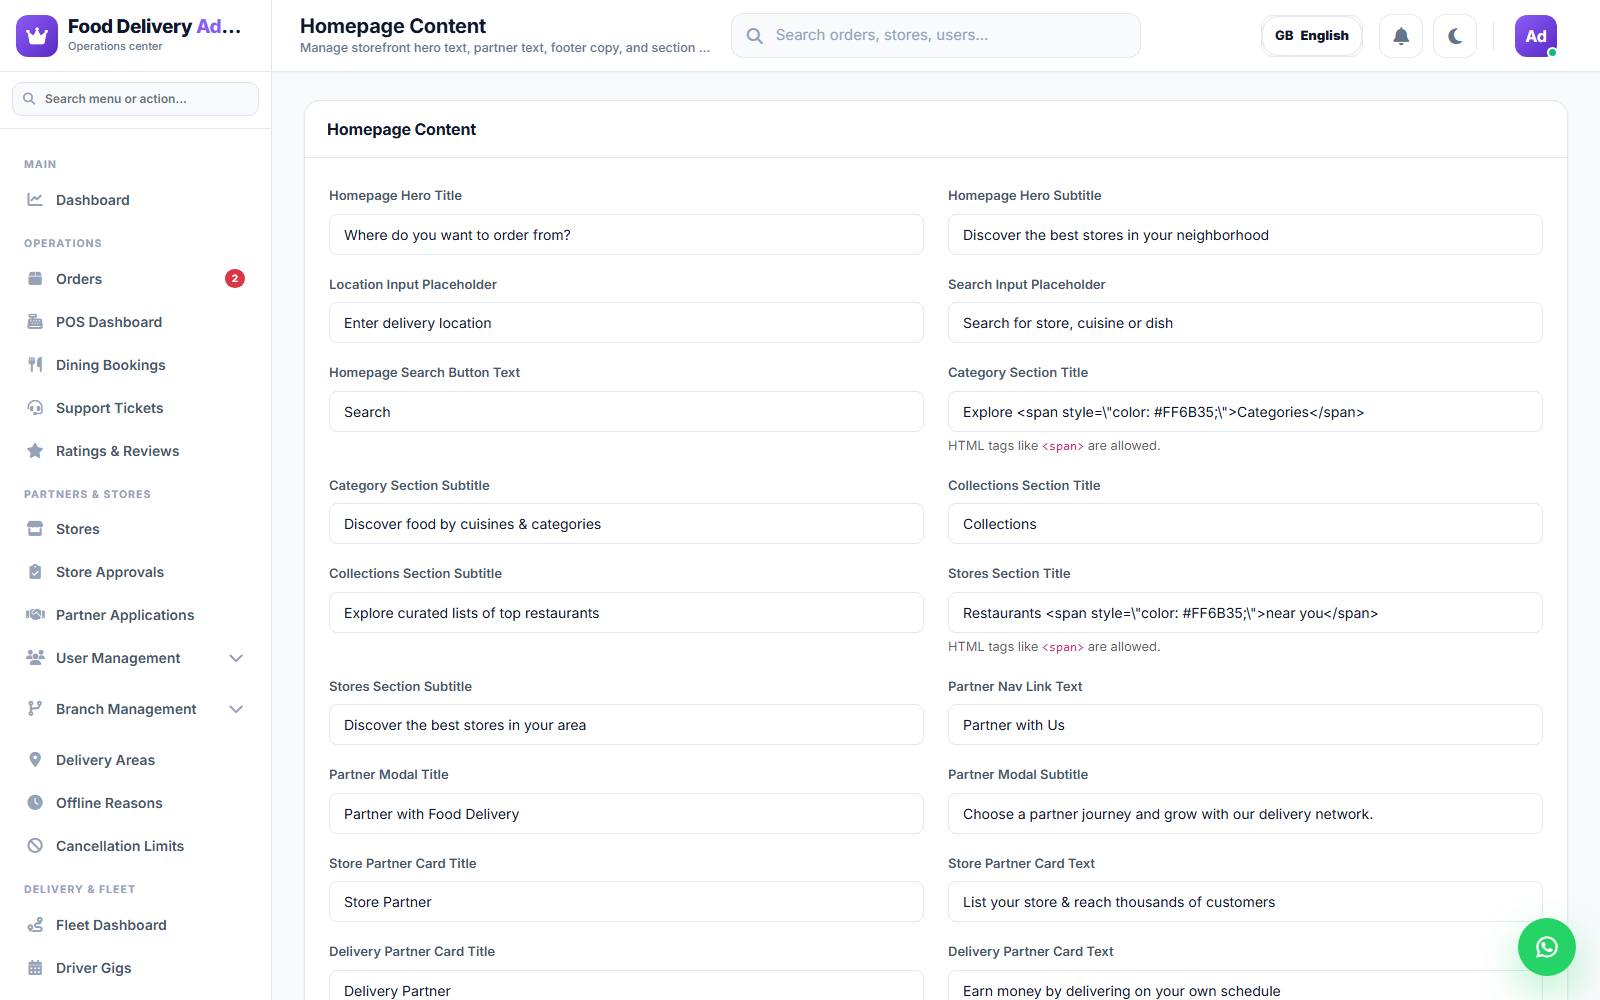
Homepage Content
Separate from Home Sections, this controls broader storefront homepage content blocks (hero text, top-level promotional copy) shared across the web storefront.
Campaigns
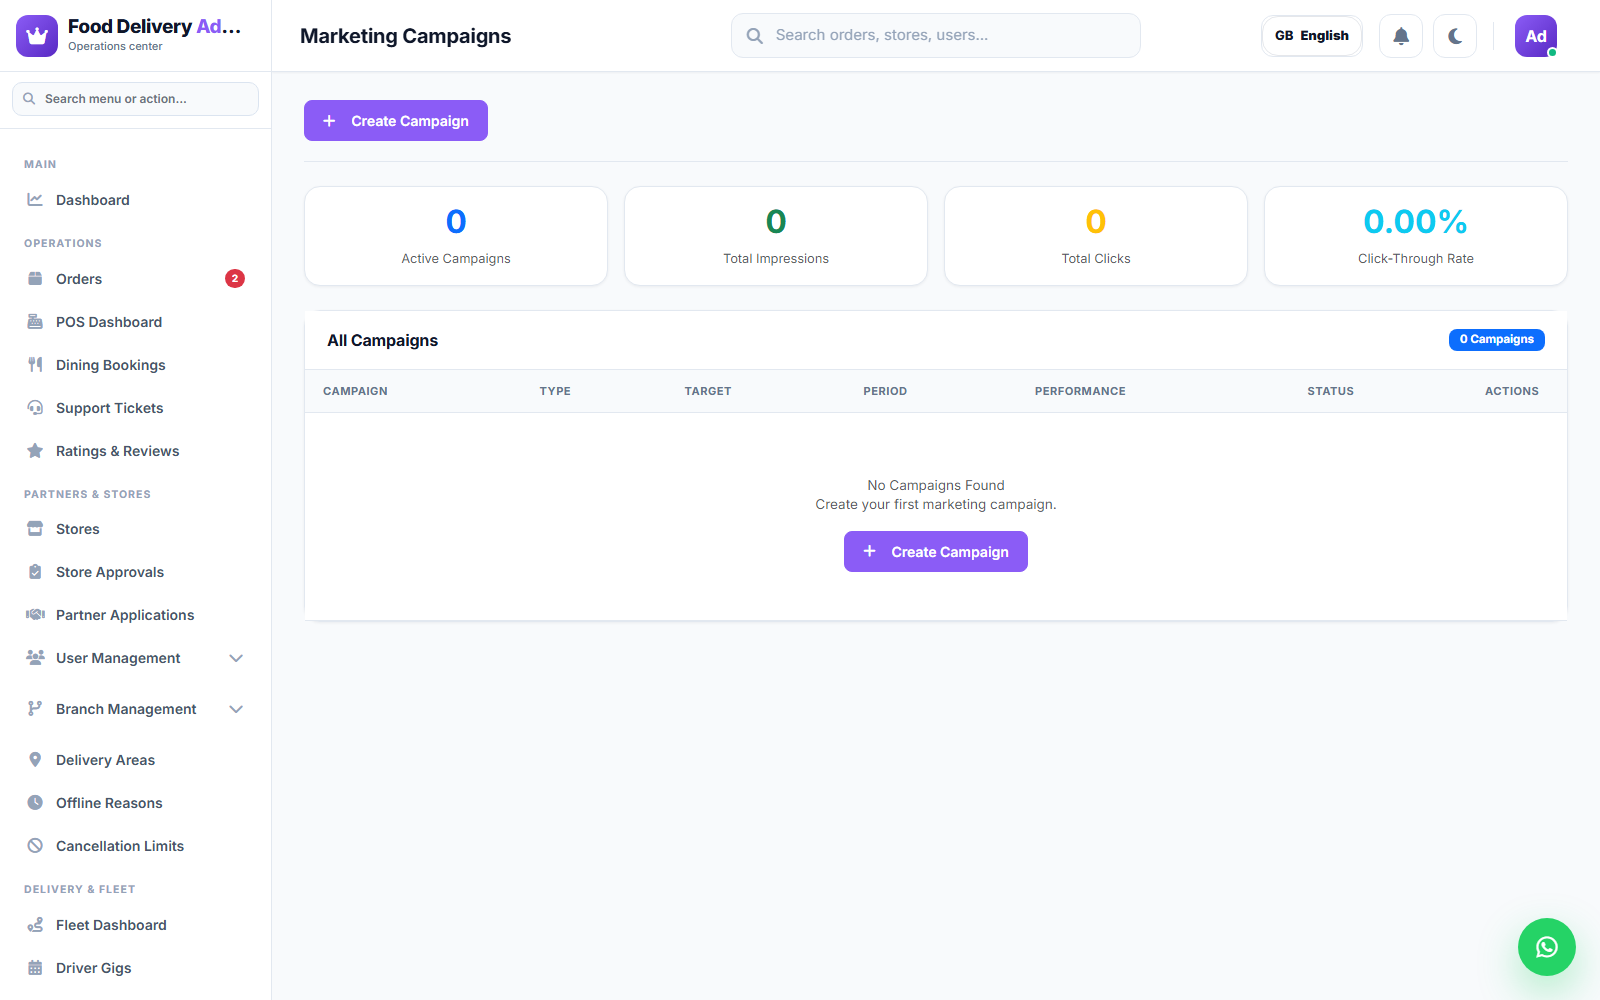
Create and track marketing campaigns (e.g. seasonal pushes) that can tie together banners, promotions, and notifications under one named initiative.
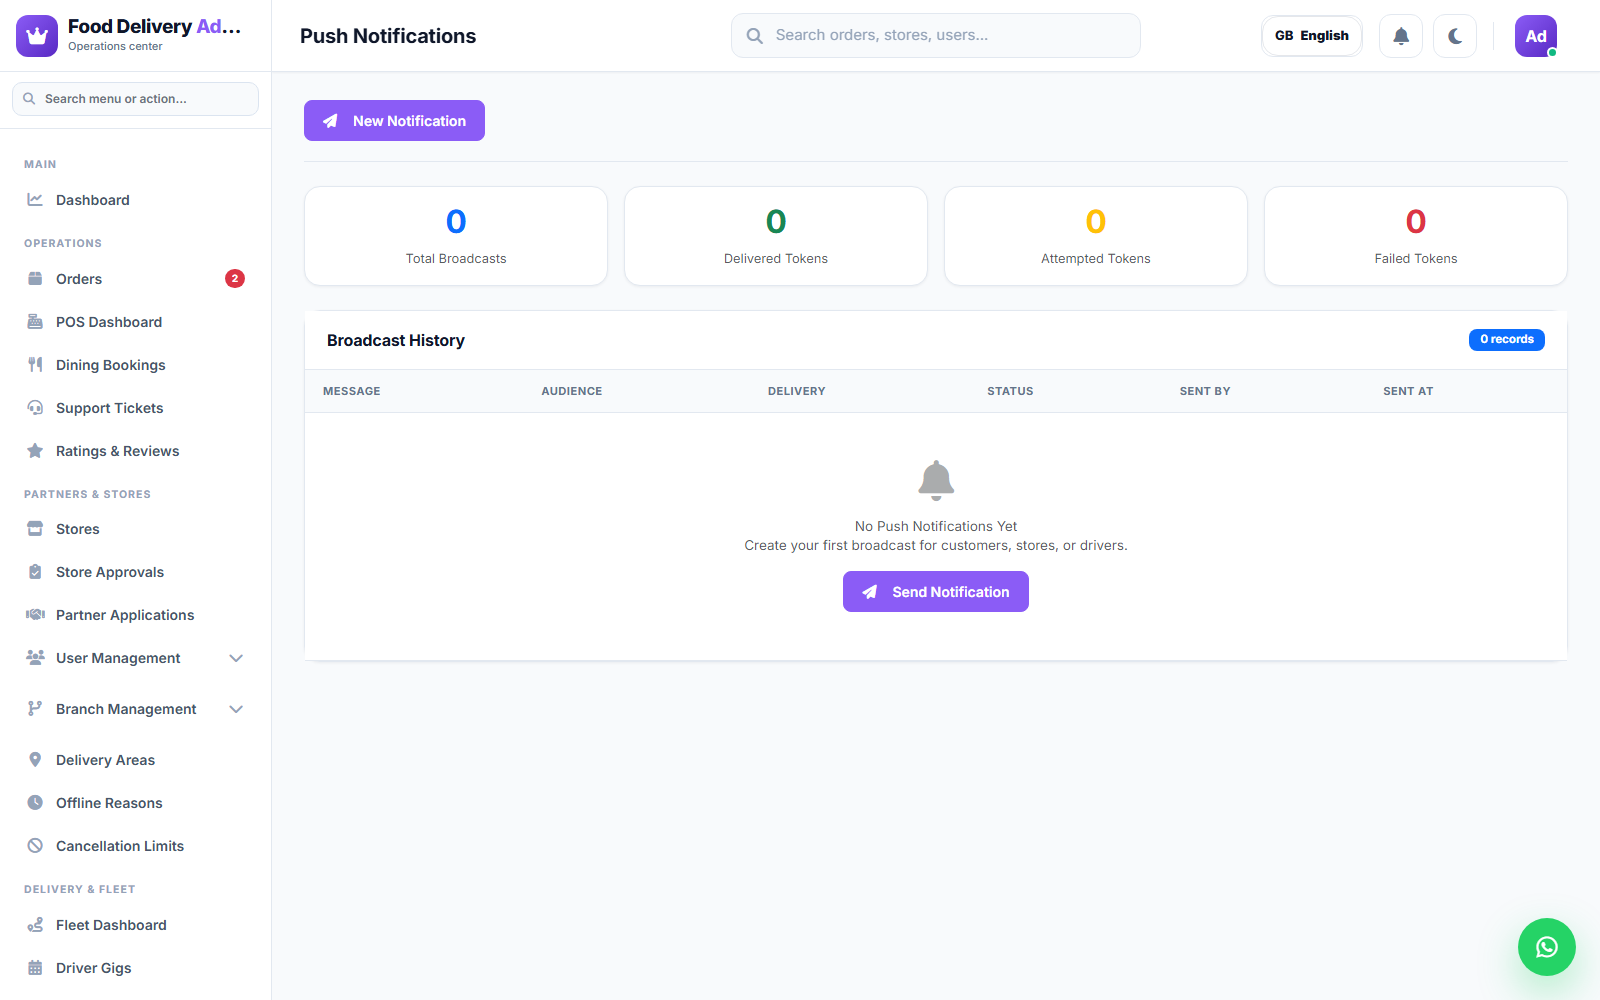
Push Notifications
Compose and send push notifications to customers, drivers, or restaurants via Firebase Cloud Messaging, and see a log of what's been sent.
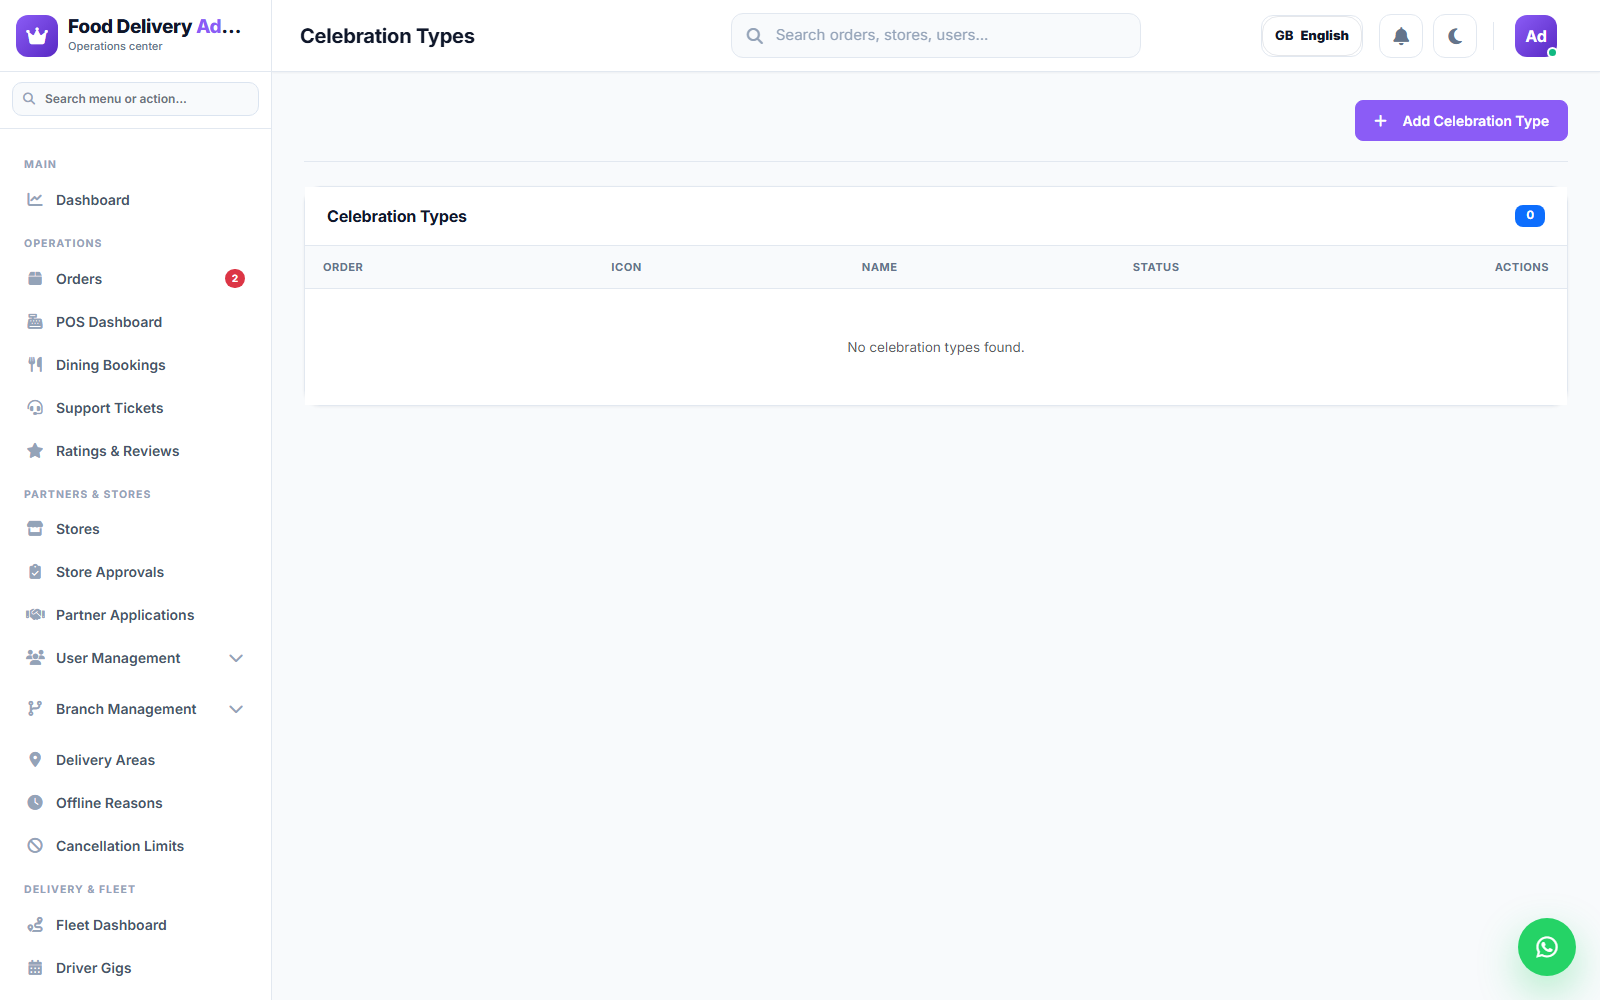
Celebration Types
Manage special-occasion types (e.g. Birthday, Anniversary) that customers can attach to an order for celebration-themed delivery experiences.
FAQ
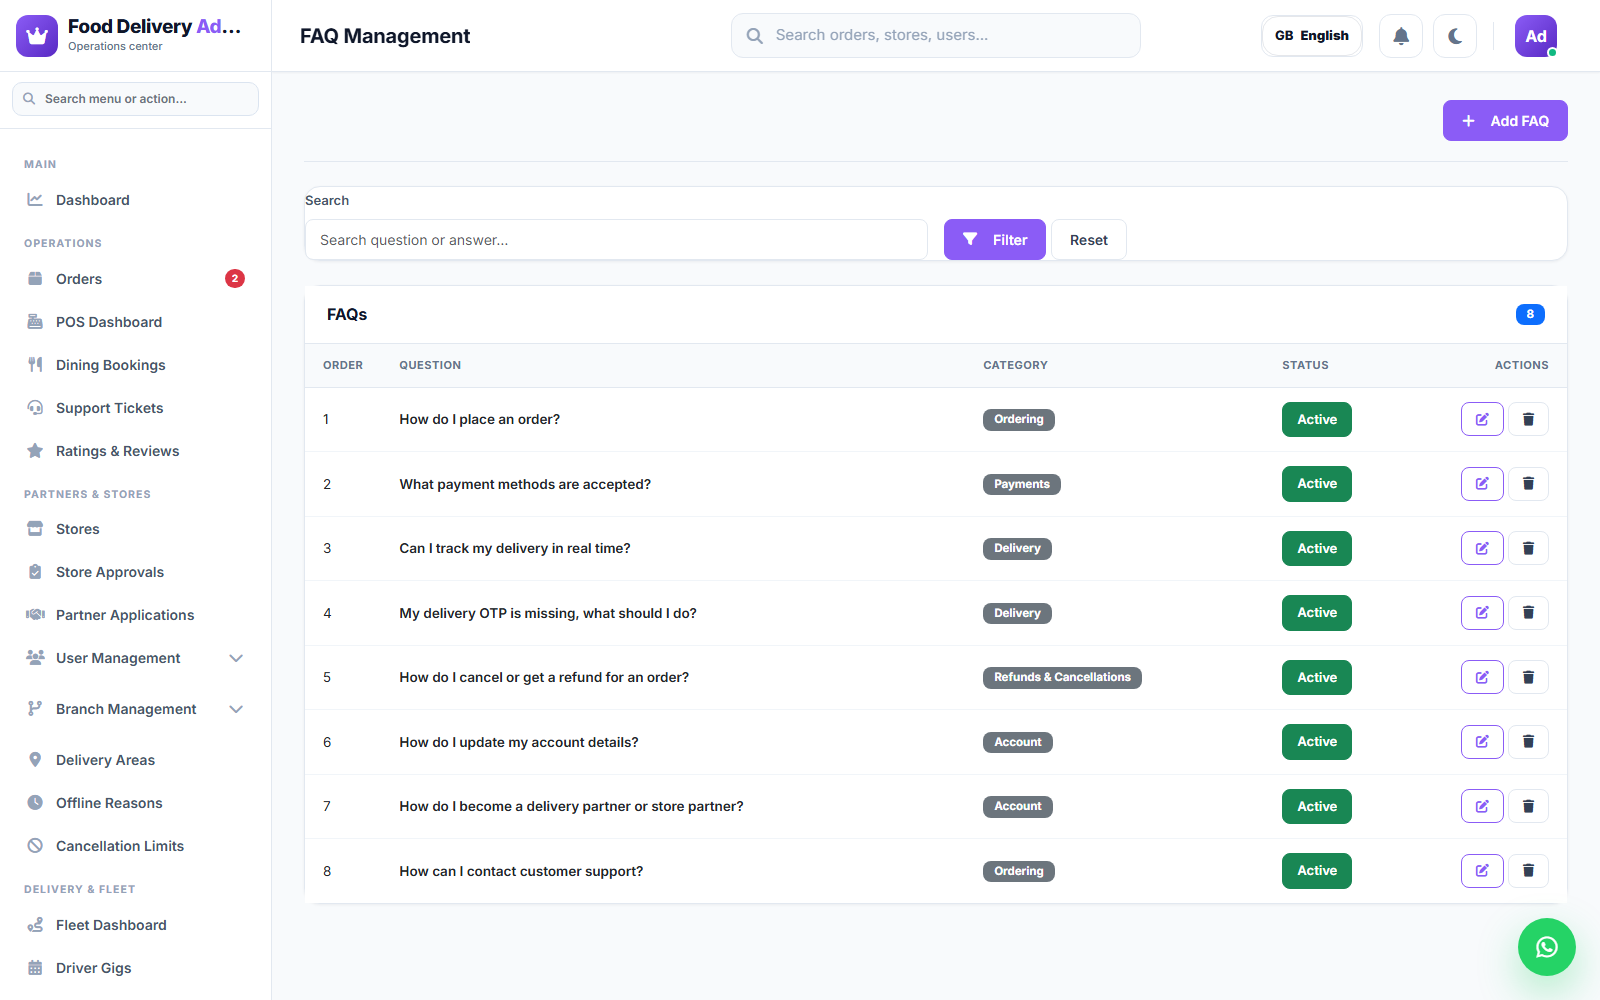
Manage the FAQs shown on the customer web FAQ page and the Help & Support screen of the customer, driver, and restaurant apps. FAQs are served live through the /api/faqs endpoint, so anything you publish here appears immediately without an app update.
- Navigate to FAQ in the sidebar.
- Click Add FAQ, fill in the Question and Answer.
- Optionally set a Category (Ordering, Payments, Delivery, Account, Refunds & Cancellations) and a Display Order.
- Set Status to Active to publish it, or Inactive to hide it while keeping it in the admin list.
From the FAQ list you can search existing questions, toggle Active/Inactive with one click, edit, or delete an entry.
Finance
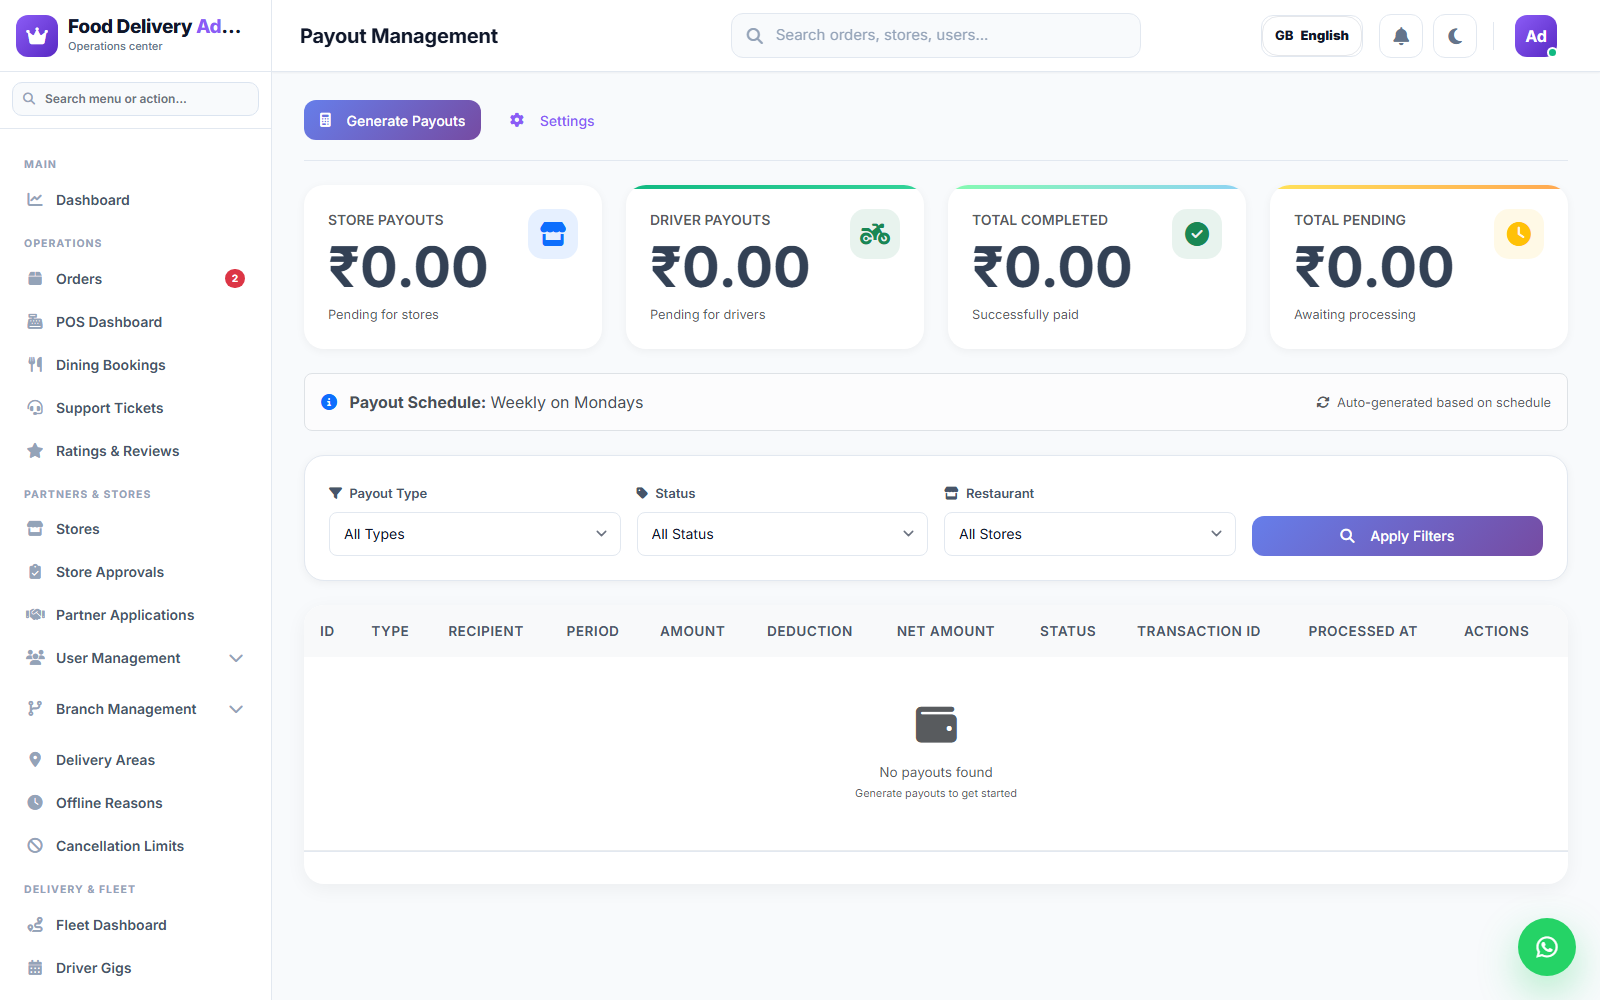
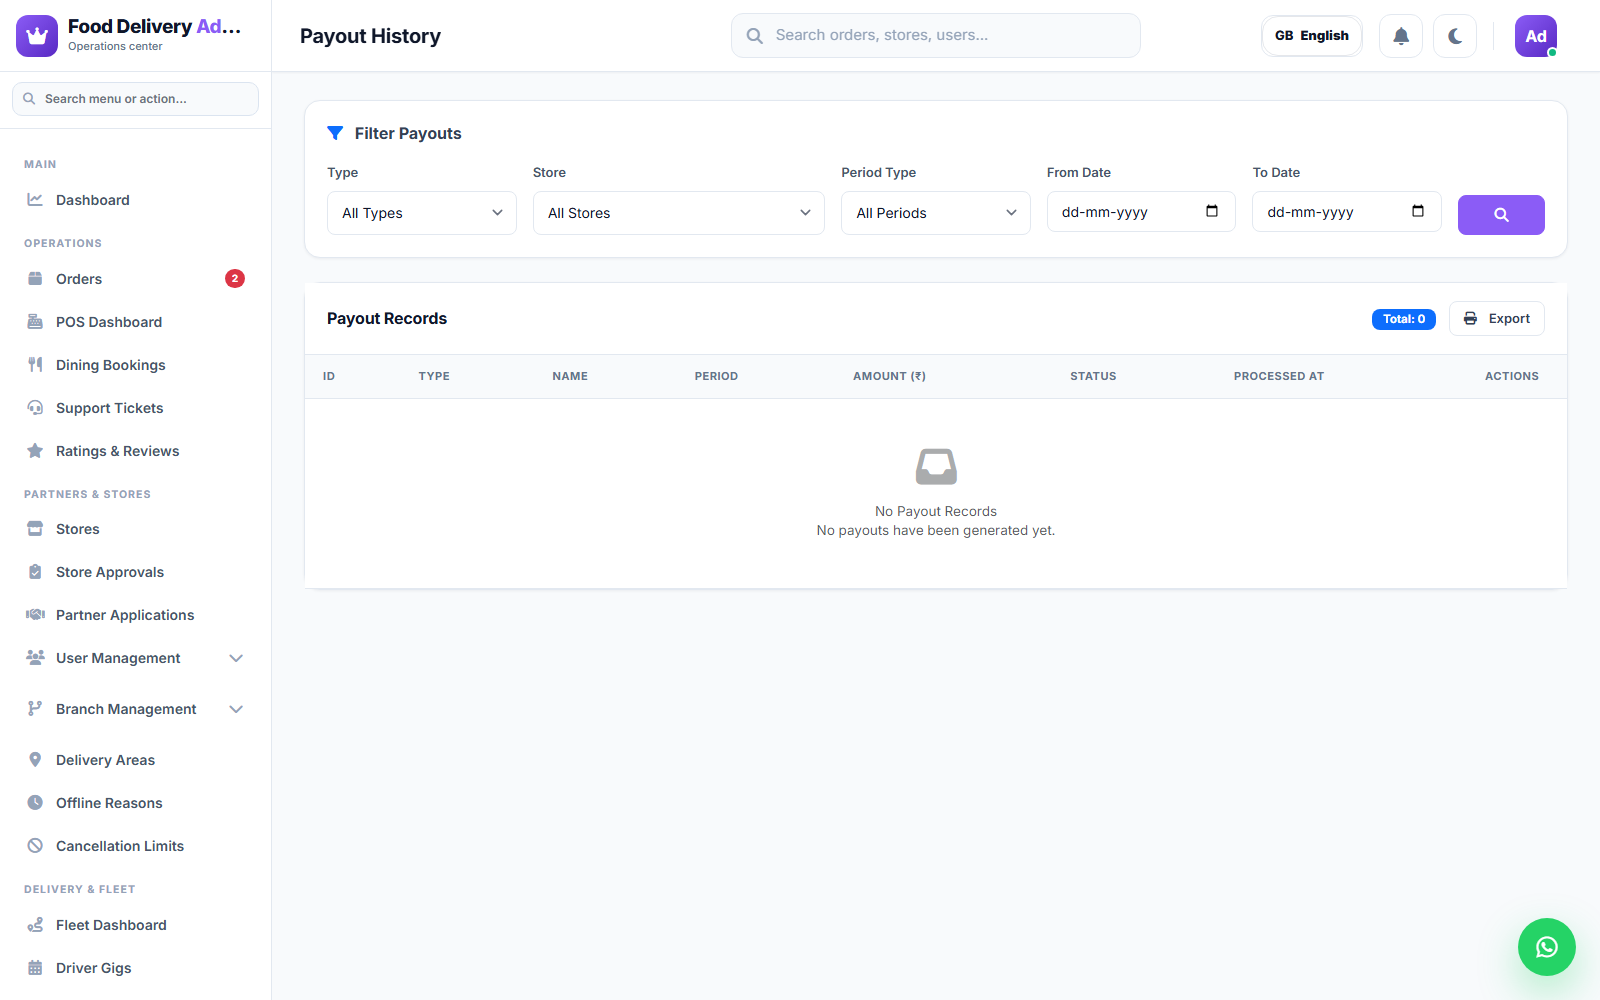
Payouts
Process outstanding payouts owed to stores/sellers for delivered orders. Payout History keeps a record of everything already paid.
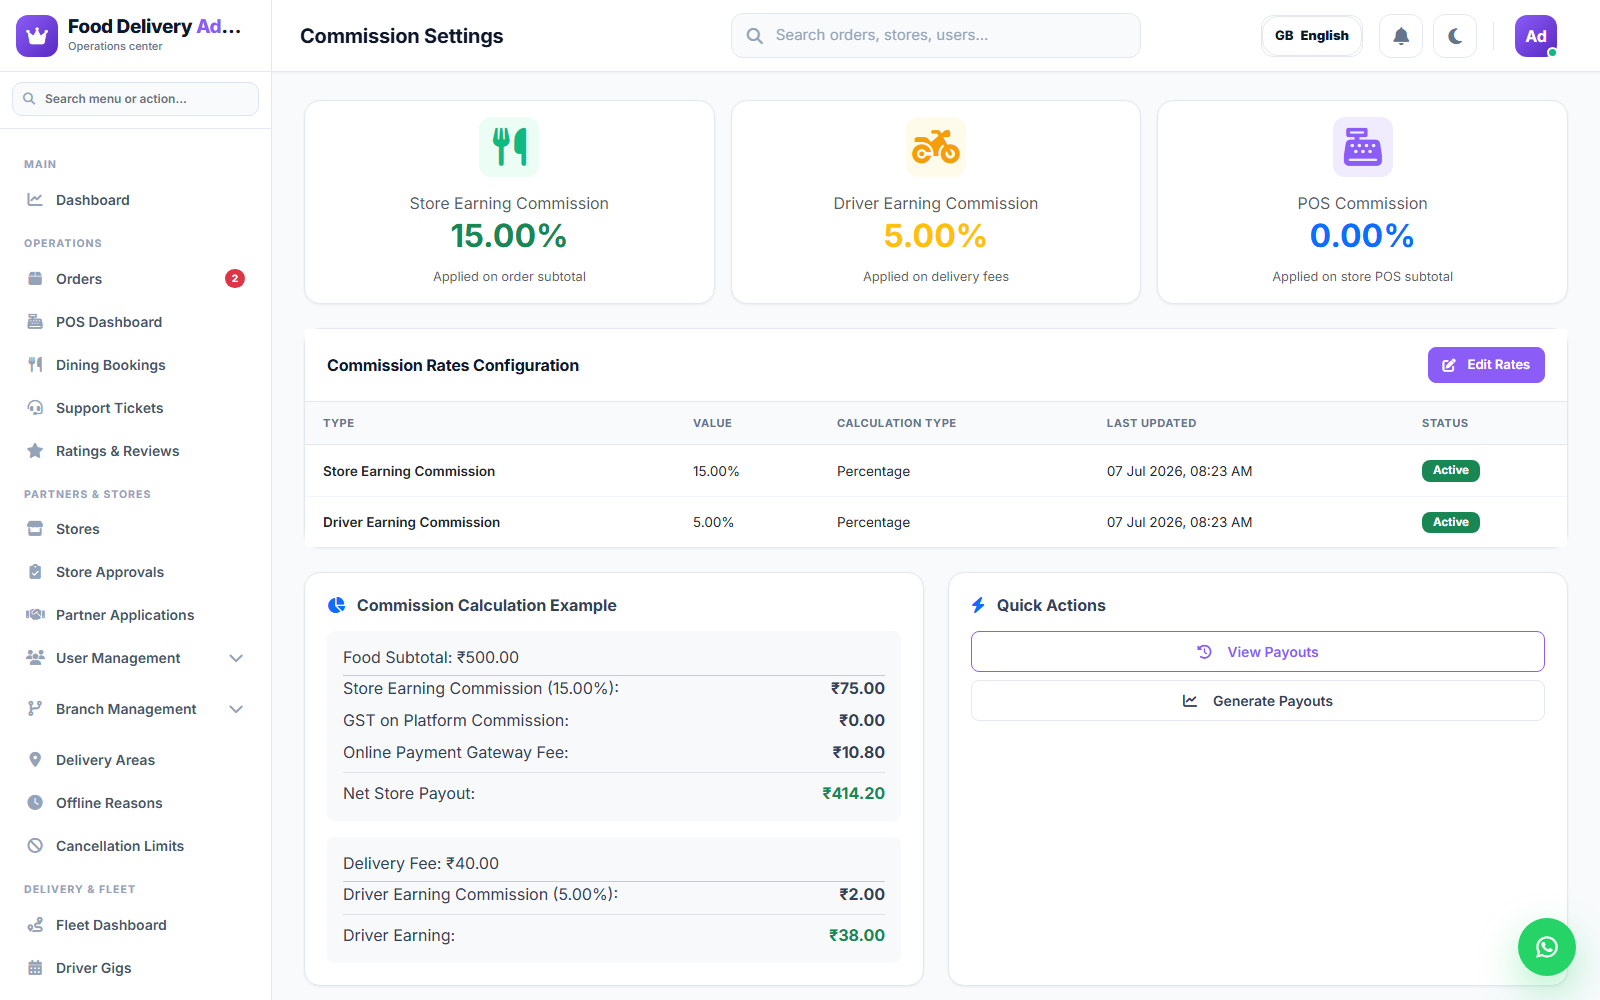
Commissions
View the platform's commission earnings across all orders and services.
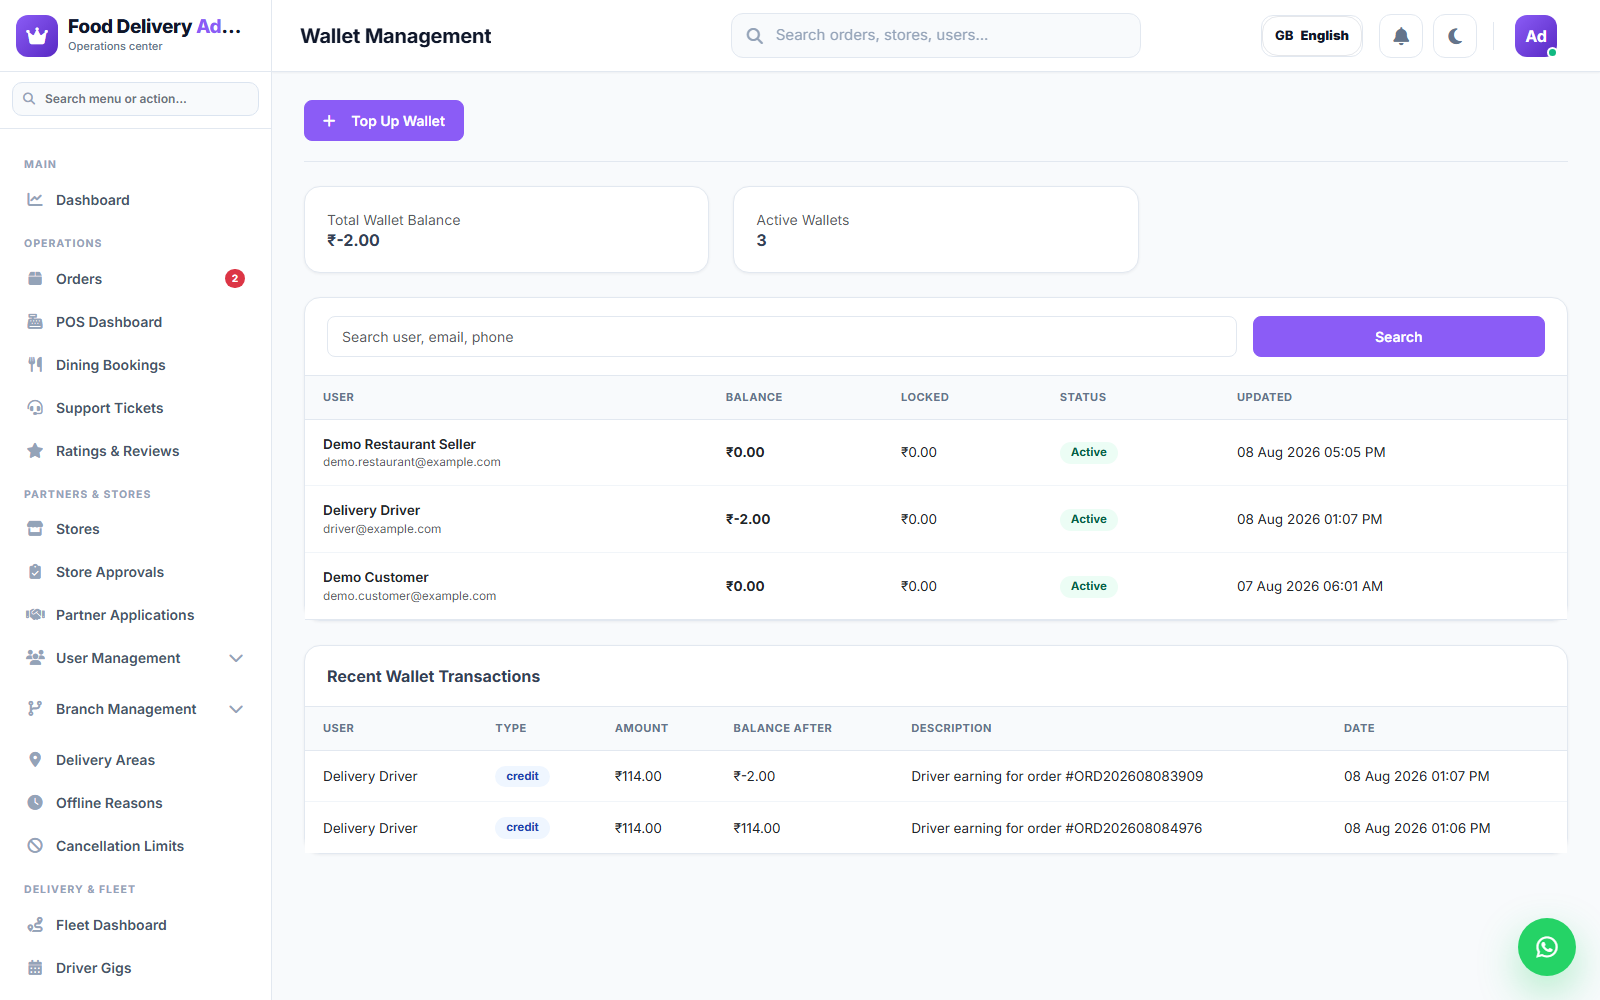
Wallets
Look up any user's (customer, driver, or store) wallet balance and transaction history.
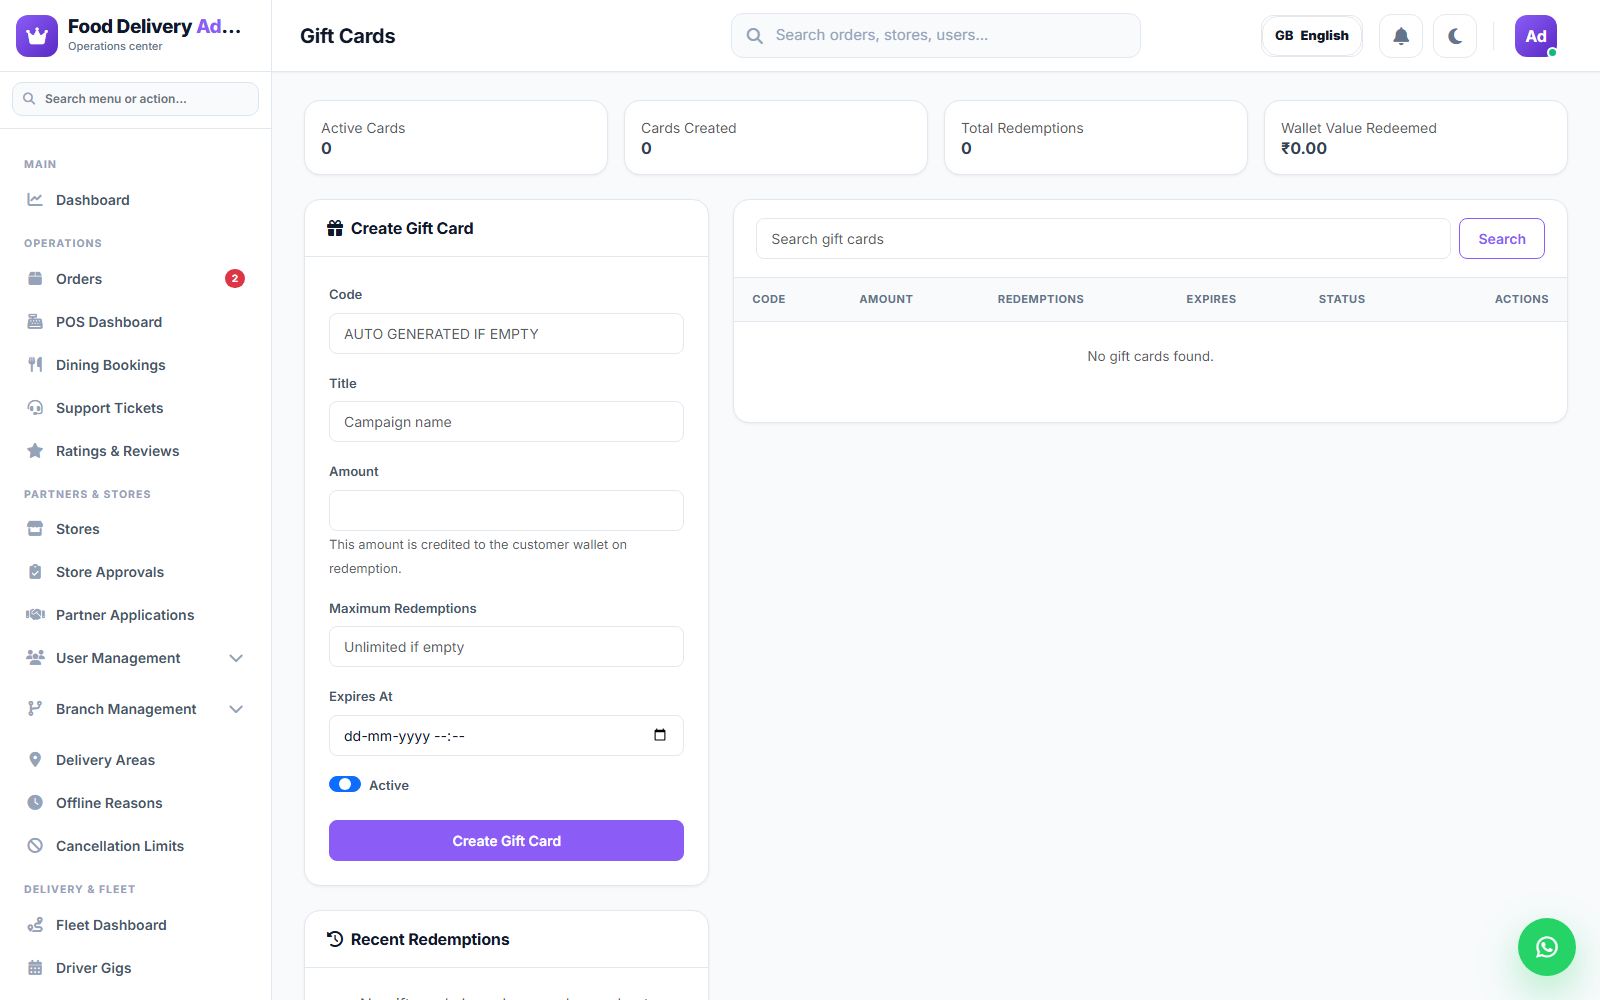
Gift Cards
Issue and manage gift cards that customers can redeem as wallet credit or at checkout.
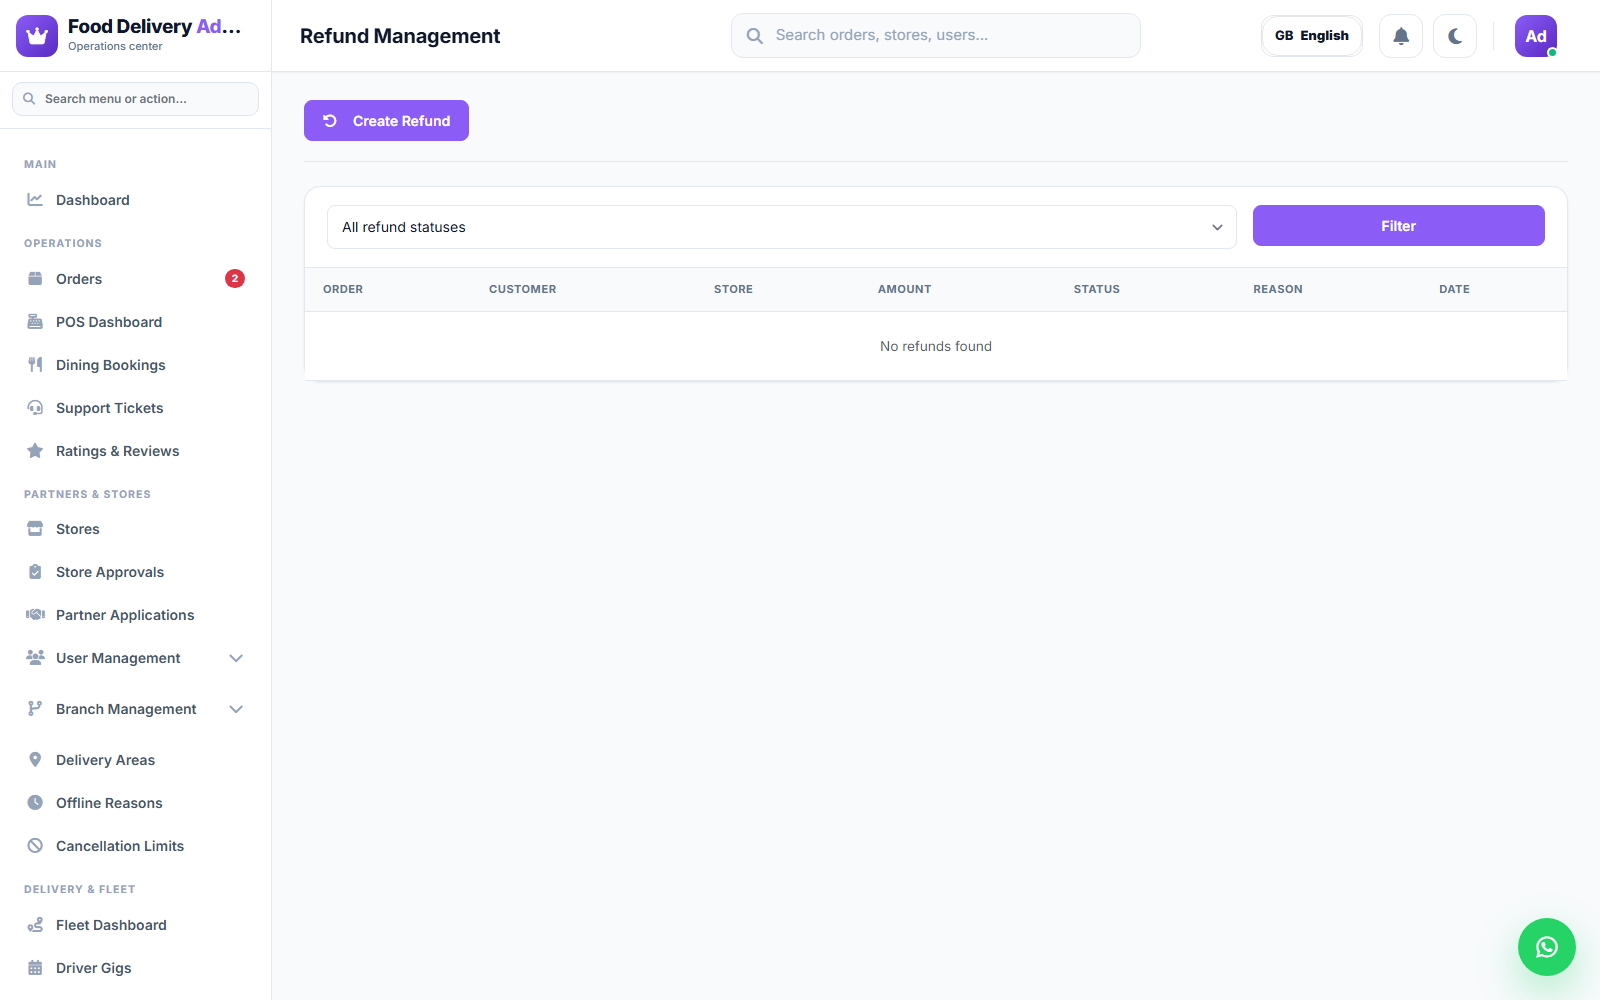
Refunds
Review and process refund requests raised against orders.
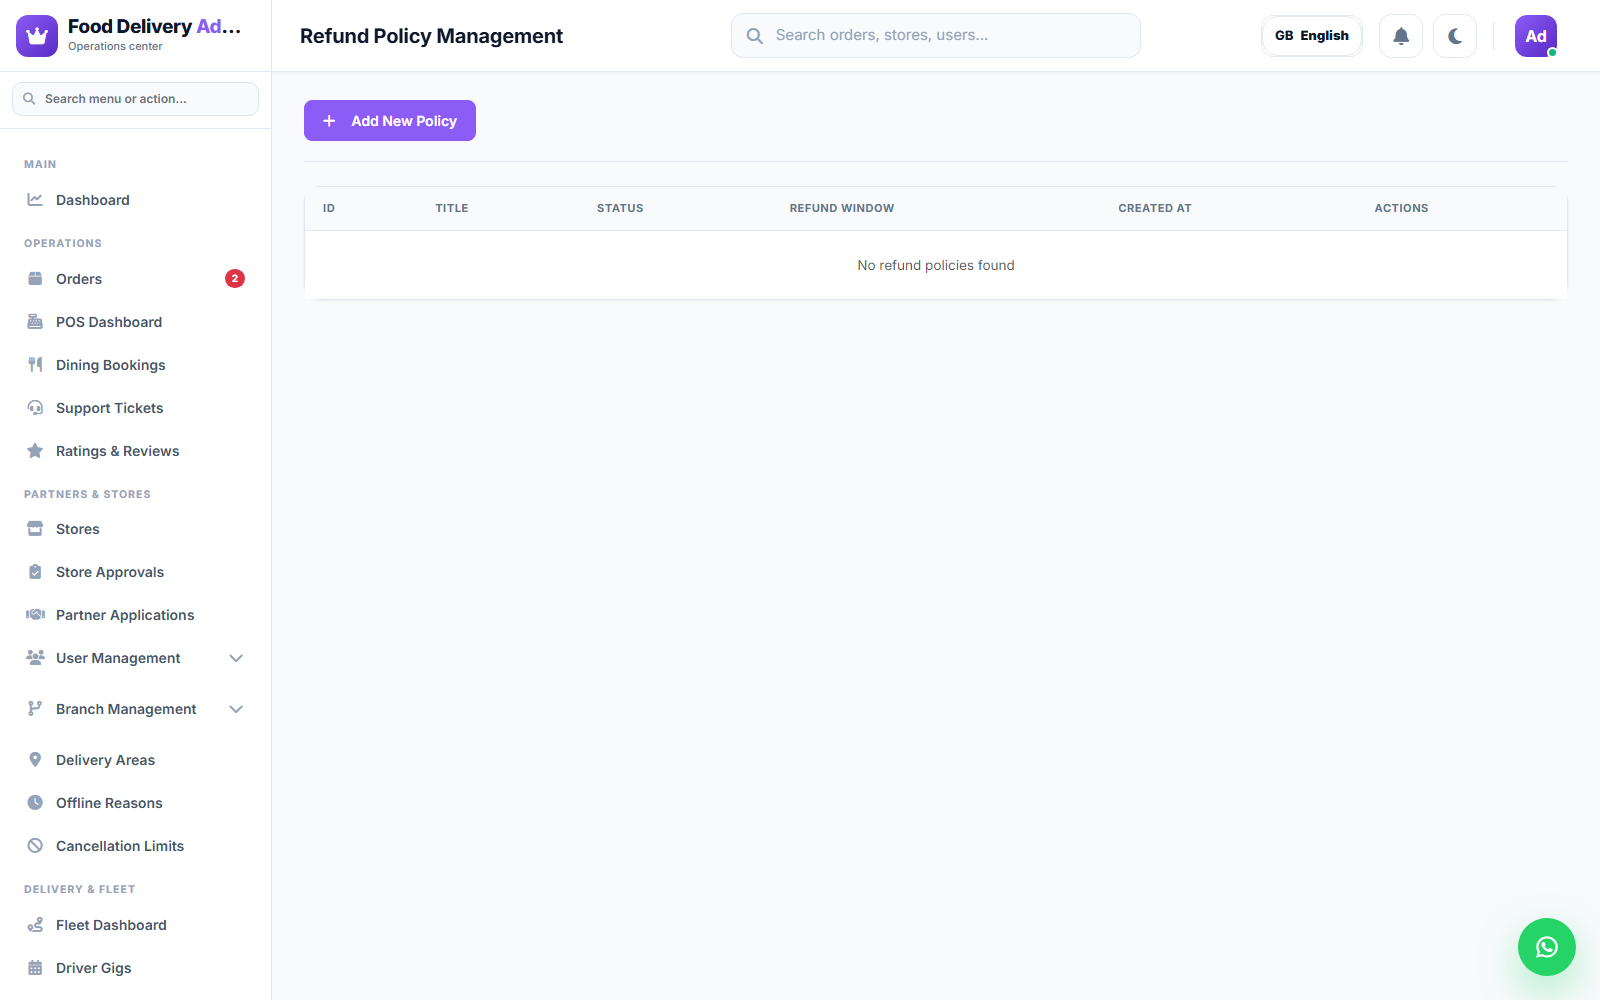
Refund Policies
Define the rules that determine when an order is eligible for a refund and how much is refunded.
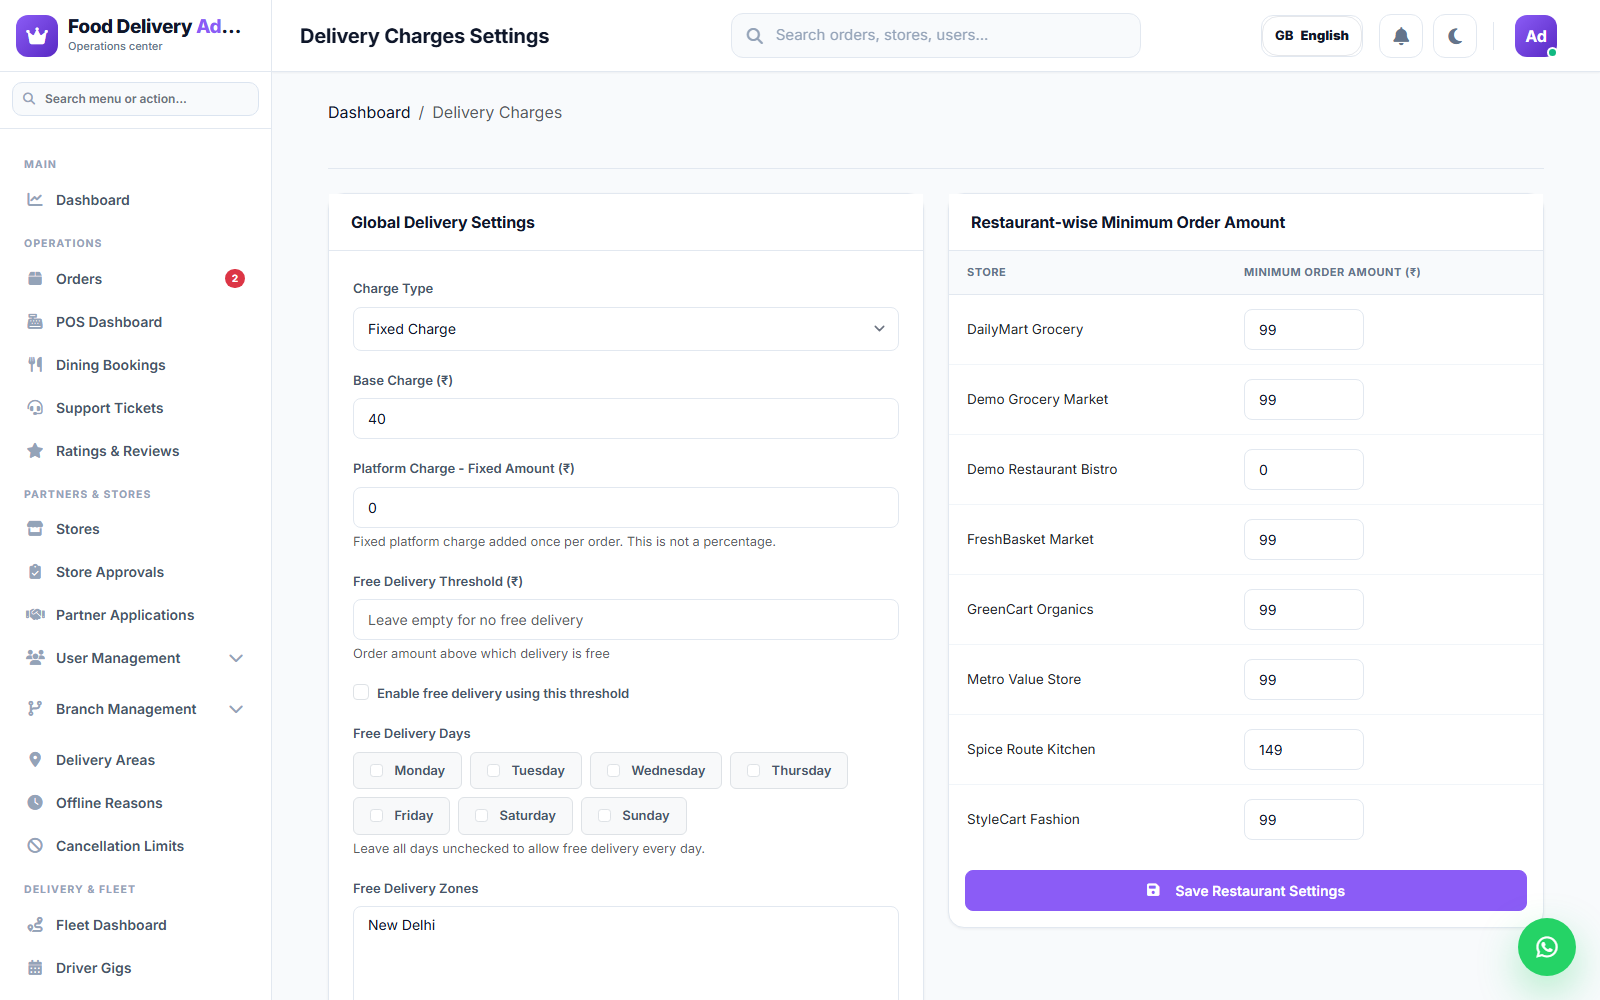
Delivery Charges
Configure how delivery fees are calculated (flat rate, distance-based, per service, etc.).
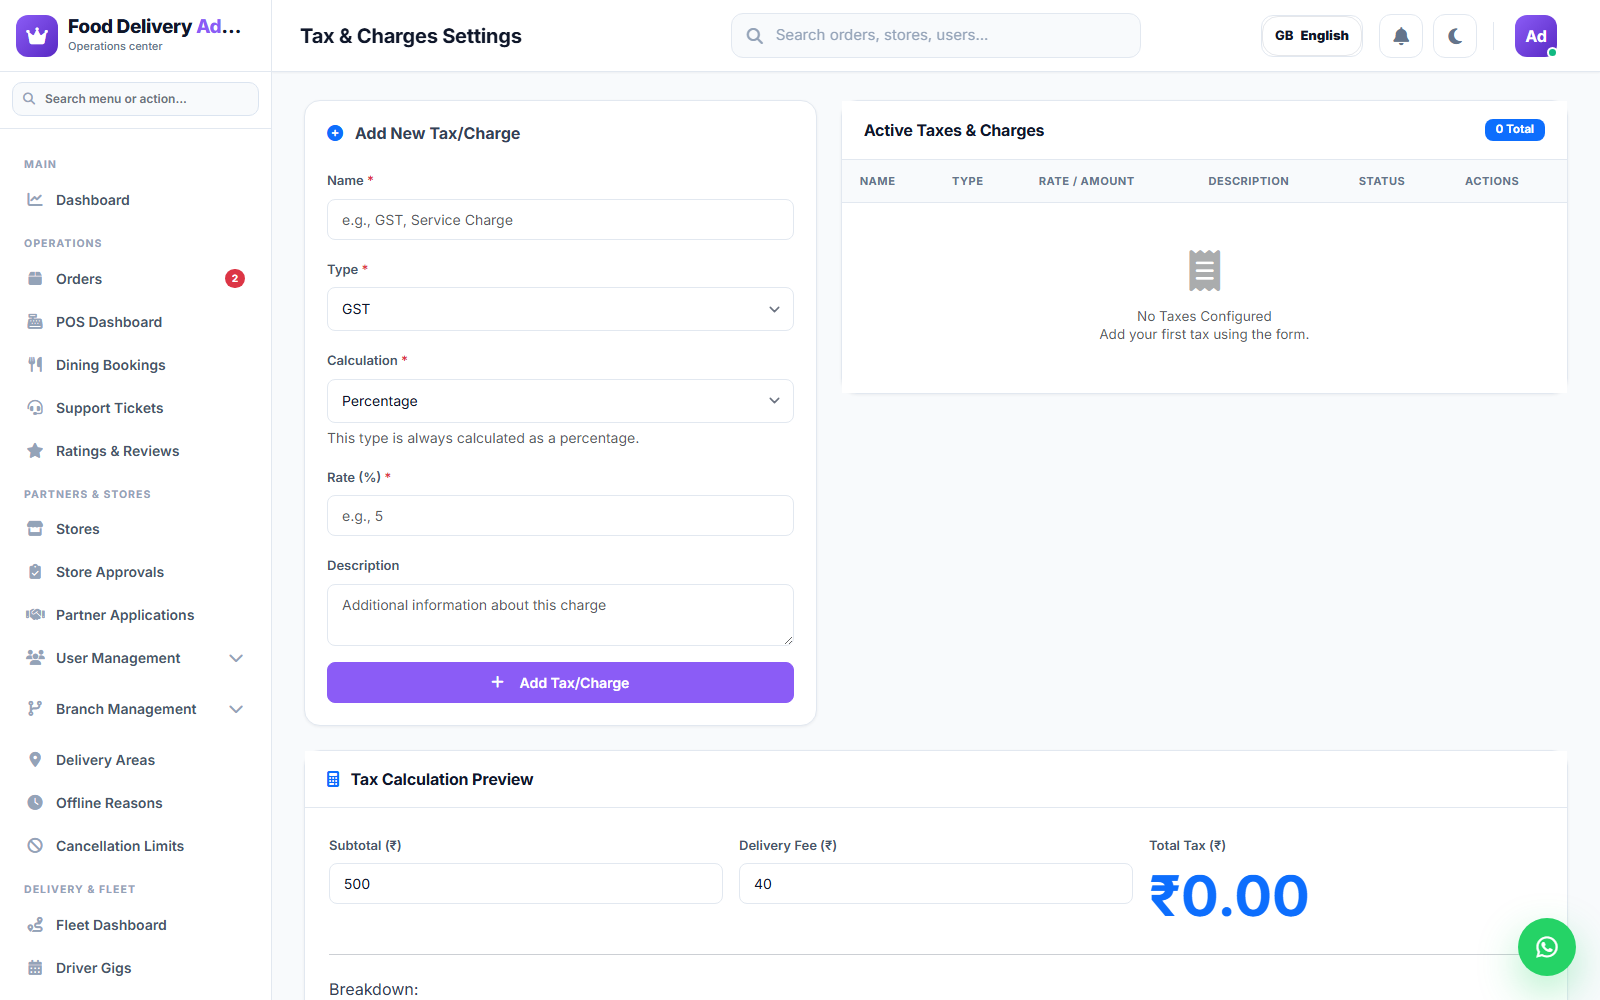
Taxes & Charges
- Normal Tax — click Create Tax, enter a title and percentage.
- Group Tax — click Create Group Tax, enter a title, and select multiple sub-taxes to combine into one group tax.
Payments (Settings)
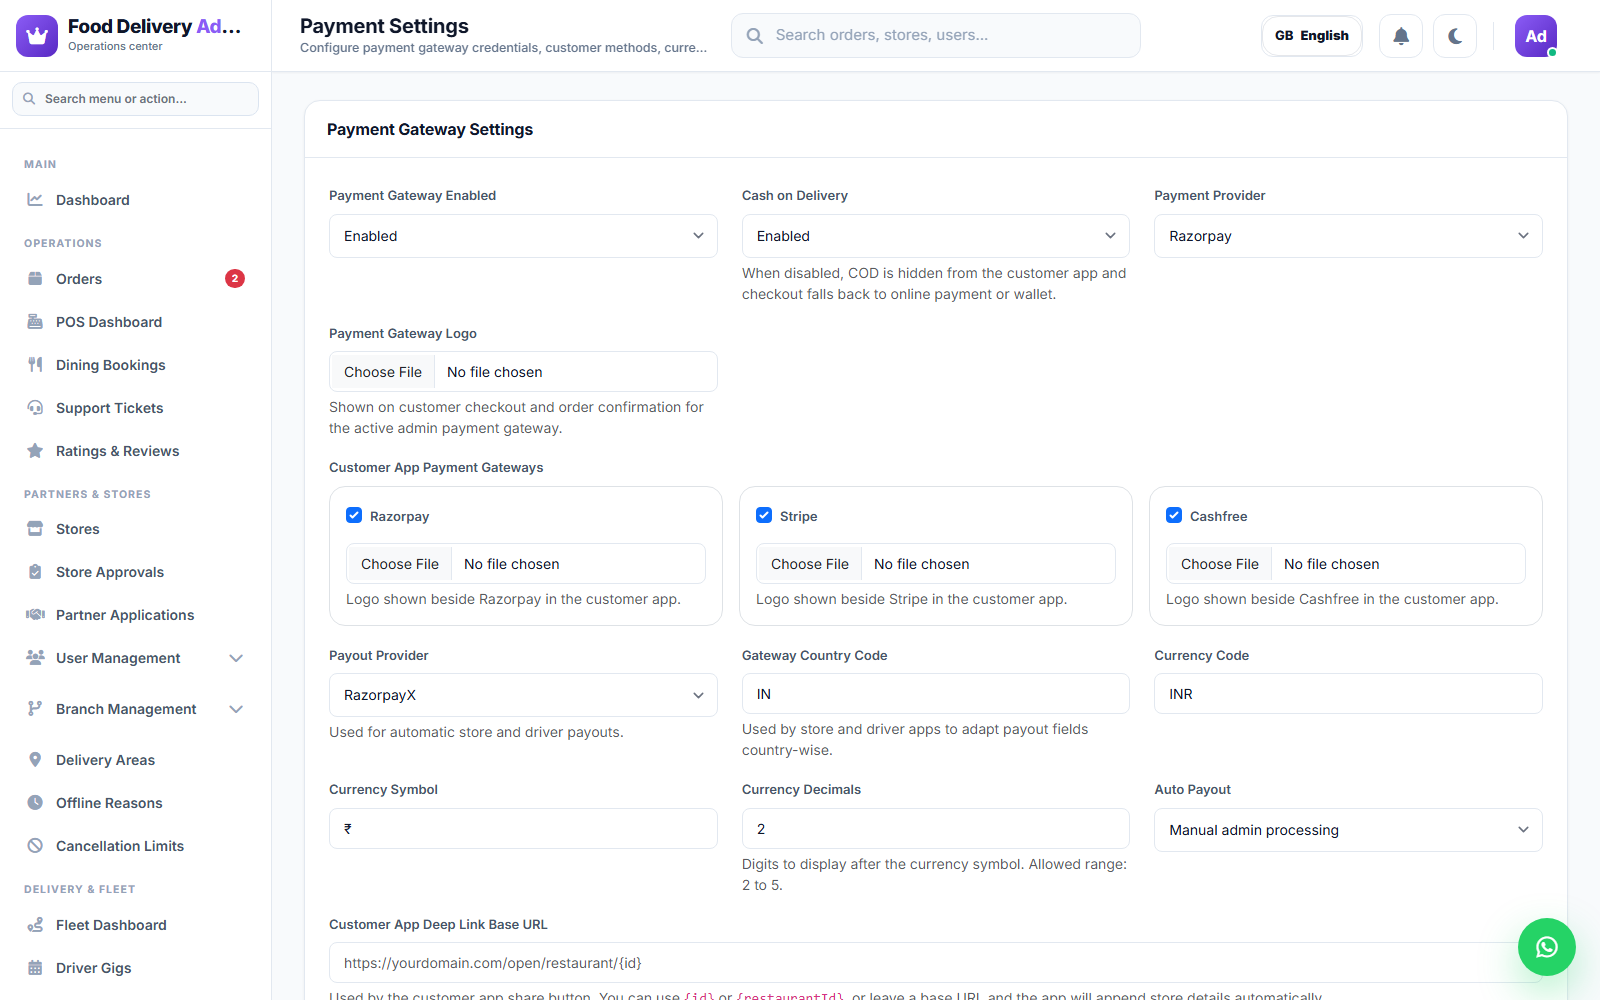
Configure which payment gateways are enabled (Stripe, Razorpay, COD, wallet, etc.) and their API credentials.
Payout Gateway
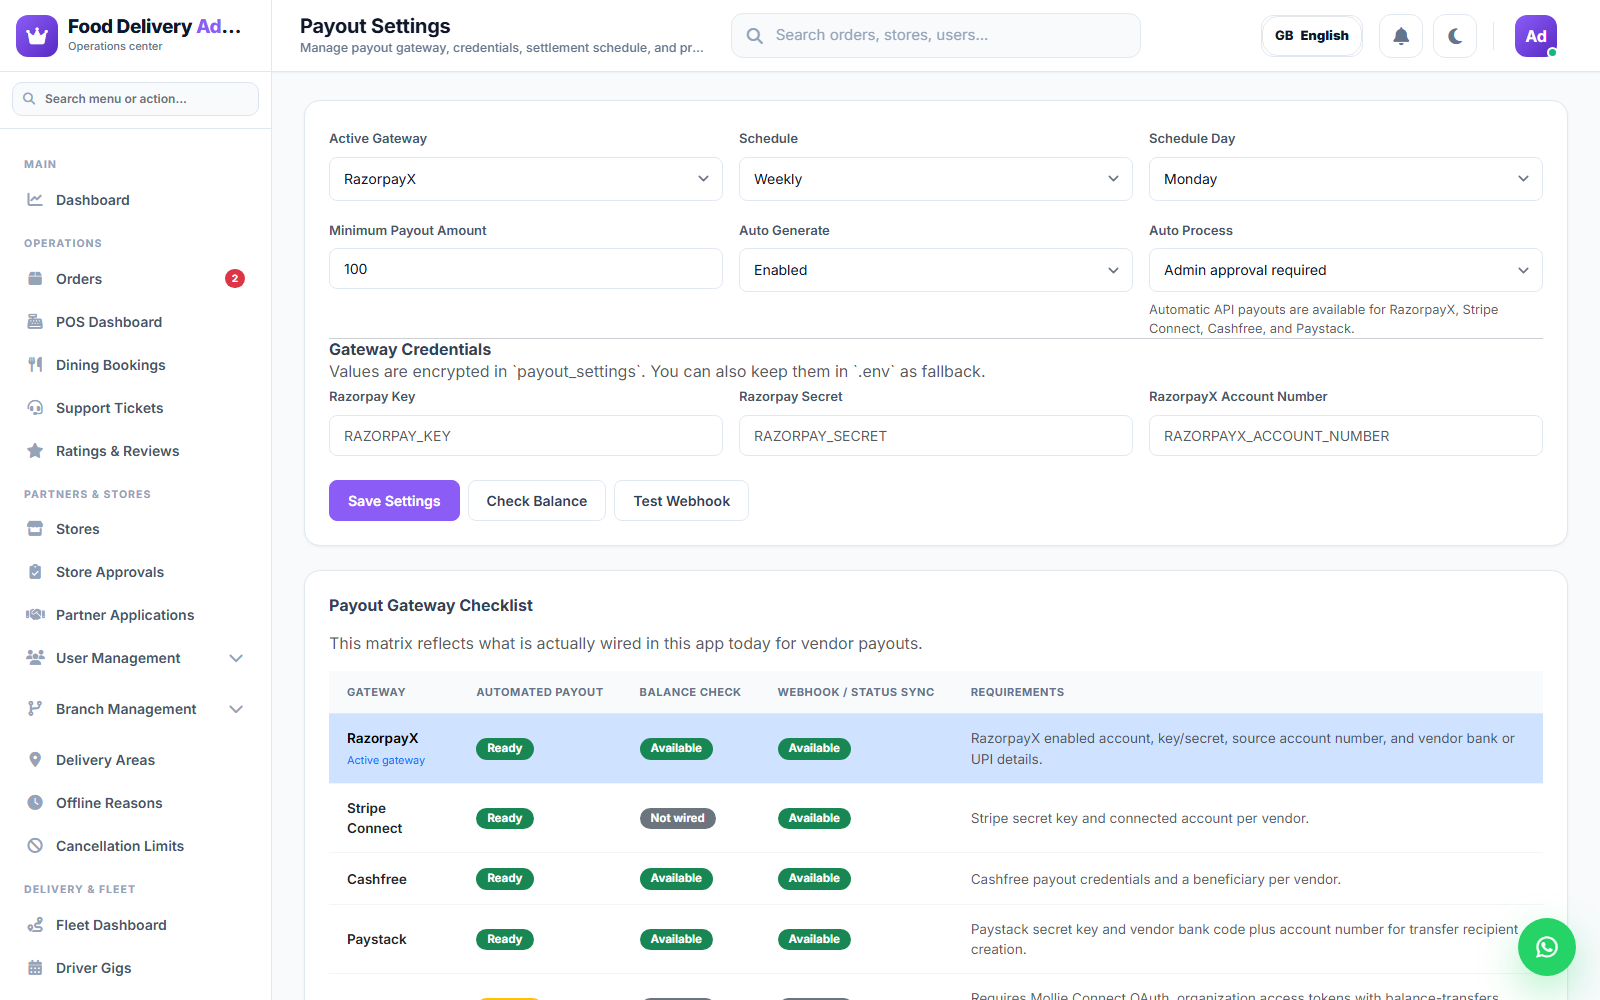
Configure the gateway used to actually transfer payout funds to sellers/drivers (e.g. bank transfer provider credentials).
Reports
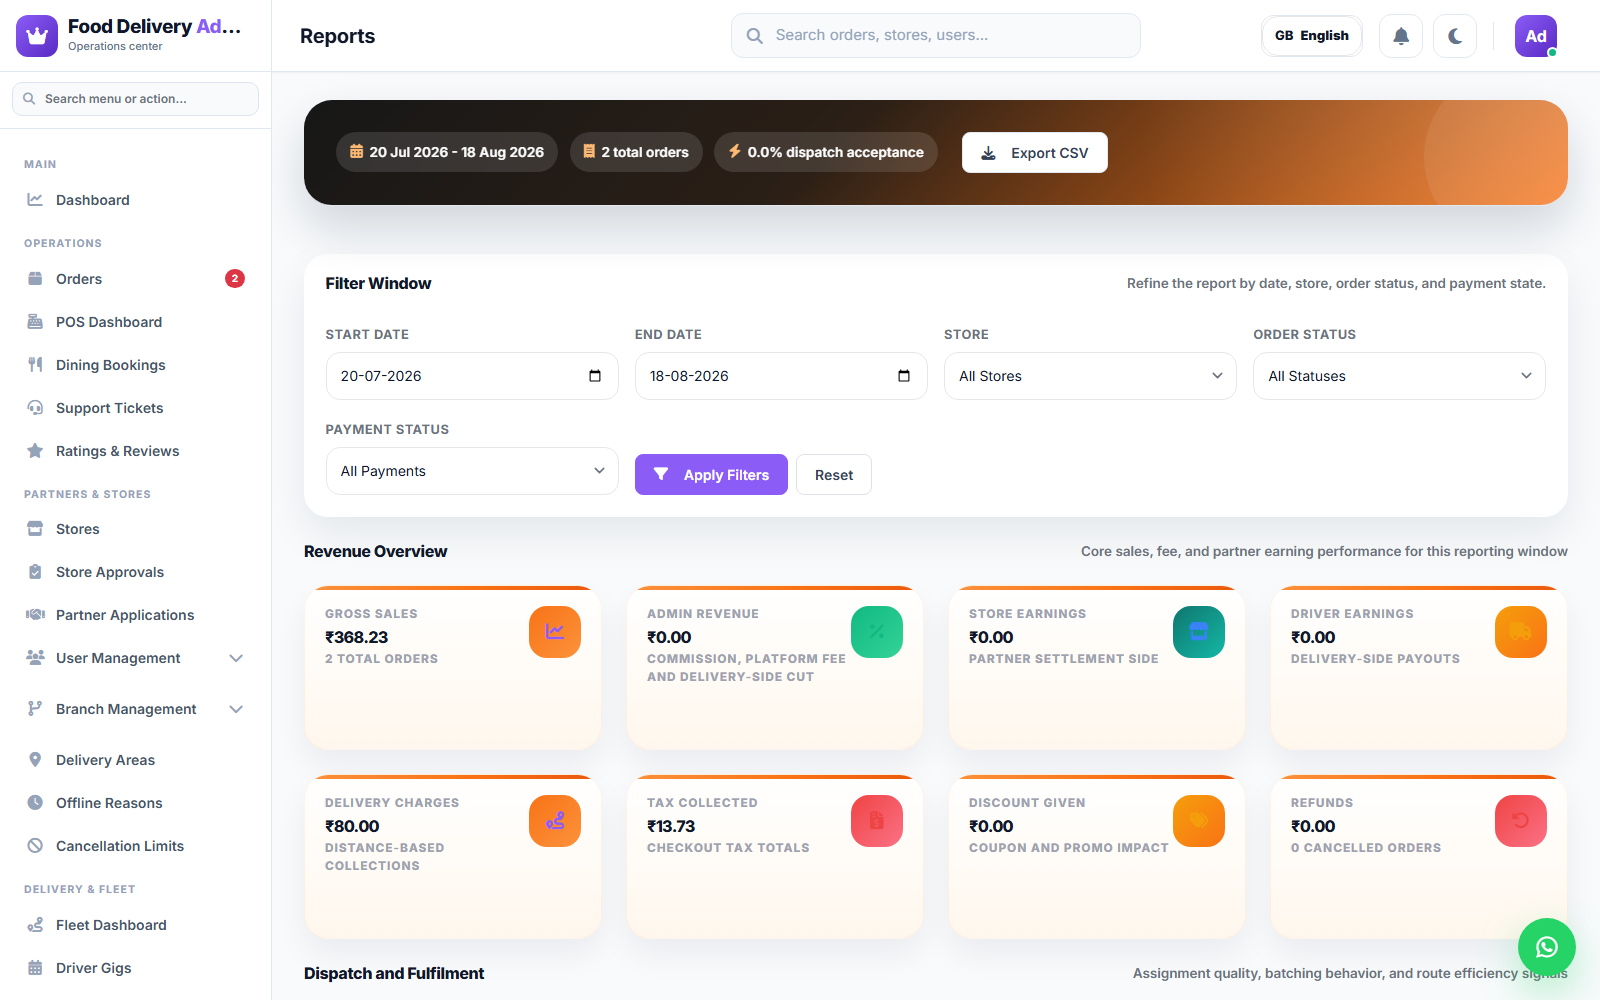
Generate financial and operational reports across orders, revenue, and commissions.
AI & Automation
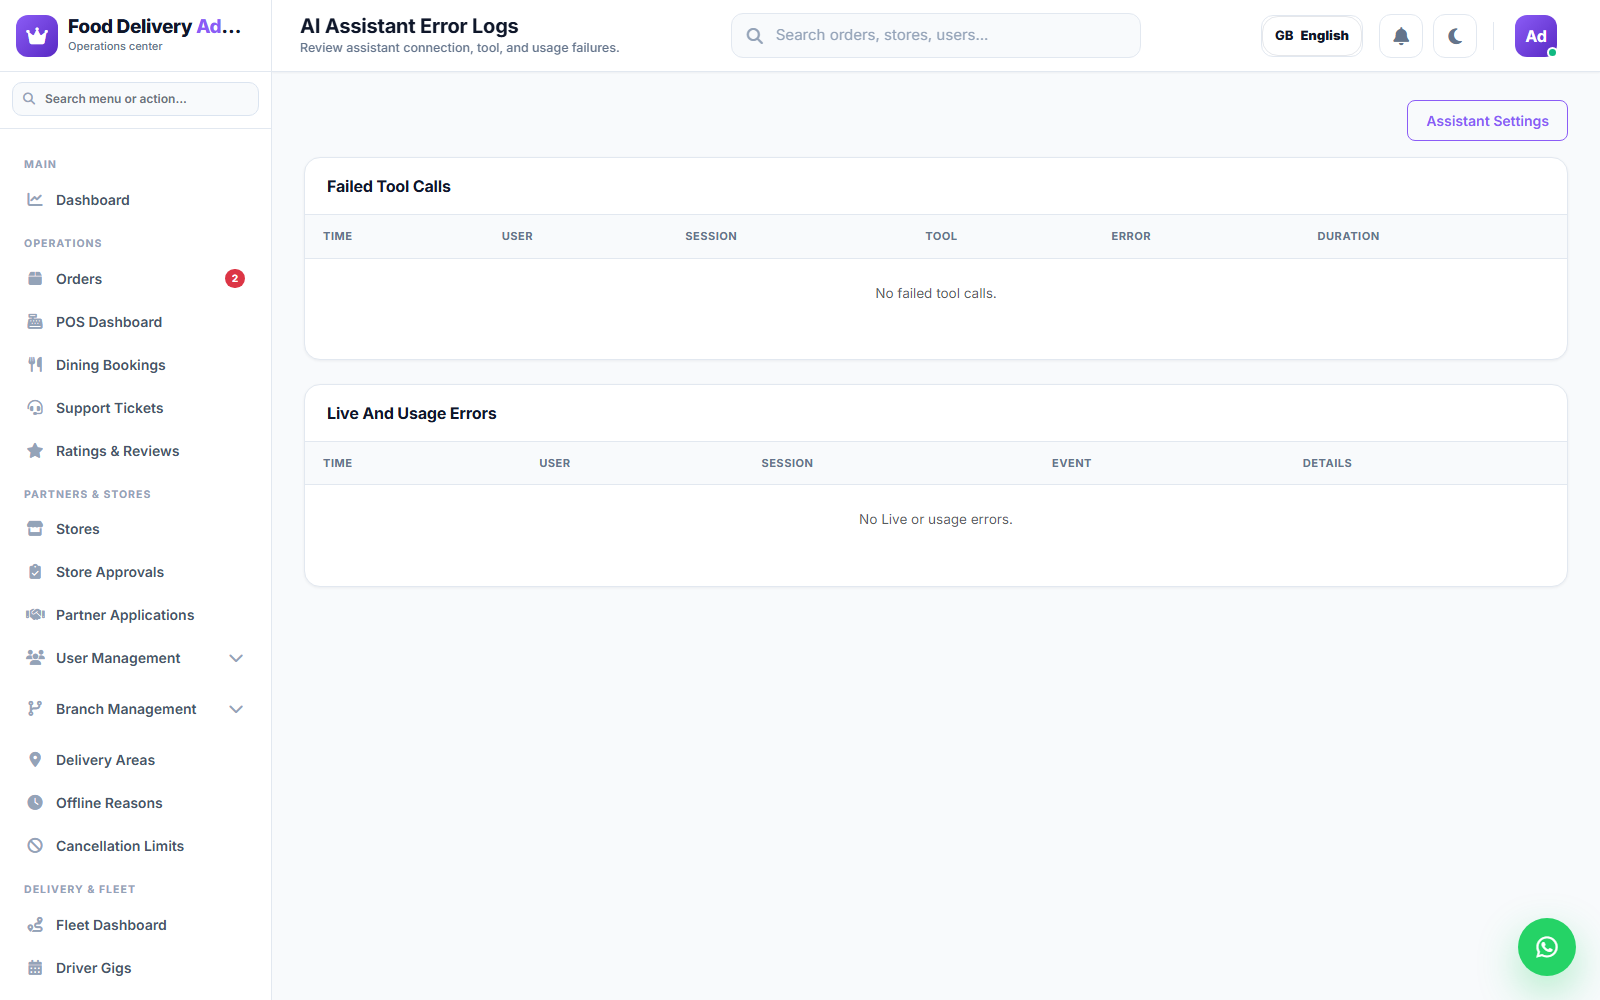
AI Assistant
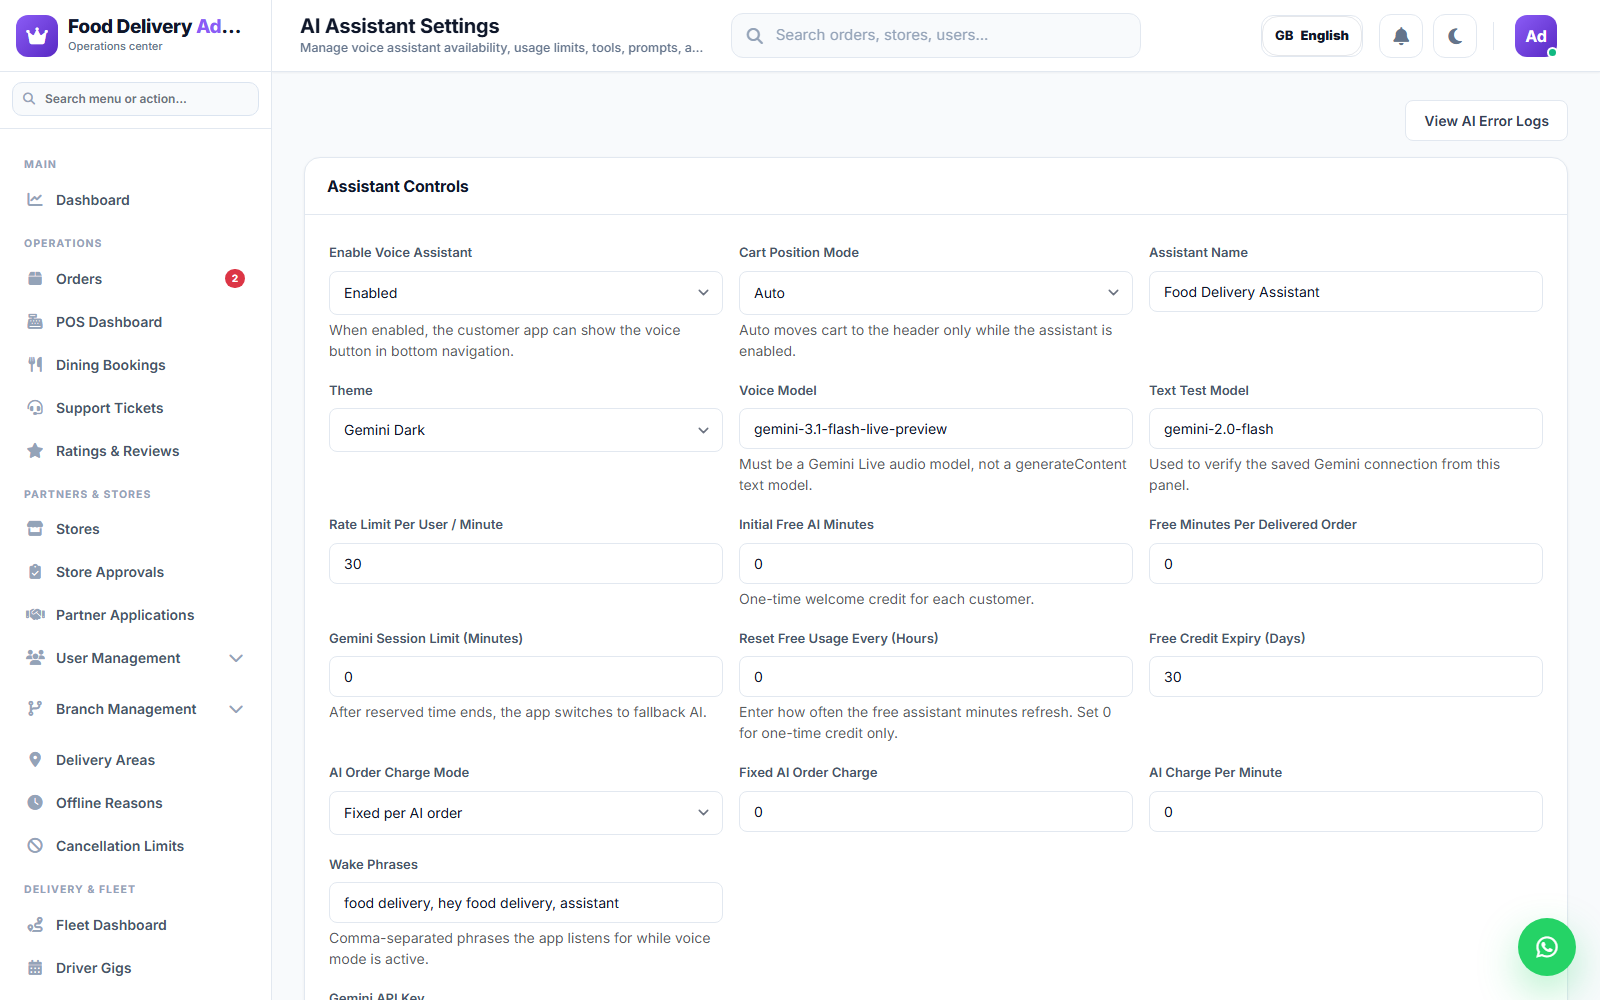
- Assistant Settings — configure the AI assistant used across the customer/driver apps (model, voice, behavior).
- Error Logs — a log of assistant errors/failures for debugging.
System
Settings
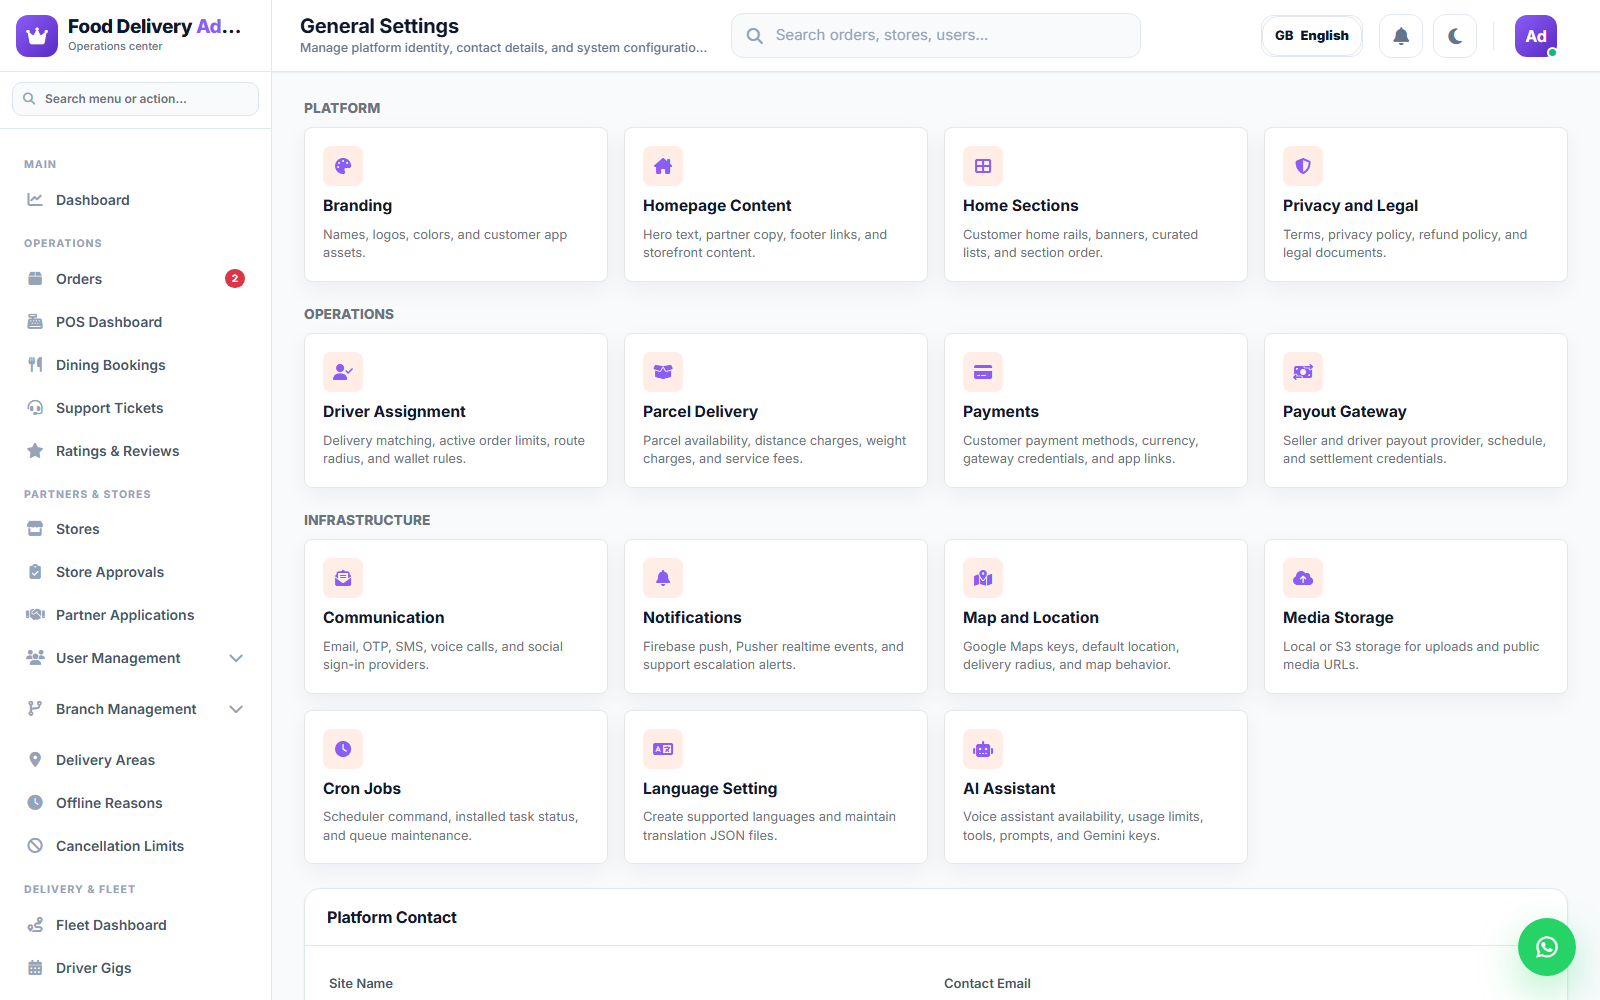
A grouped submenu of platform-wide configuration:
- General Settings — app name, timezone, currency, and core platform behavior.
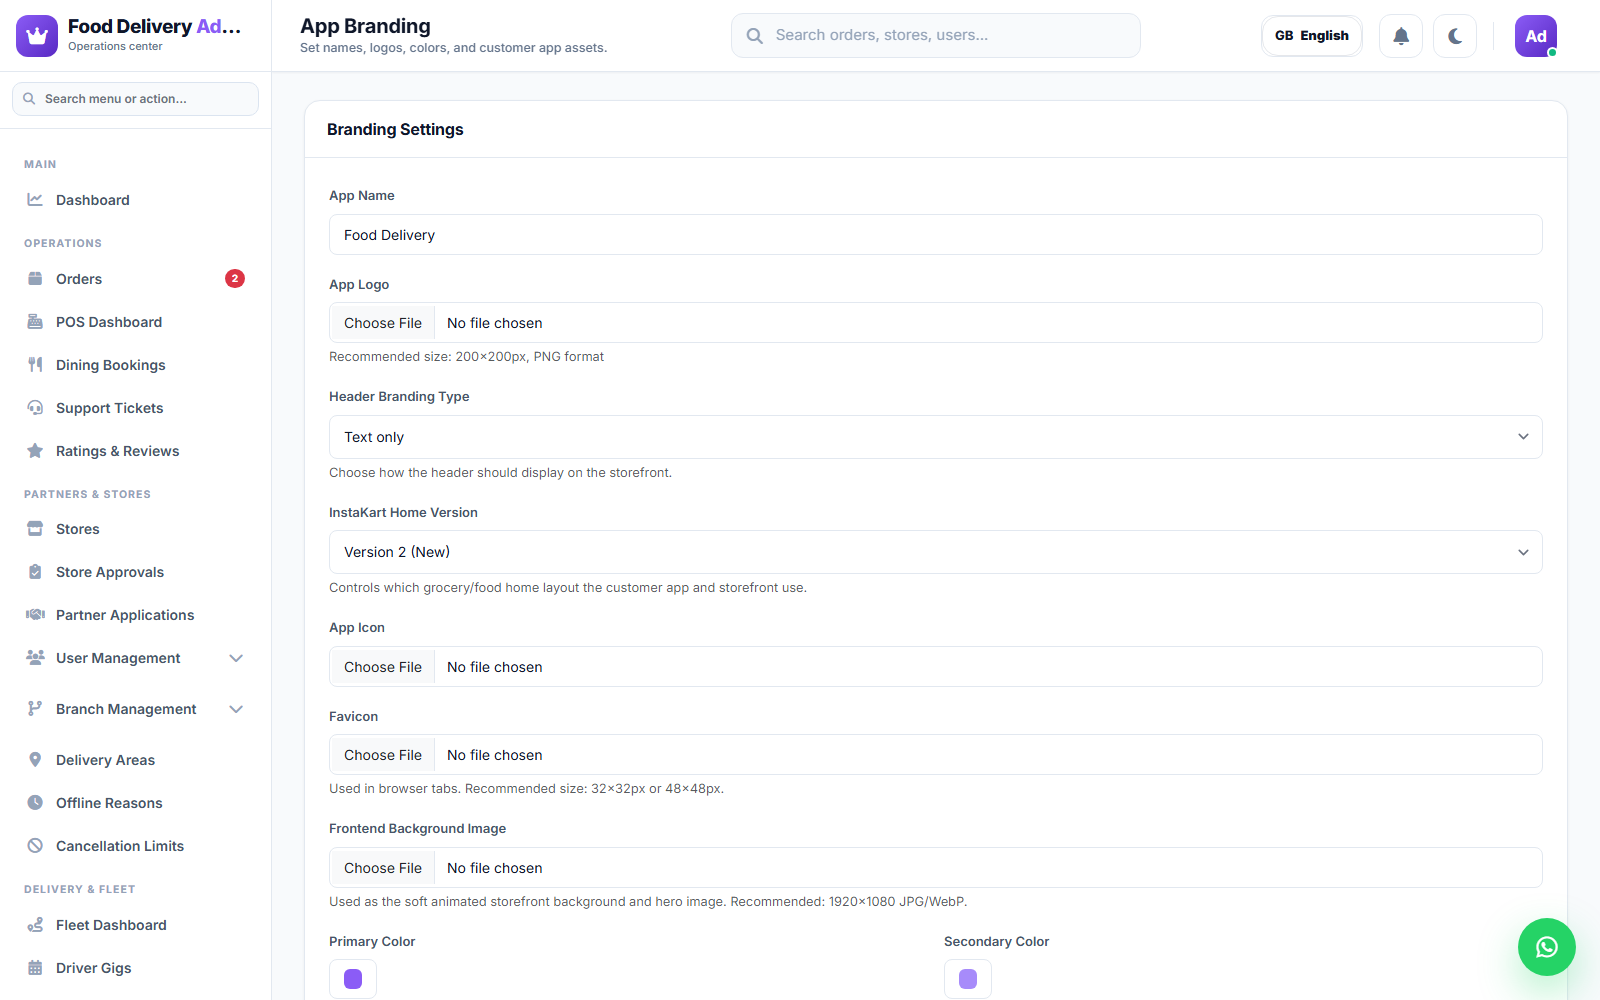
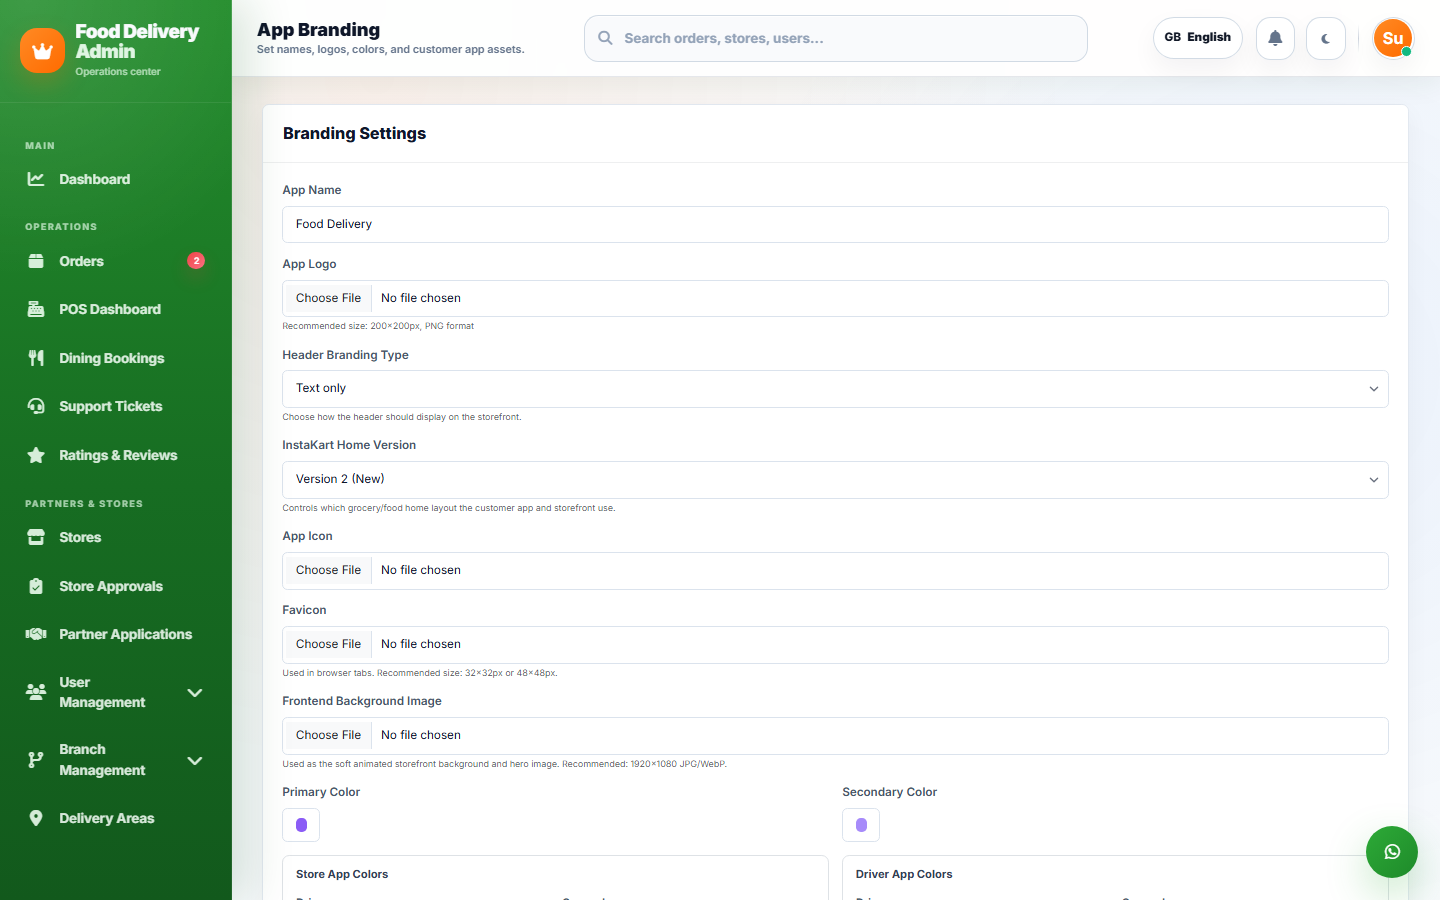
- Branding — app name, logo/icon/favicon, header branding type, primary/secondary colors, and per-app (Store/Driver) color overrides. See App Color.
- Homepage Content, Payments, Payout Gateway, Driver Assignment — covered above.
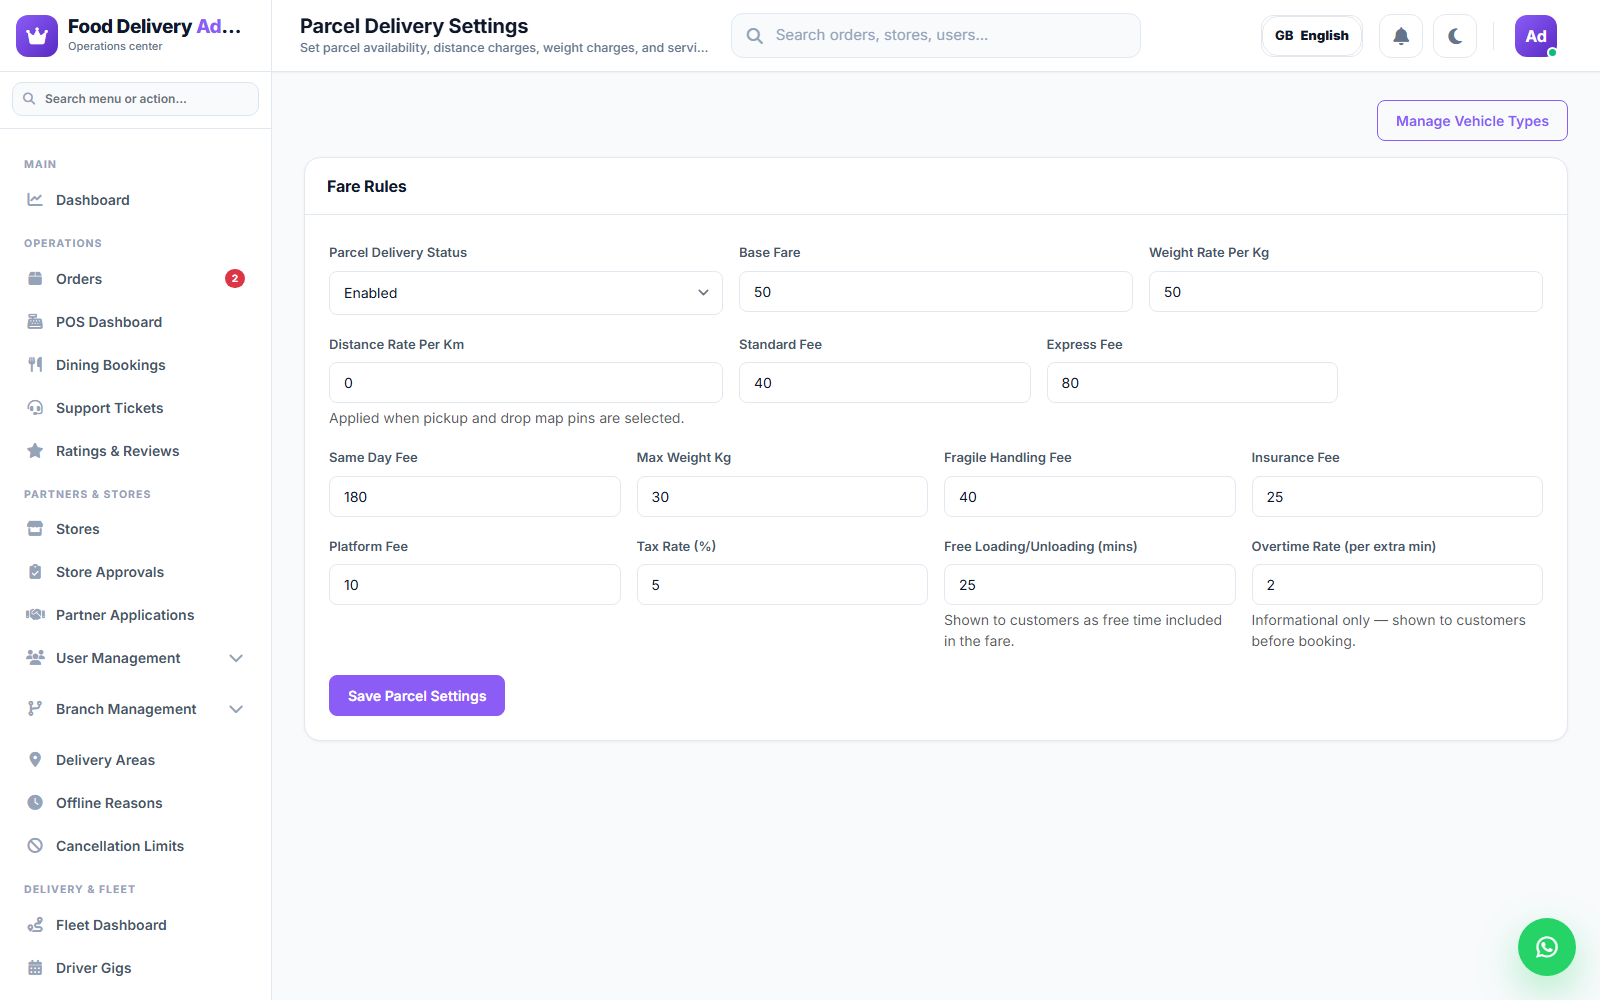
- Parcel Delivery — parcel-service-specific settings (vehicle types, pricing rules).
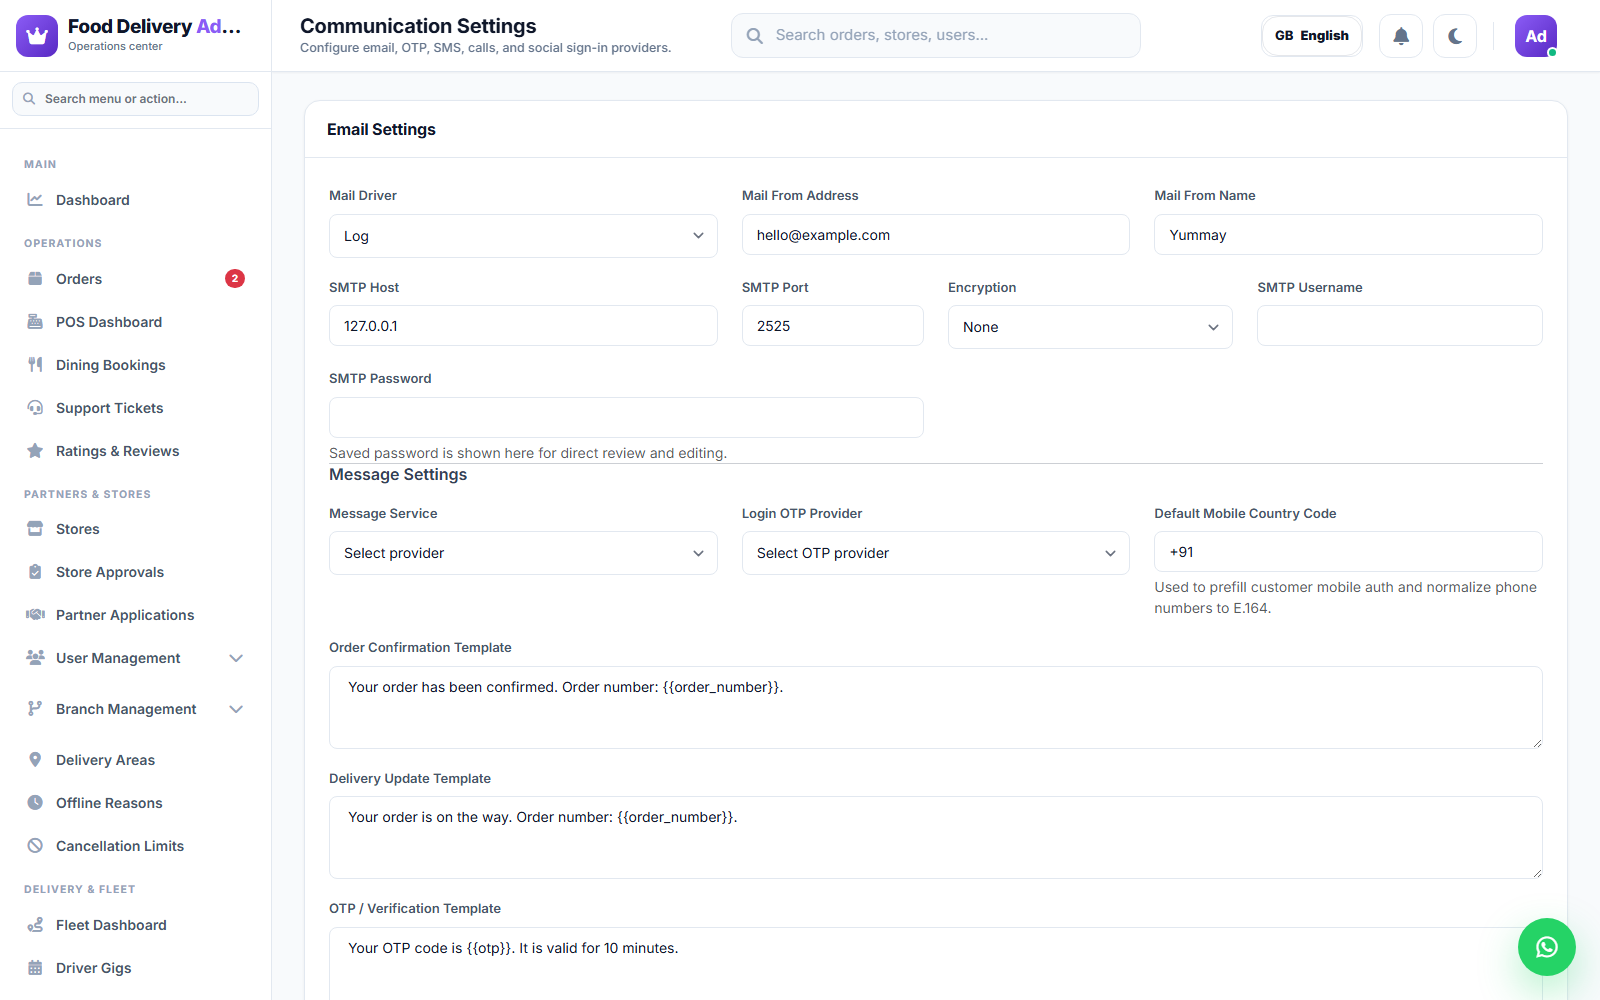
- Communication — email/SMTP, OTP provider, and Social Login configuration (including the Google Web Client ID — see Google Web Client ID).
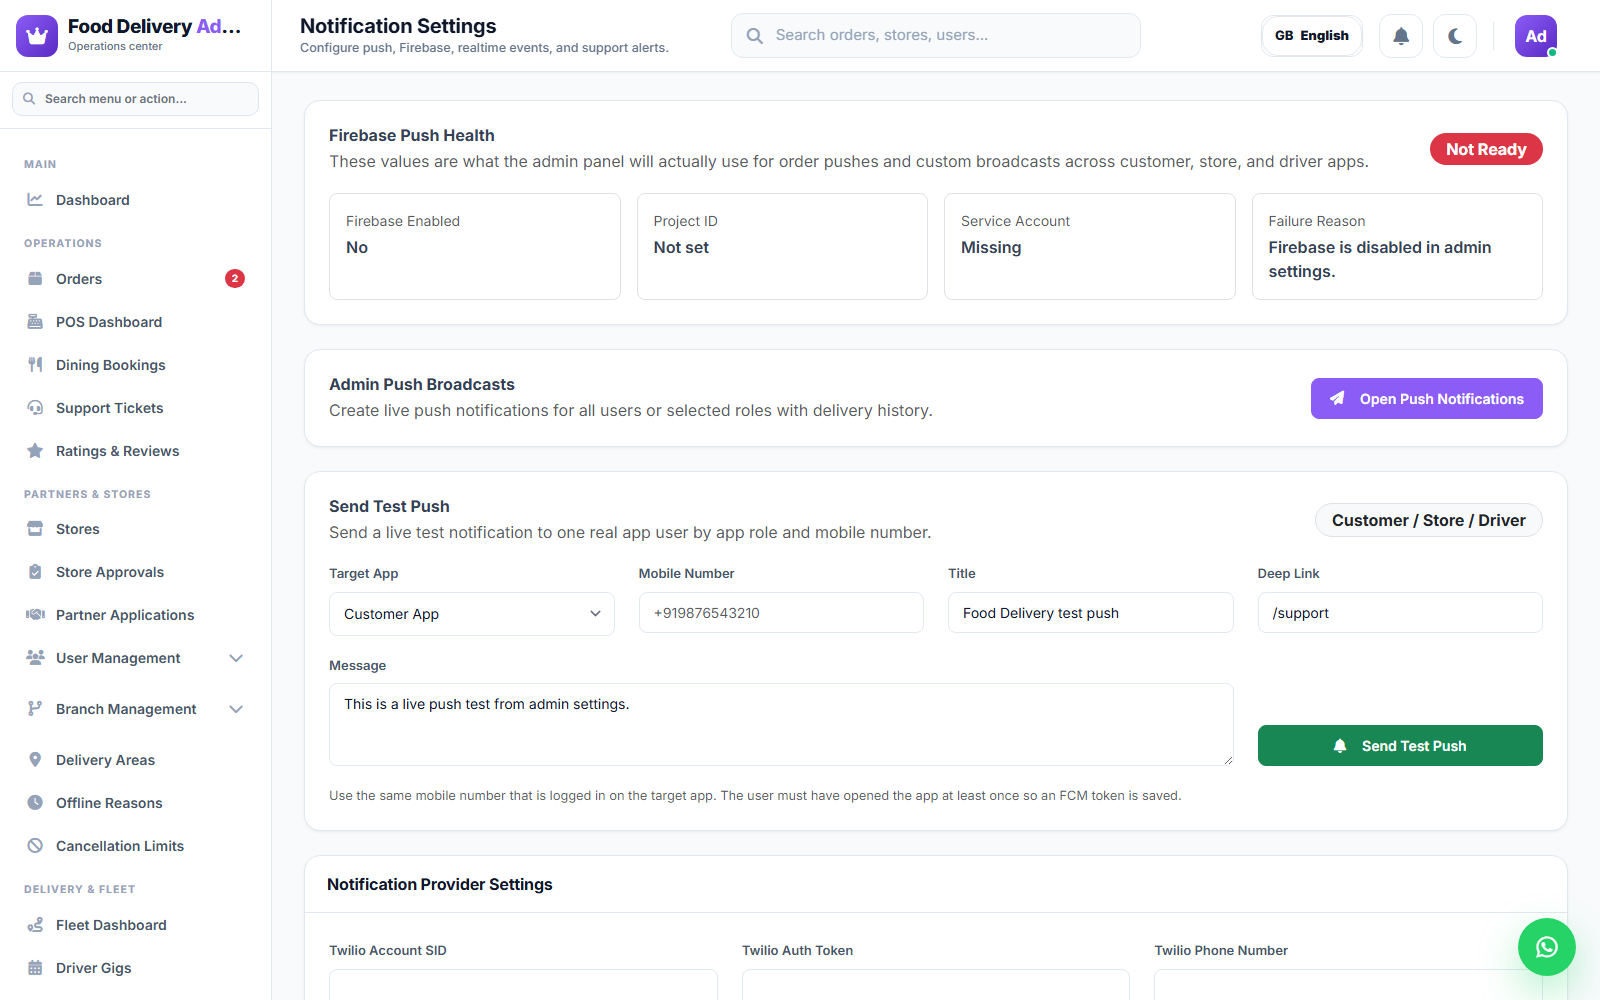
- Notification Settings — push notification and Firebase diagnostics.
- Map Settings — Google Maps API key and default storefront location. See Android Maps API Key.
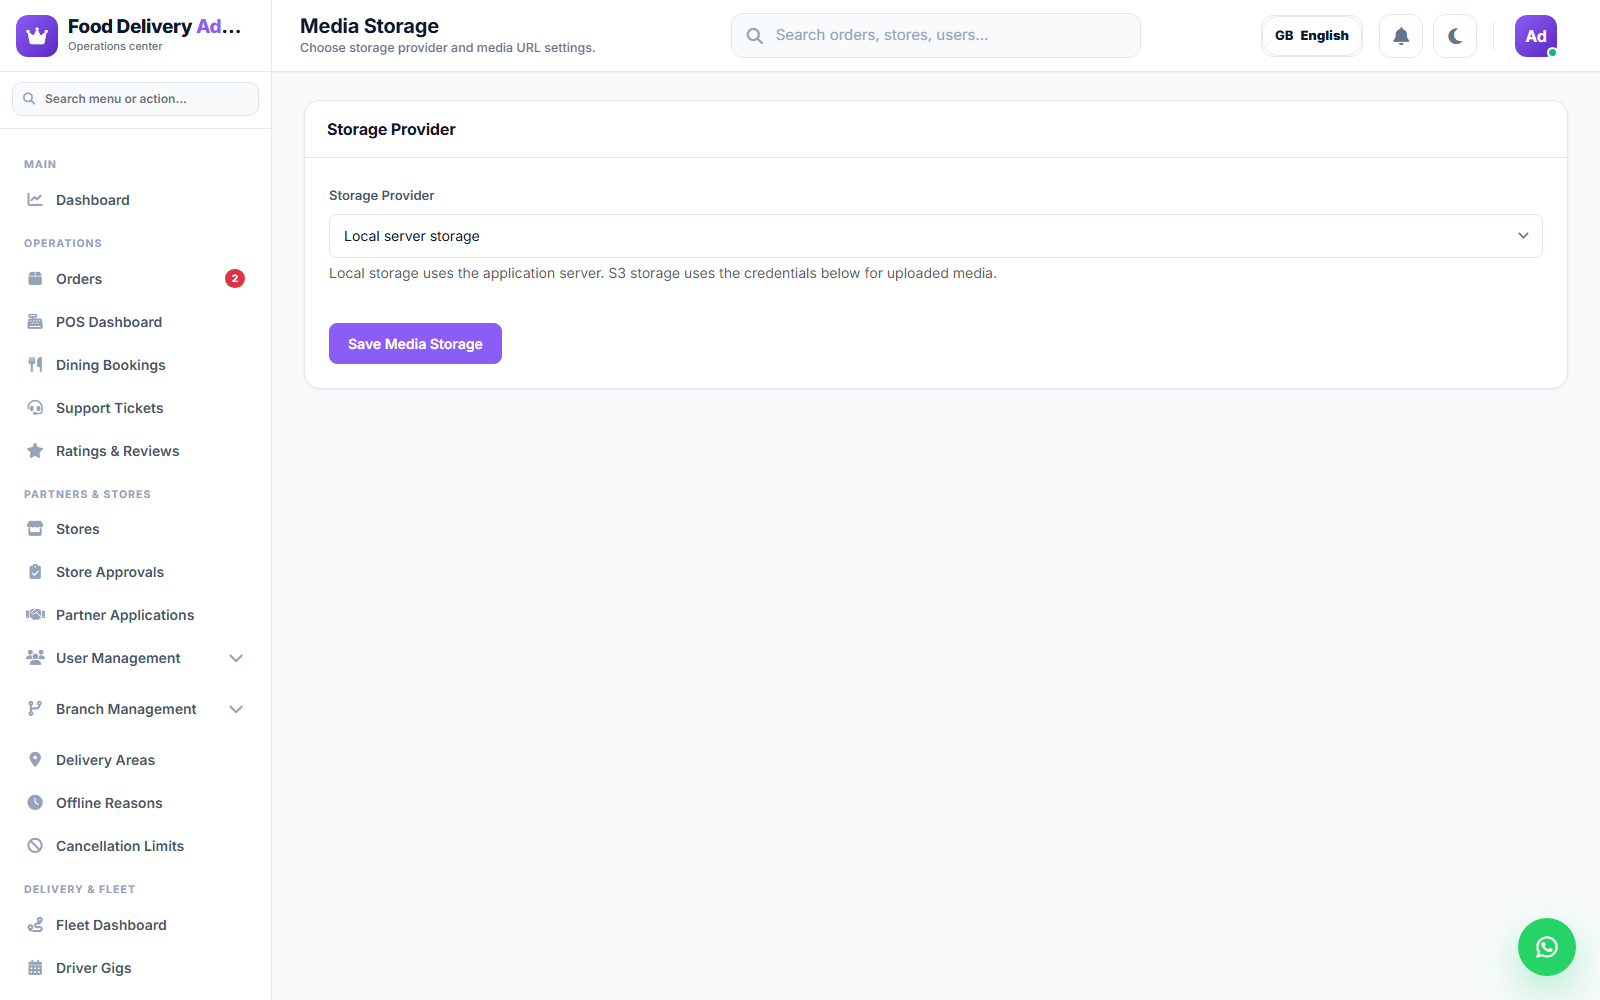
- Storage Settings — where uploaded media is stored (local disk, S3, etc.).
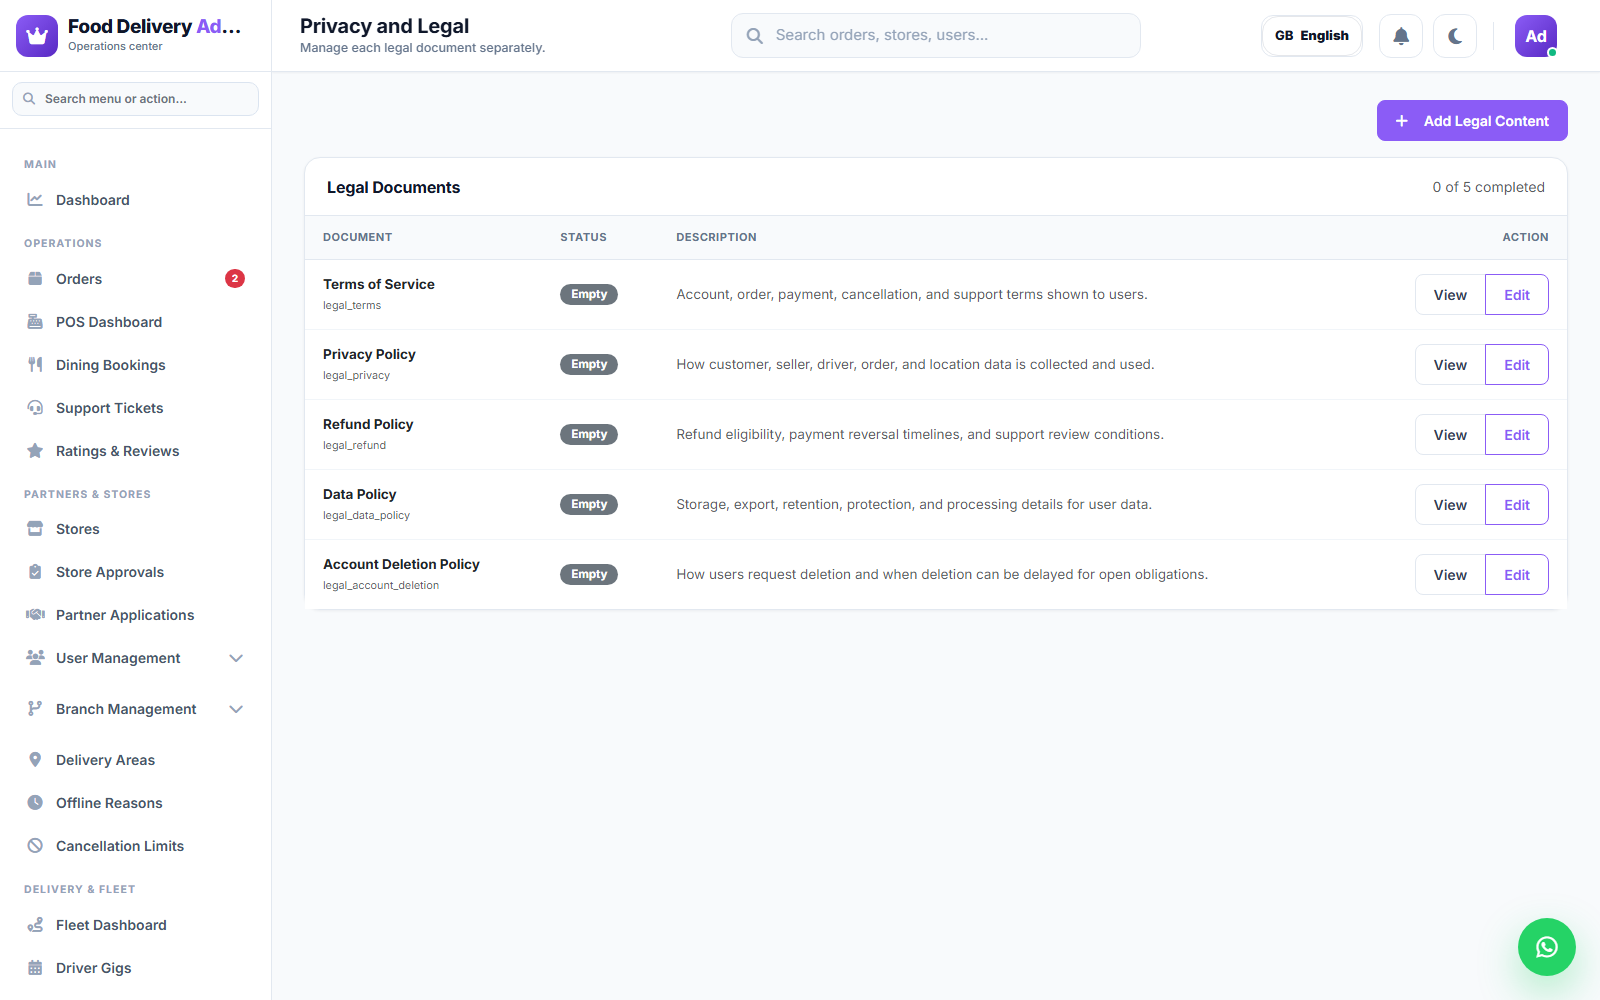
- Privacy & Legal — manage the platform's Terms of Service, Privacy Policy, Refund Policy, Data Policy, and Account Deletion Policy as separate documents, each independently publishable.
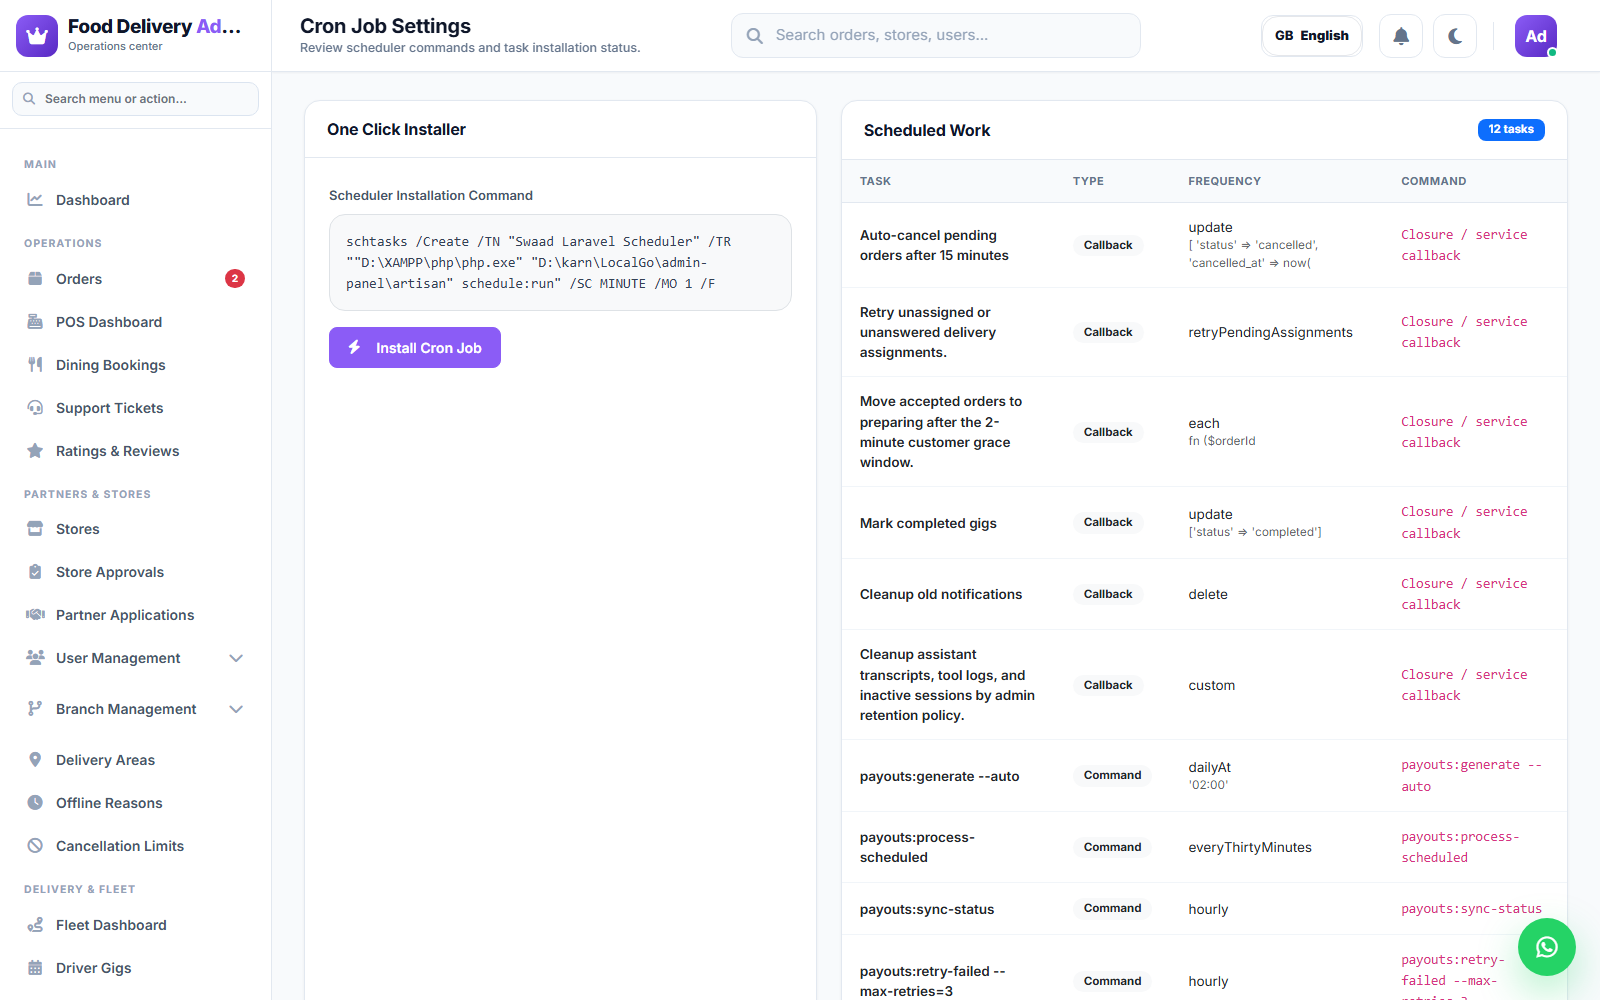
- Cron Jobs — scheduled task configuration/status.
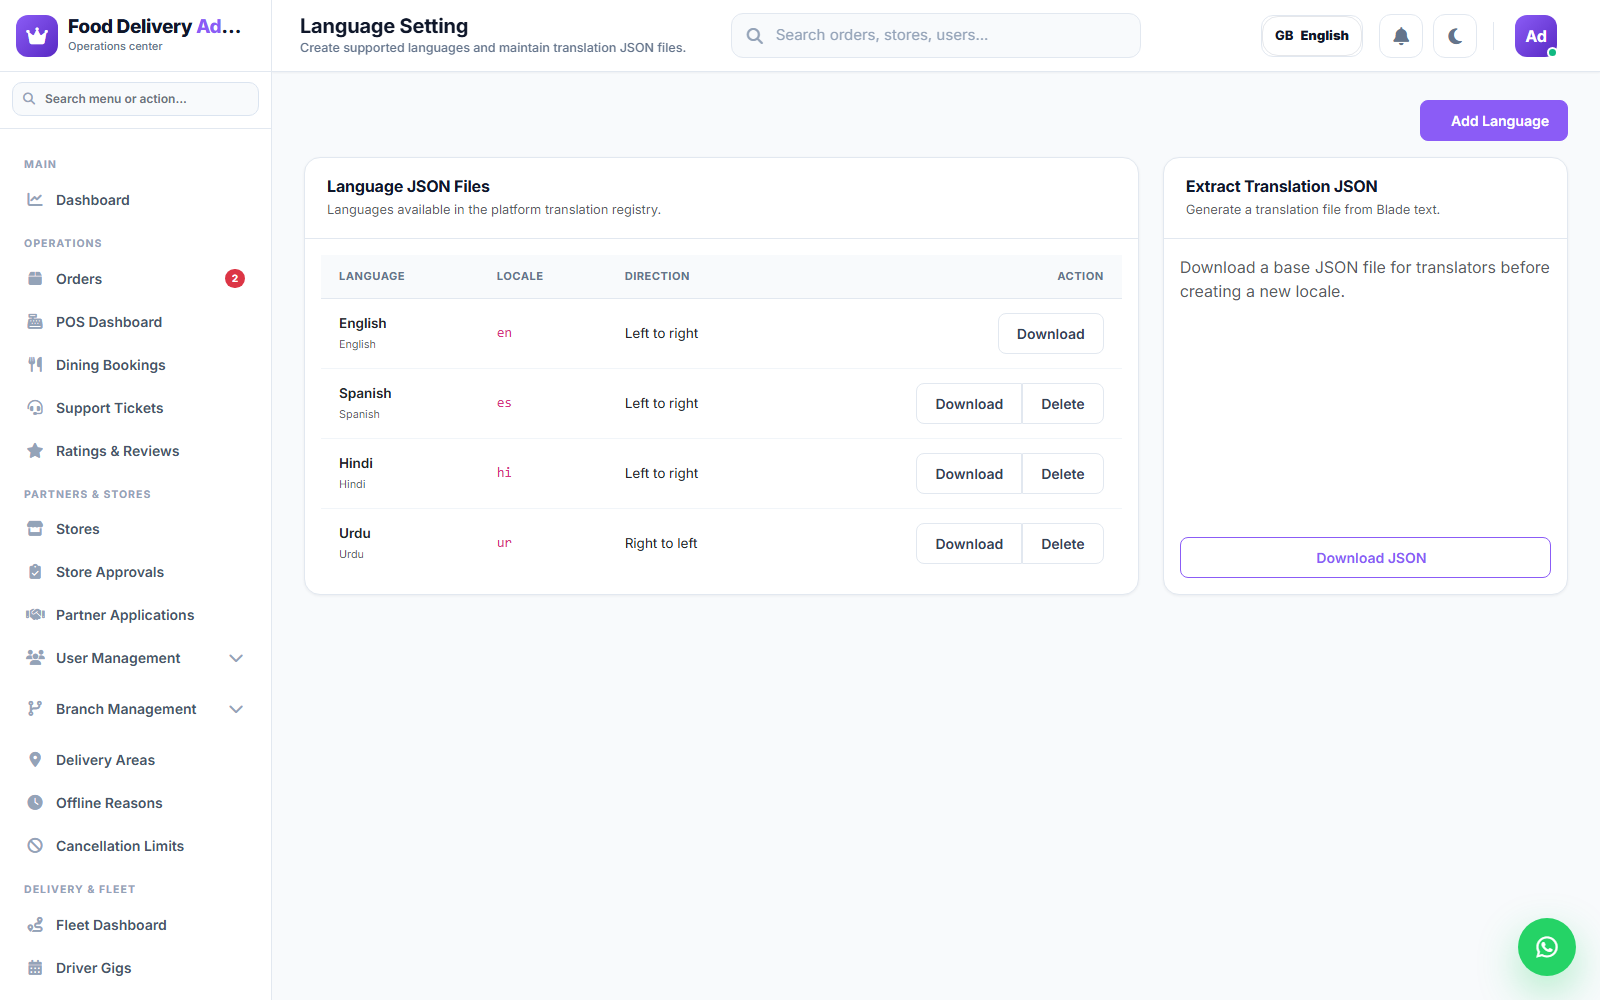
- Language Setting — manage translations for the admin UI and storefront.
System Updates
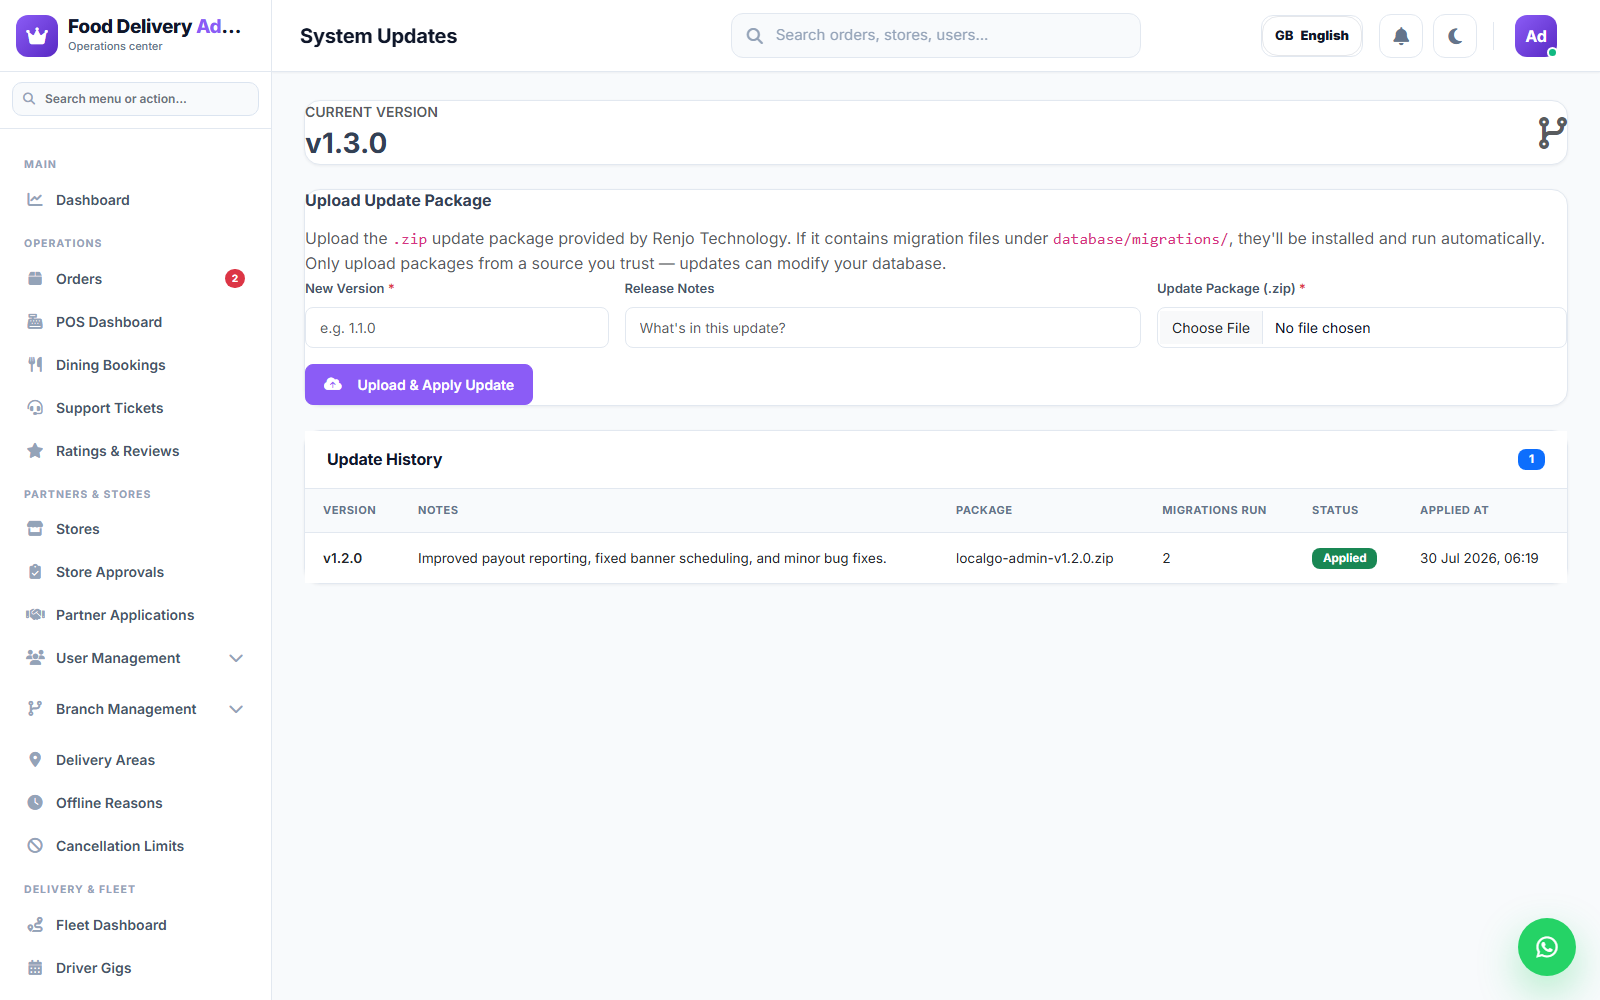
Keep your Admin Panel up to date and track what's been installed.
- Navigate to System Updates in the sidebar.
- The Current Version card shows the version currently installed.
- Under Upload Update Package, enter the New Version number and optional Release Notes, then choose the .zip update package provided by Hyperdash.
- Click Upload & Apply Update. If the package contains database migrations (under
database/migrations/), they're installed and run automatically — no manualartisan migrateneeded. - The Update History table logs every update you've applied: version, notes, package filename, how many migrations ran, and whether it succeeded.
Only upload update packages from a source you trust — like any software update, they can change your database and application behavior.
Related Panels
The Admin Panel is the platform-wide control tower. Two other, more focused panels exist for day-to-day operators, sharing the same login page but redirecting by role:
- Branch Panel (
/branch-panel/dashboard, role:branch_owner/branch_manager/branch_staff) — used by franchise branch owners/managers to run their own territory (orders, drivers, restaurants, wallet, settlements). - Restaurant Panel Overview — used by store/restaurant owners to run their own store (orders, menu, POS, staff).
Restaurant Panel Overview
Every store/restaurant owner gets their own login to a dedicated Restaurant Panel (labeled "{Your App Name} — Store Panel" in the sidebar — it reads the same App Name set in Admin Panel → Settings → Branding, not a fixed brand) at /restaurant/dashboard, separate from the Admin Panel. This is where a store owner runs their day-to-day business: orders, menu, POS, staff, and settings — scoped only to their own store(s).
Log in at the same Admin Panel login page with a restaurant_owner or restaurant_staff account; the app redirects you into /restaurant/... automatically based on your role.
There's also a dedicated Store App (Flutter) — the mobile version of this same panel, for owners who'd rather manage their store from a phone.
Main Menu
Dashboard
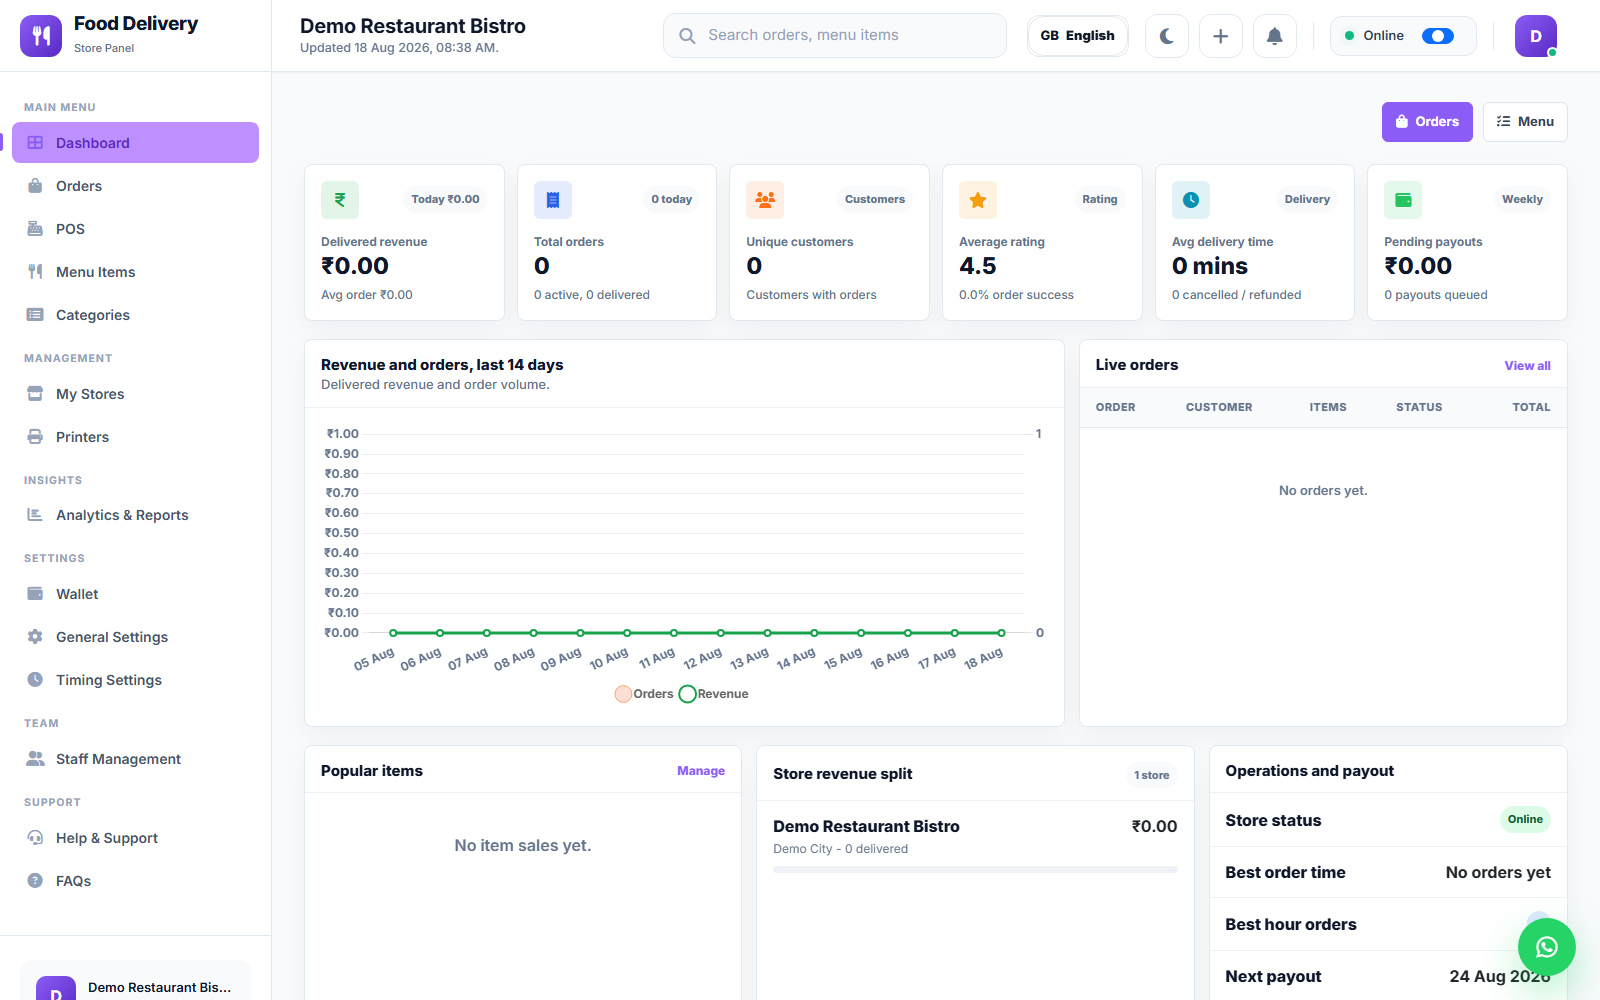
Today's snapshot for the active store: delivered revenue, total orders (active vs. delivered), unique customers, average rating, average delivery time, and pending payouts — plus a 14-day revenue/orders chart and a live orders feed. Use Orders and Menu shortcuts at the top-right to jump straight into either.
Orders
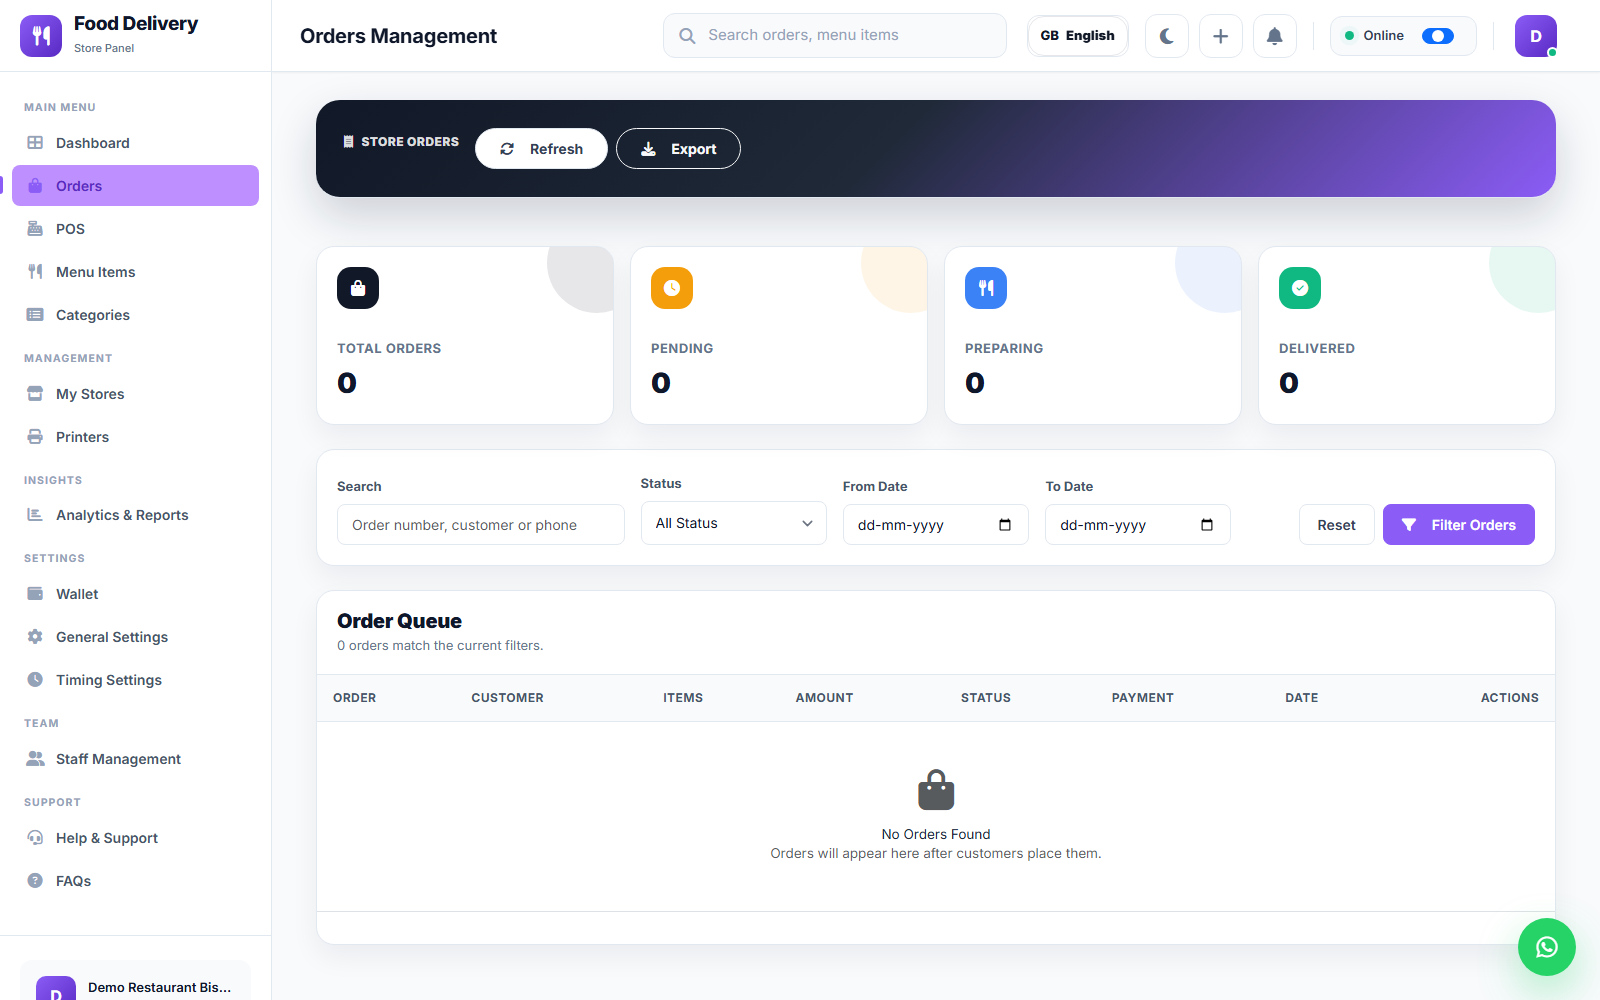
The store's own order queue. Accept or reject incoming orders, update status as they're prepared, assign a driver, and export order data. A badge on the sidebar shows how many orders are pending.
POS
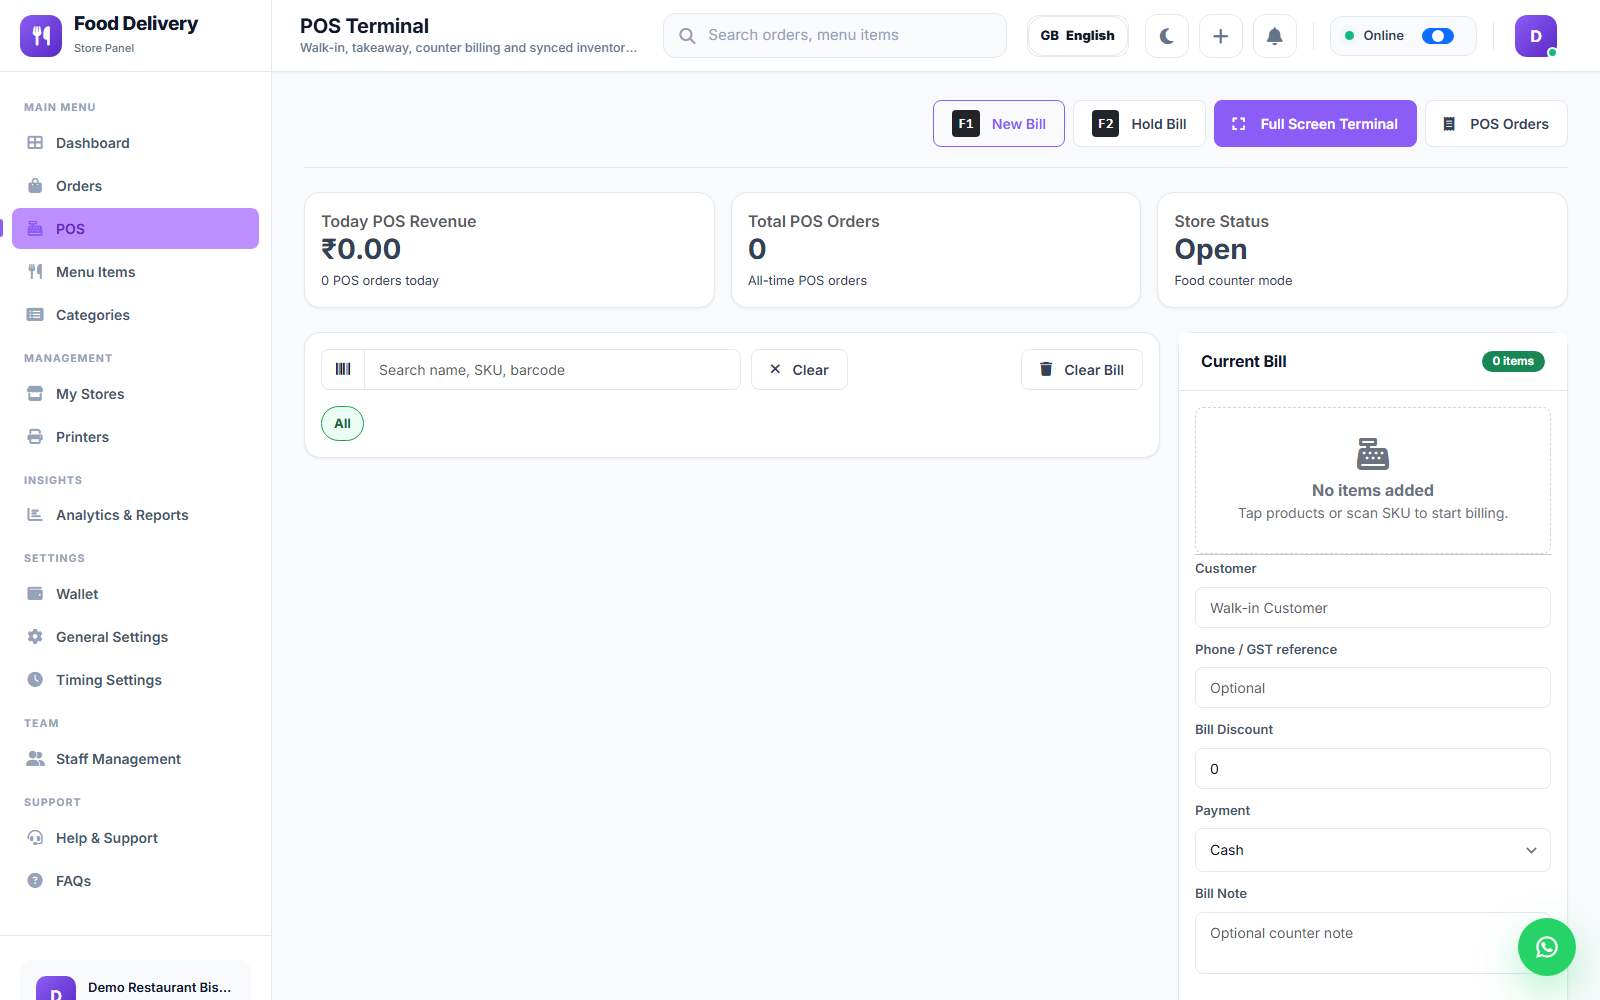
Take walk-in/in-store orders directly from the panel (Point of Sale), recorded the same way as app orders so they show up in the same revenue and order history.
Menu Items
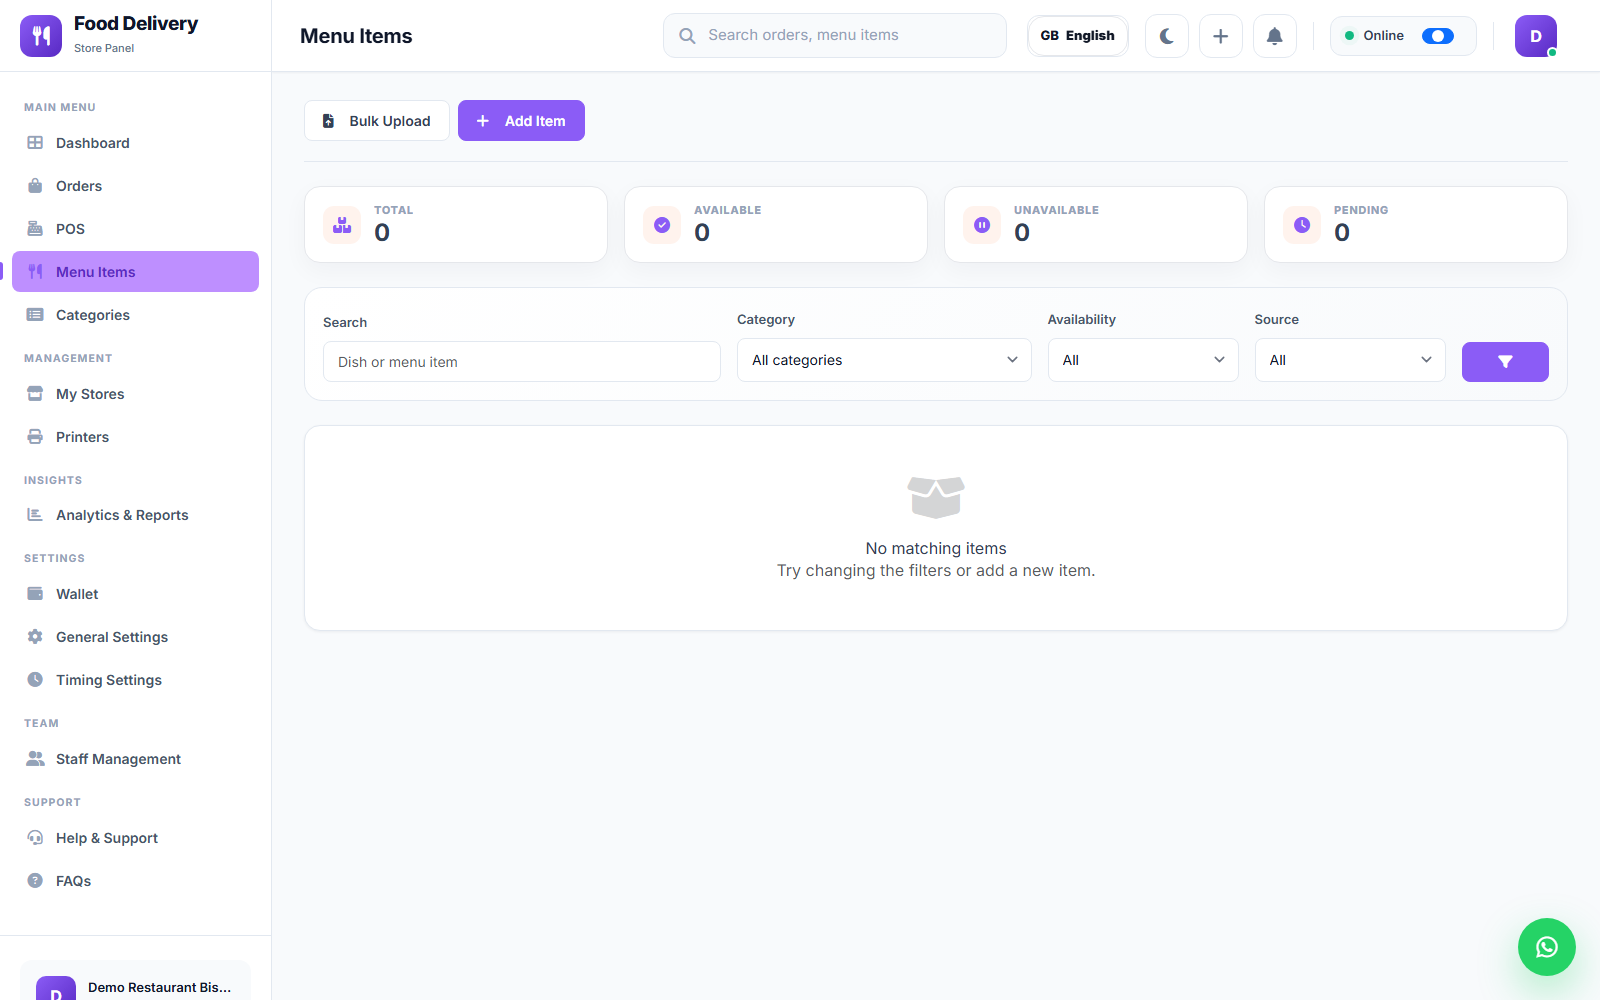
Manage the store's own dishes/products: pricing, availability, and ordering options. Add items one at a time, Bulk Upload via spreadsheet, or import from the Global Menu Items library the Admin Panel maintains (see Admin Panel Overview → Food Catalog) instead of typing everything from scratch. Filter by category, availability, or source.
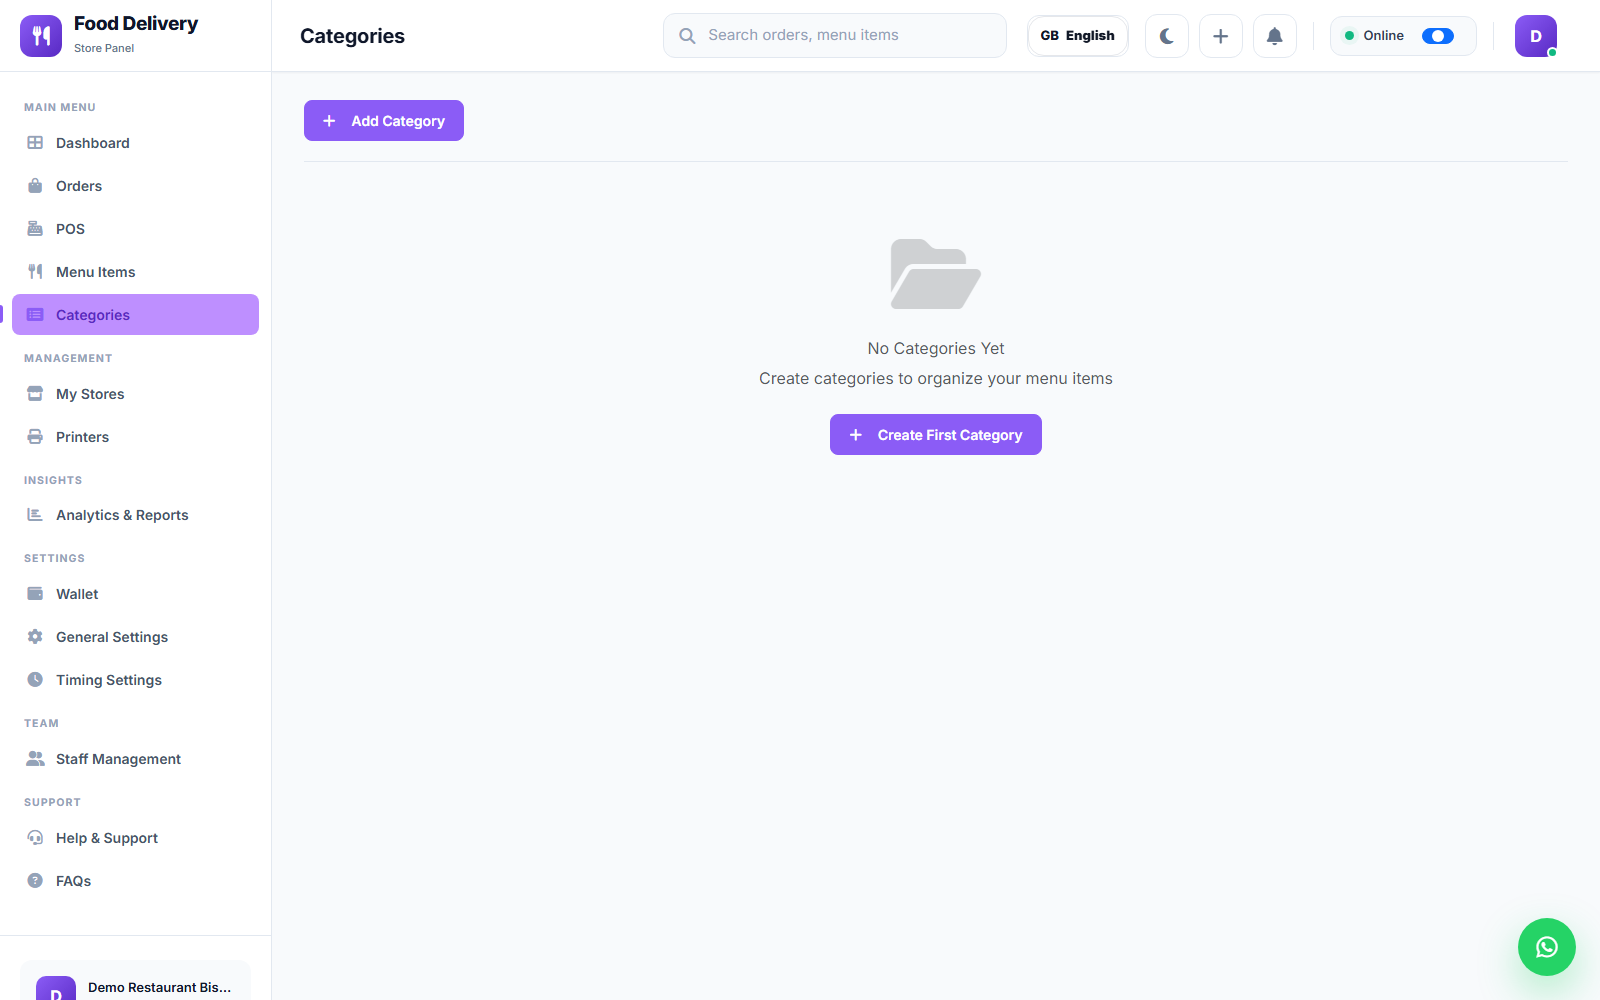
Categories
Organize menu items into categories specific to this store. Drag to reorder how categories appear in the customer-facing menu.
Management
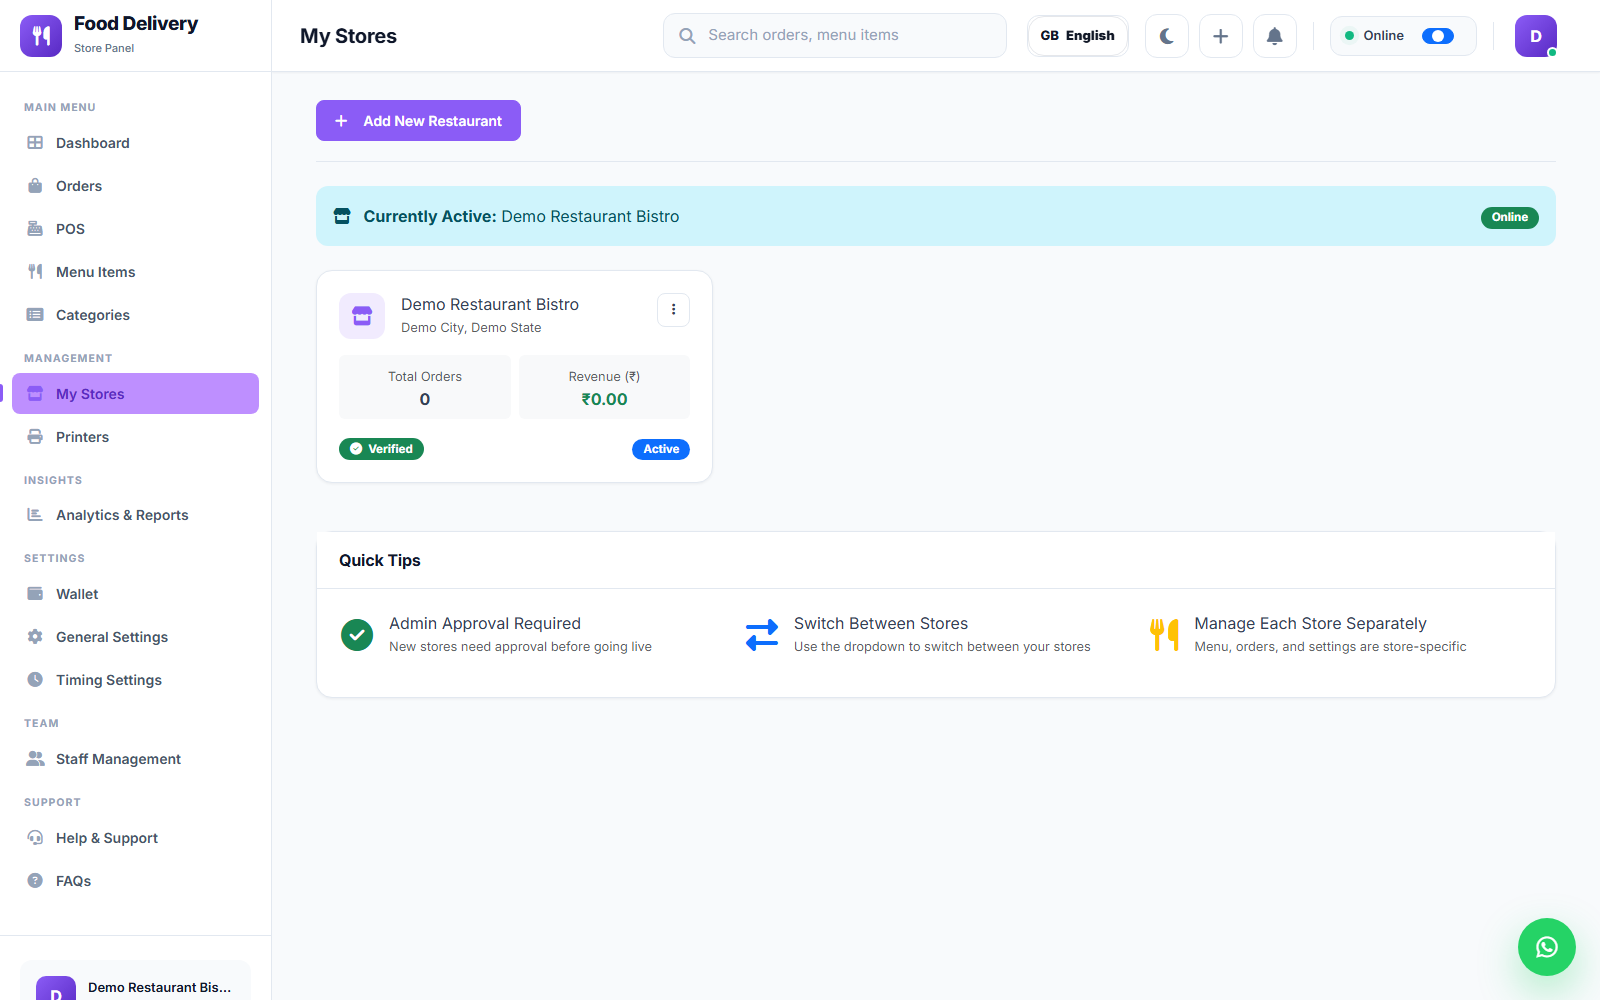
My Stores
If an owner runs more than one store, this lists all of them and lets you switch which store you're currently managing — everything else in the panel (orders, menu, dashboard) scopes to whichever store is active.
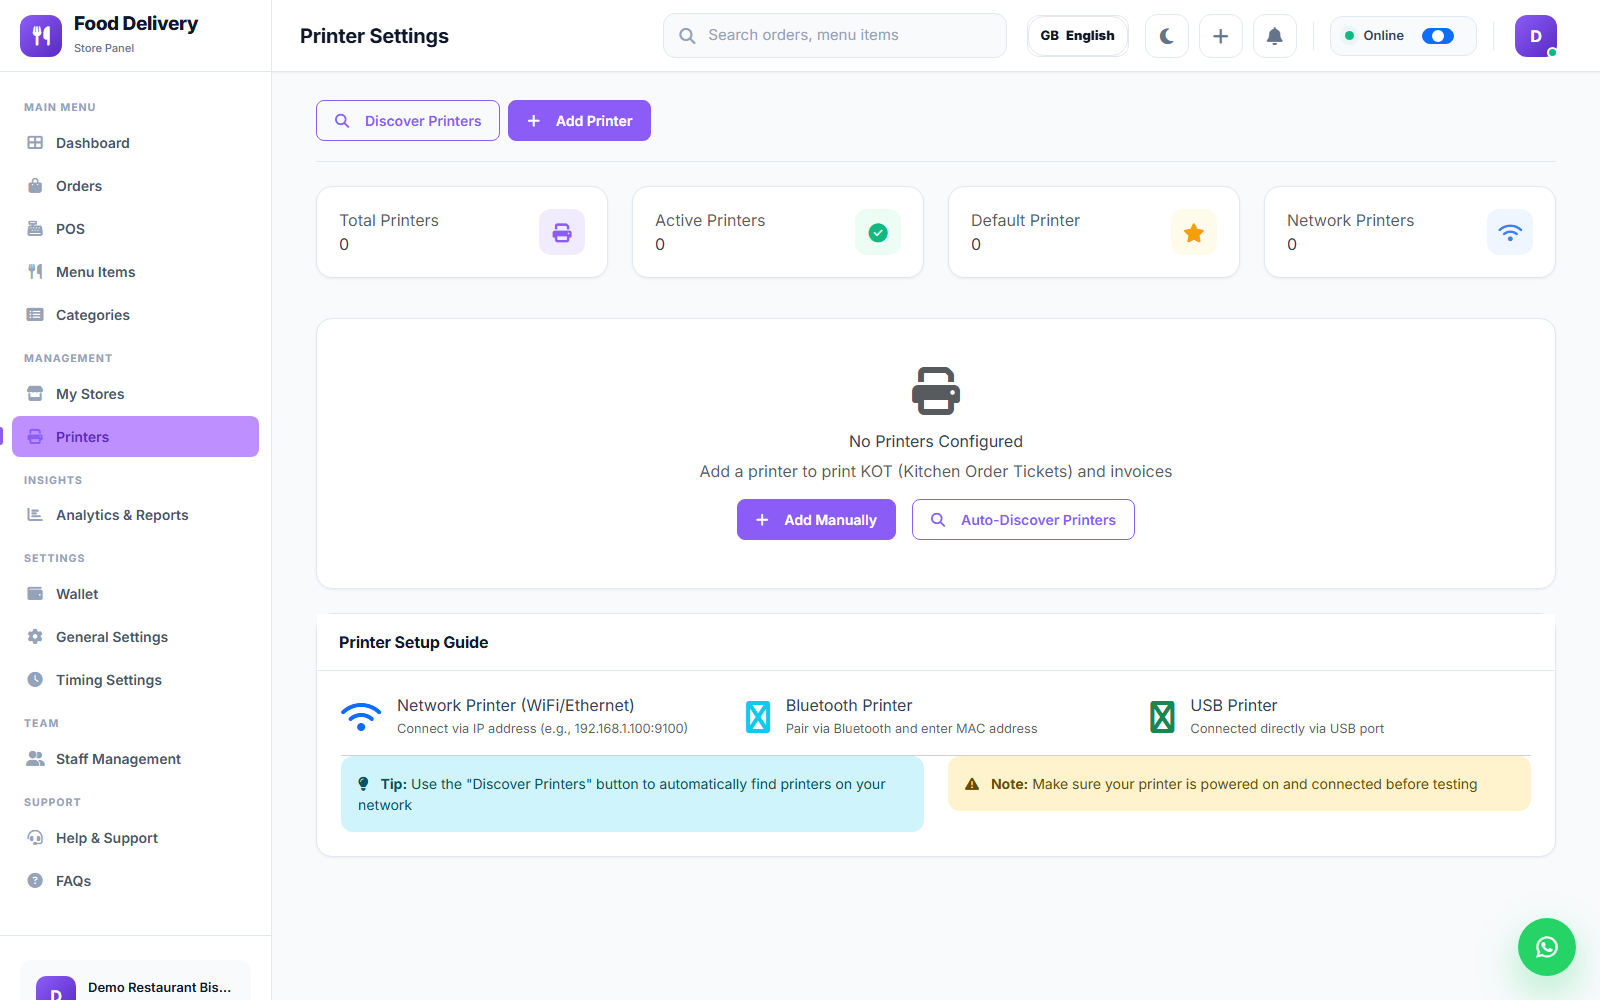
Printers
Pair a Bluetooth receipt/kitchen printer, discover nearby printers, and send a test print. Once configured, the panel can print KOTs (kitchen order tickets) and invoices directly.
Insights
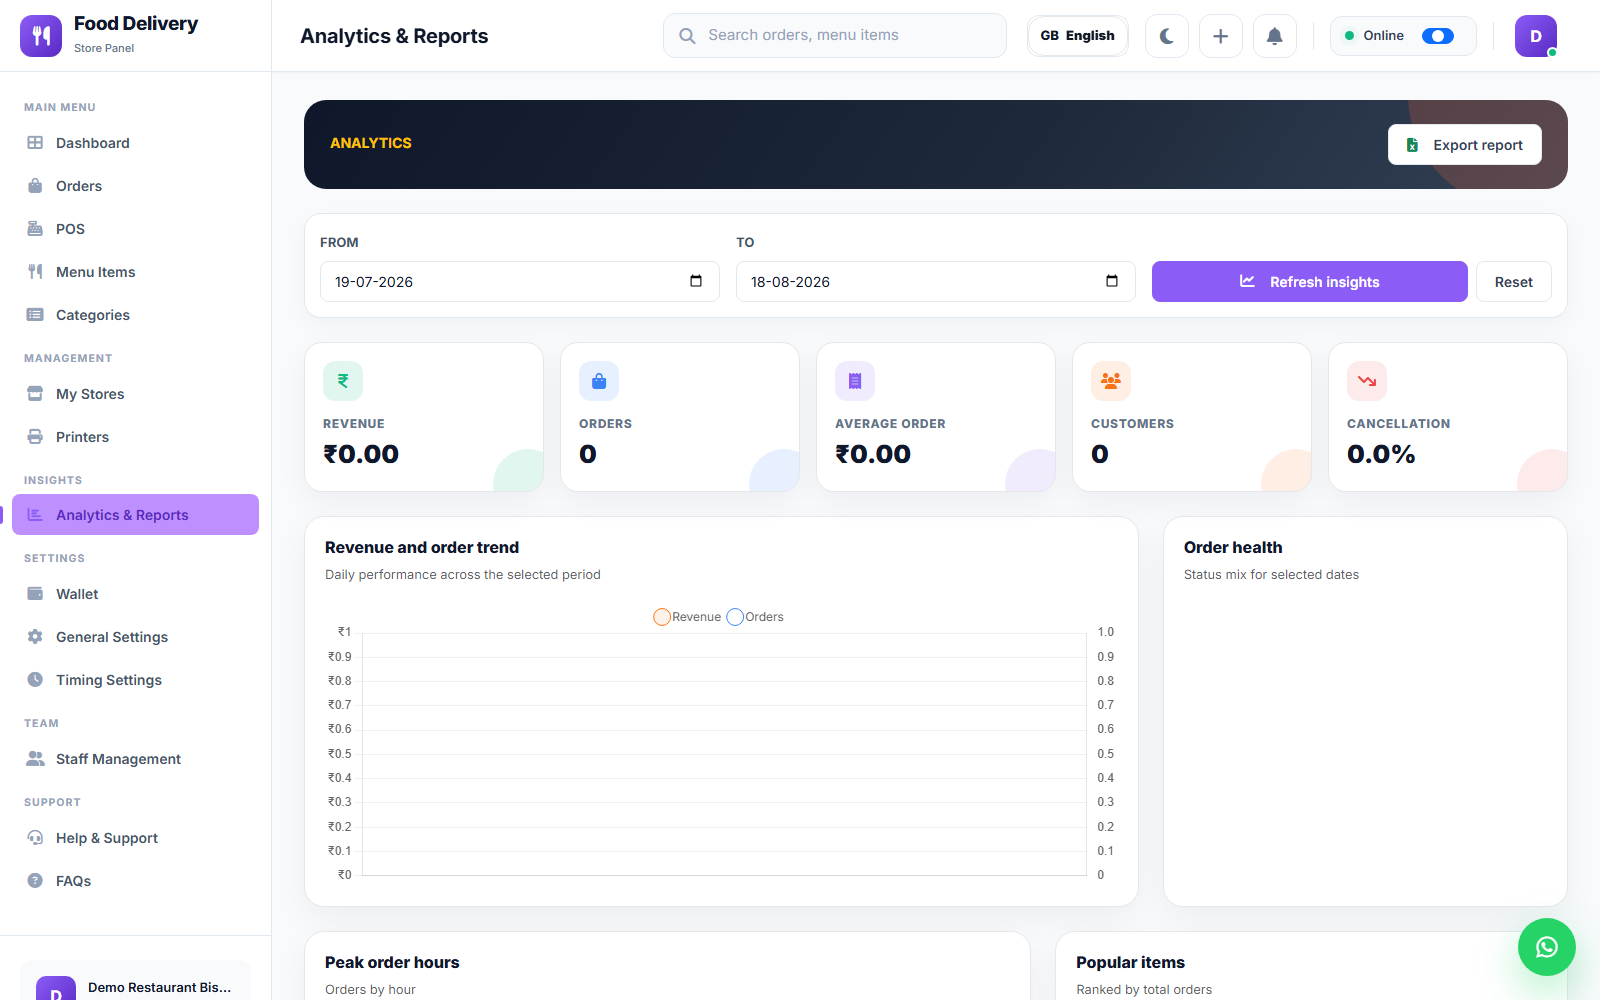
Analytics & Reports
Deeper performance data than the dashboard: revenue trends, best-selling items, and — like the Admin Panel's Branch Reports — a peak-order-hour breakdown computed live from the store's own order history.
Settings
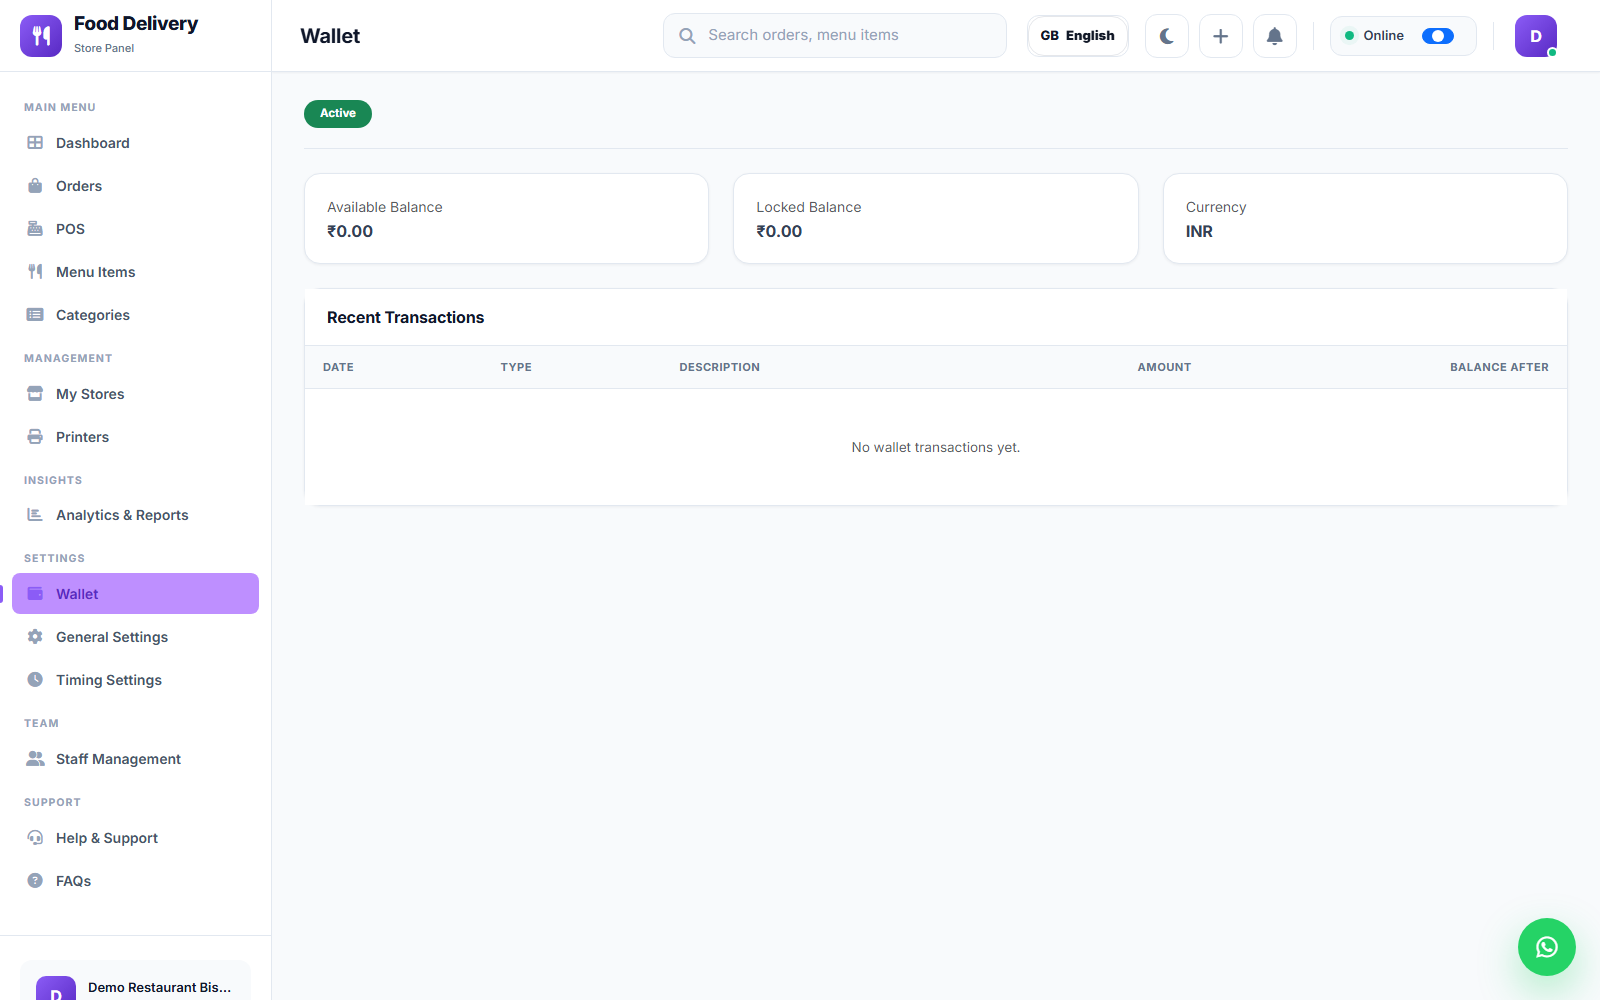
Wallet
The store's running wallet balance and transaction history — earnings from delivered orders land here before payout.
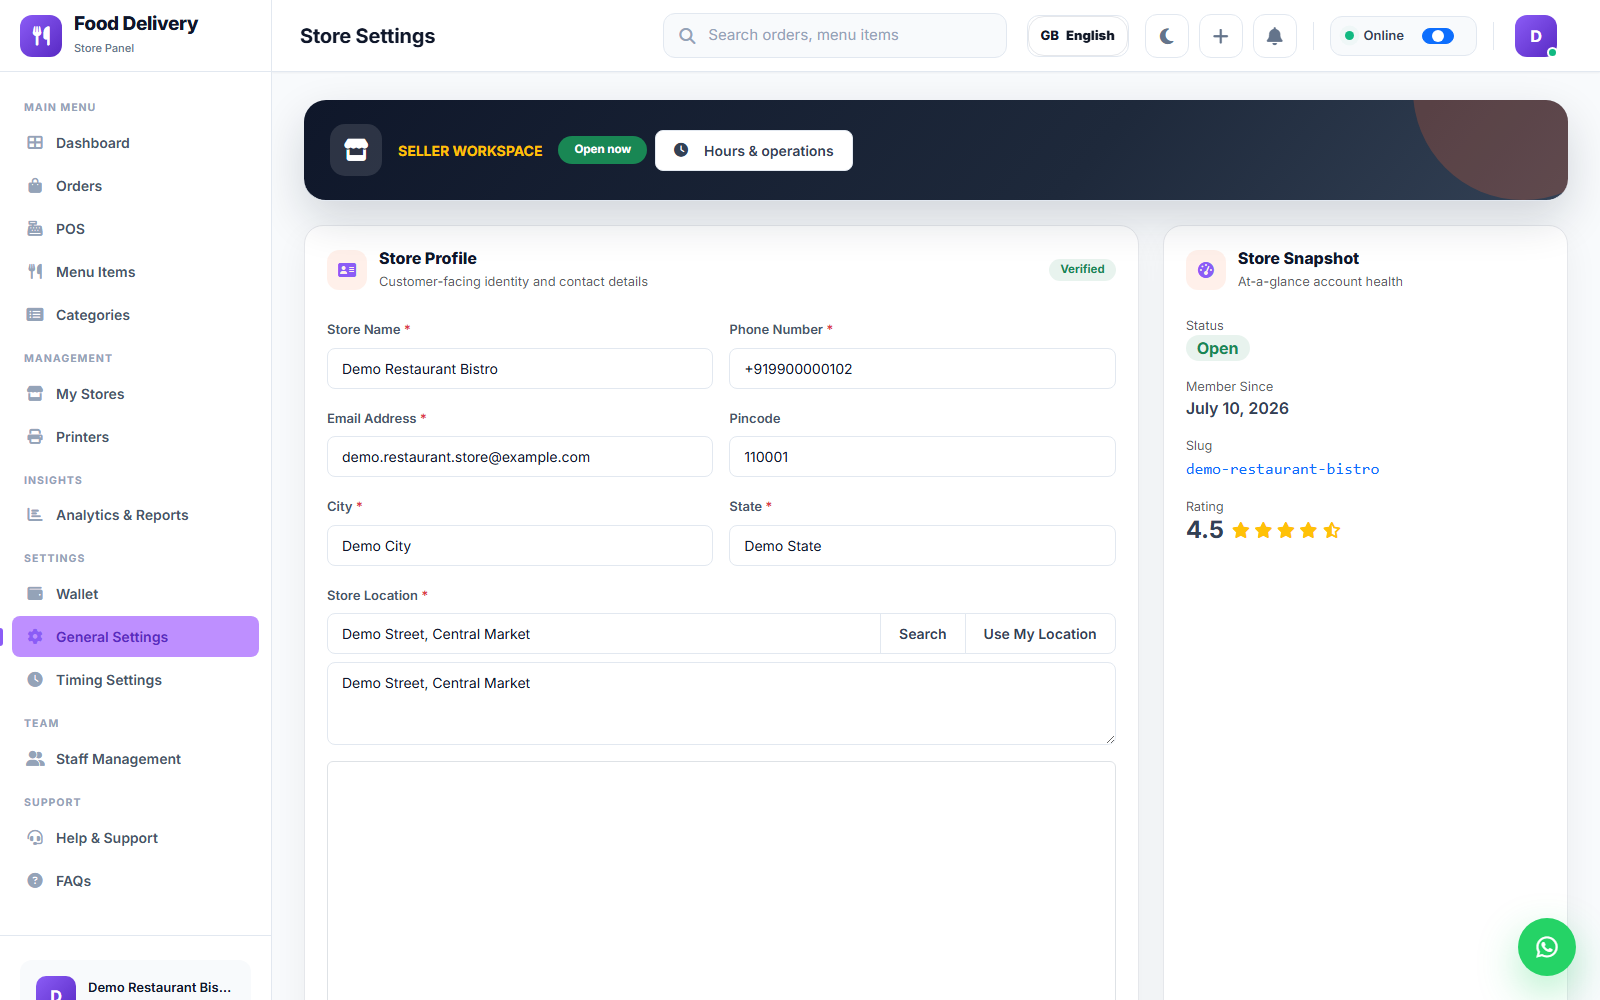
General Settings
Store profile details: name, address, contact information, and delivery configuration. This is also where you can take the store Online/Offline for orders (the same toggle available from the top bar).
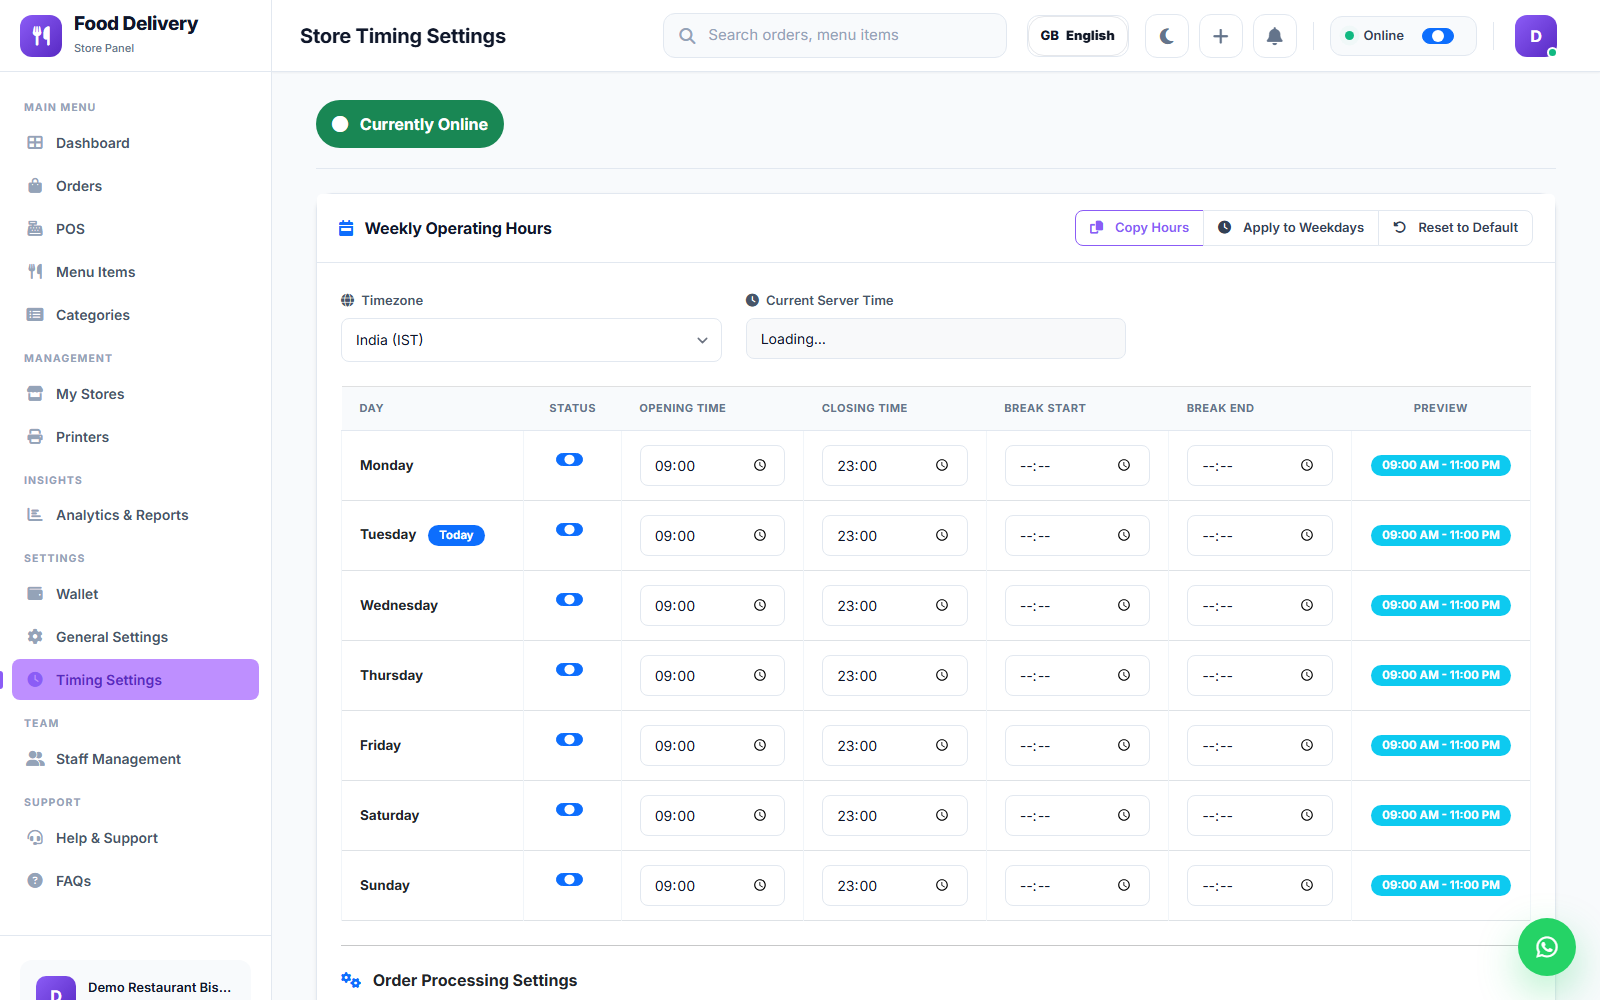
Timing Settings
Set opening/closing hours per day of the week. Copy Timings duplicates one day's hours to others, Apply Weekday Timings sets Mon–Fri in one action, and Reset clears the schedule.
Team
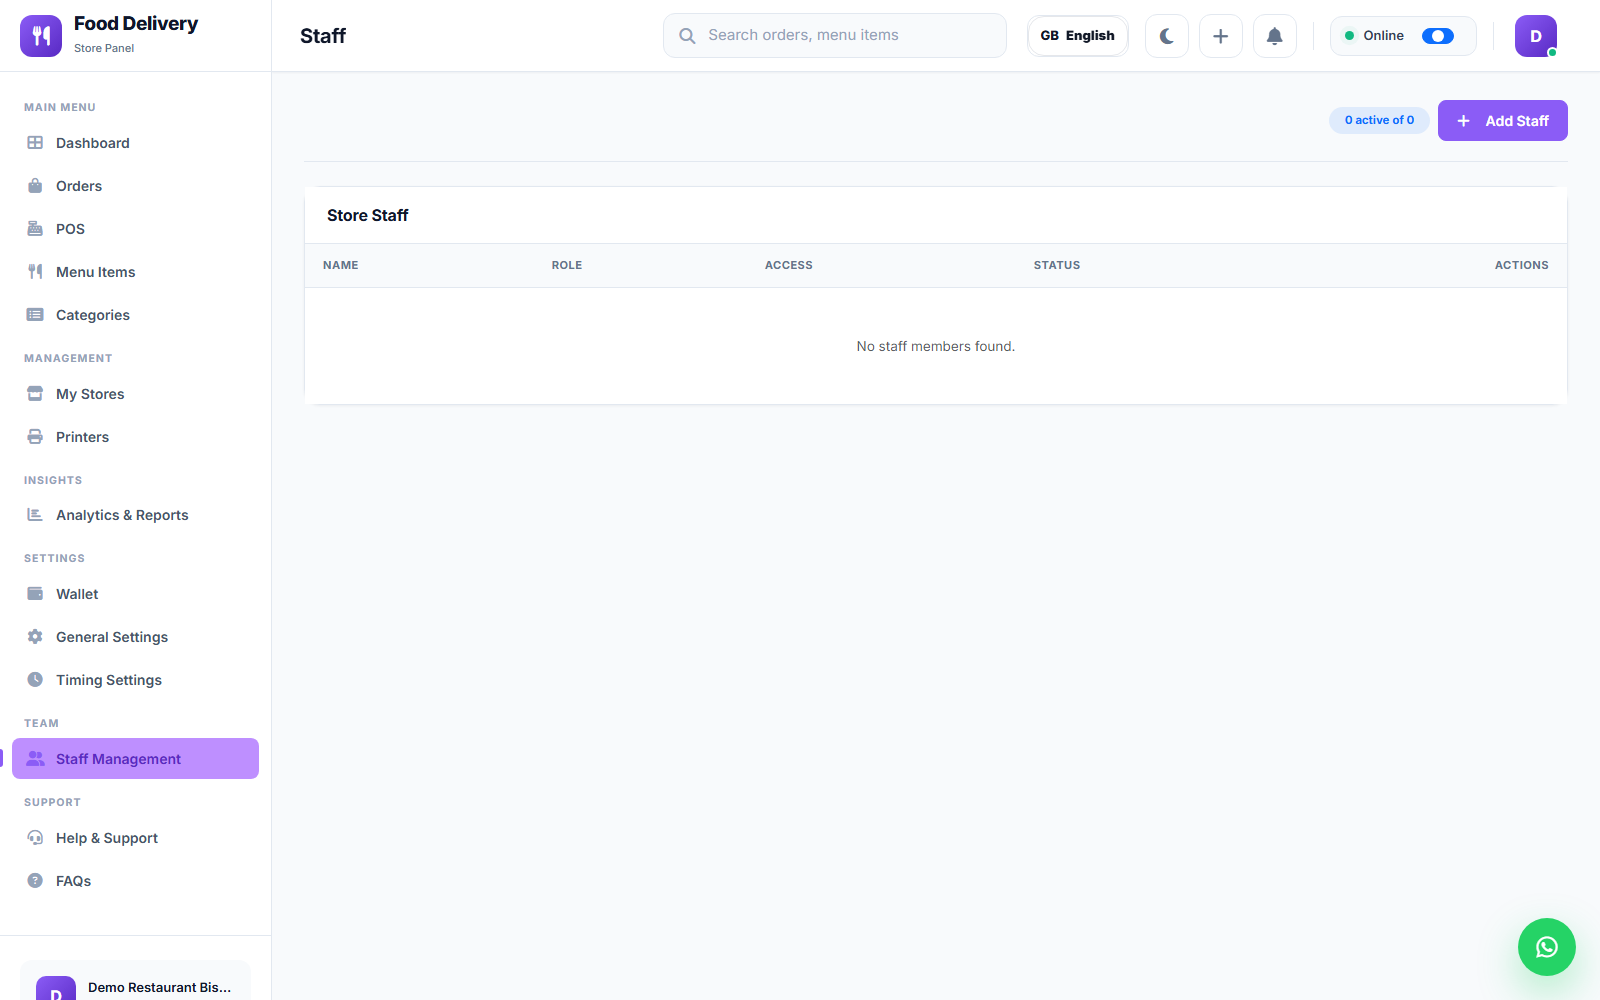
Staff Management
Add staff accounts (restaurant_staff role) who can help run the store without owner-level access — staff can be granted specific permissions (view/manage orders, manage menu, view reports) rather than full control.
Support
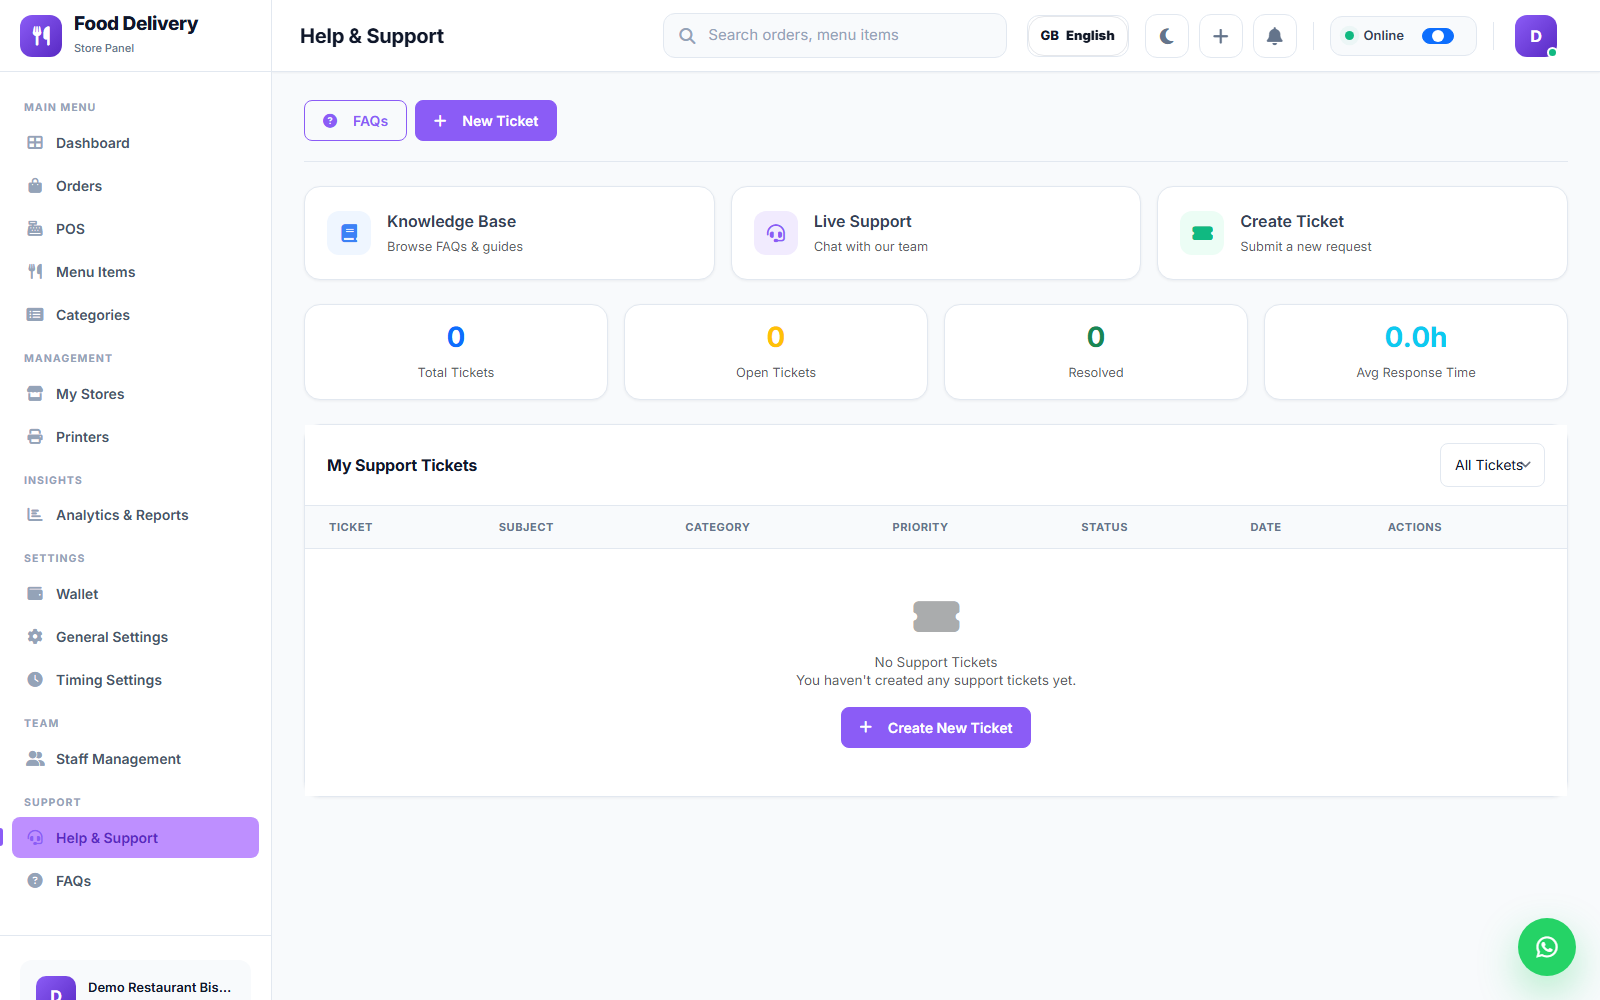
Help & Support
Raise a support ticket to the platform admin and track replies, the same ticketing system that feeds into the Admin Panel's Support Tickets.
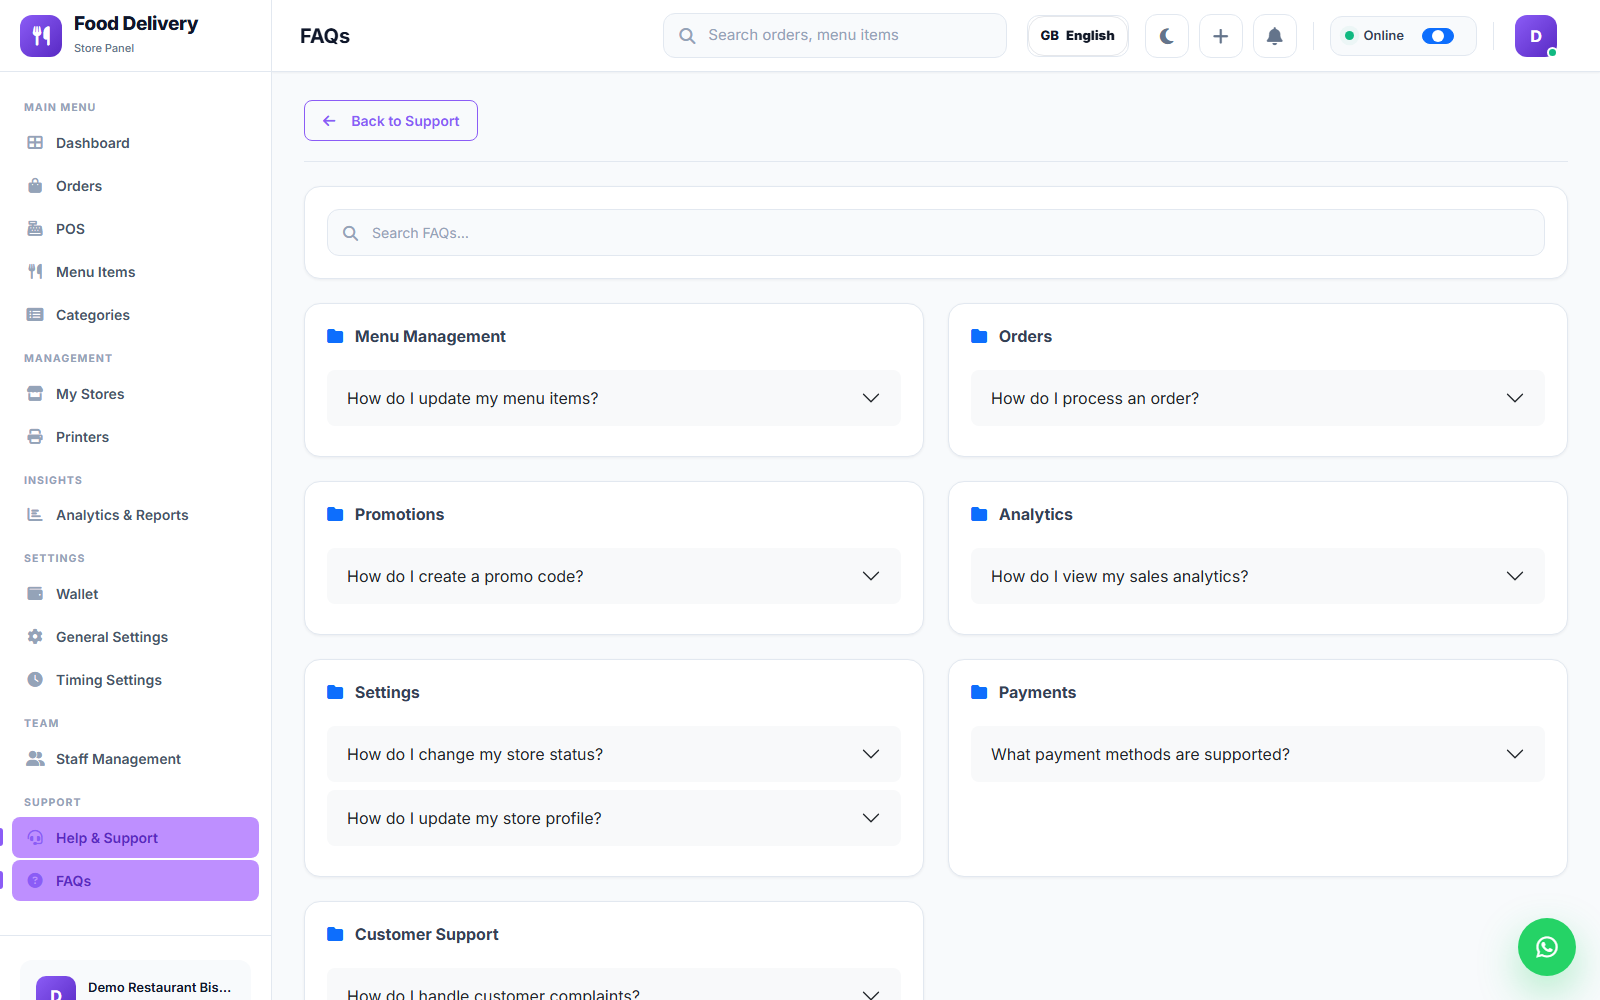
FAQs
A built-in list of common "how do I…" questions for running the store panel (updating the menu, processing orders, creating promo codes, reading analytics, going offline, handling complaints, updating the store profile).
Introduction — Customer Web (Next.js)
The Customer Web (project folder web/) is a Next.js 16 + Tailwind CSS + HeroUI storefront — the browser-based counterpart to the Customer App, letting customers browse stores, order, and track deliveries from a desktop or mobile browser instead of installing an app.
Overview
- Fetches its branding, colors, and Firebase configuration from the same Admin Panel
/api/app/brandingendpoint the mobile apps use, so most day-to-day content changes need no rebuild — see Prerequisites. - Can run either as a statically exported site (
output: "export", deployed as plain HTML/CSS/JS to any web host via FTP) or as a full server-rendered (SSR) Node.js app — controlled by a single environment variable. See Deployment. - Ships with its own automated deploy pipeline (
npm run deploy) that builds the site, generates the correct.htaccessrewrite rules for its dynamic routes, and uploads everything over FTP in one command.
Key Features
- Store, product, and category browsing with search
- Cart and checkout (Stripe integration)
- Order tracking and order history (
/my-account/orders) - Delivery zone lookup
- Brand and featured-section pages
- PWA support (installable, offline-capable shell) via
@ducanh2912/next-pwa - i18n-ready (
i18next) and SEO-optimized (sitemap/robots generation, structured metadata)
Technical Architecture
- Next.js 16 (App/Pages structure) with Turbopack for local dev
- Tailwind CSS + HeroUI component library for styling and theming
- Redux Toolkit for state management
- Axios for talking to the Admin Panel REST API
- Firebase (web SDK) for authentication/push, configured entirely through Admin Panel settings
- Leaflet for map display, Stripe.js for payments
System Requirements
For Developers
- Node.js 20 LTS or newer
- npm (bundled with Node.js)
- Git for version control
- A running Admin Panel instance to point the site at
Next Steps
- Review the Prerequisites
- Follow the Installation Guide
- Customize colors/fonts in the Theme Guide
- Deploy using the Deployment Guide
Related Documentation
Prerequisites — Customer Web (Admin, Firebase & Maps)
Before running or deploying the Customer Web, make sure the Admin Panel is reachable, and that a few values are set in two different places: some come from the Admin Panel automatically at runtime, but a couple of keys still need to be set locally in the project's own environment file.
1) Admin Panel Setup
- Make sure the Admin Panel is fully installed and reachable at a URL (see Admin Panel Installation).
- Branding (app name, logo, primary/secondary colors) and Firebase authentication config are fetched by the site at runtime from
/api/app/branding— you don't hardcode these in the Next.js source.
2) Local Environment Variables (required)
Unlike the mobile apps, the Customer Web does need a few values set locally, because they're needed at build time (not just runtime). Create a .env.local file in the web/ project root:
# web/.env.local
NEXT_PUBLIC_ADMIN_PANEL_URL=https://your-admin-panel-url.com
NEXT_PUBLIC_GOOGLE_MAPS_API_KEY=your-google-maps-js-api-key
NEXT_PUBLIC_SITE_URL=https://your-customer-web-domain.com
NEXT_PUBLIC_SSR=falseNEXT_PUBLIC_ADMIN_PANEL_URL— your Admin Panel's base URL, without an/apisuffix (the app appends/apiitself). If this is missing or invalid, every API call fails and the console logsNEXT_PUBLIC_ADMIN_PANEL_URL is not defined in environment variables.NEXT_PUBLIC_GOOGLE_MAPS_API_KEY— a separate Google Maps key used directly by the web app. This is not pulled from the Admin Panel's Map Settings — it's read locally at build time, so it must be set here even if you've already configured a Maps key in the Admin Panel for the mobile apps.NEXT_PUBLIC_SITE_URL— the public URL the Customer Web itself will be hosted at (used for SEO canonical URLs,sitemap.xml, androbots.txt). Not the Admin Panel URL.NEXT_PUBLIC_SSR—false(or unset) builds a static export (out/folder, deployable to any web host);truebuilds a full server-rendered Node.js app. See Deployment for what each mode means in practice.
web/.env also exists with the same public keys as defaults — .env.local (git-ignored) overrides it and is the right place for your own values.
3) Firebase Configuration (through the Admin Panel)
Firebase (used for the web app's authentication) is configured once, in the Admin Panel — there's no firebaseConfig object to edit in the Next.js source.
- Go to the Firebase Console, create/open your project, and add a Web app (the
</>icon) if you haven't already. - Open Project settings → General and copy the config values:
apiKey,authDomain,projectId,storageBucket,messagingSenderId,appId. - In the Admin Panel, go to Settings → Notification Settings and fill in:
- Firebase Enabled → Yes
- Firebase API Key, Firebase Project ID, Firebase Database URL, Firebase Storage Bucket, Firebase Messaging Sender ID, Firebase App ID
The current Admin Panel UI has no input for Firebase's authDomain or the Web Push vapid/certificate key — only the fields listed above. If your Firebase project needs authDomain (most web sign-in flows do), it currently has to be set directly in the app_settings table (firebase_auth_domain key) until the Admin UI adds a field for it.
4) Google Maps
- In Google Cloud Console, enable Maps JavaScript API, Places API, and Geocoding API for your project.
- Create an API key under APIs & Services → Credentials, and restrict it to your Customer Web's domain (HTTP referrer restriction) for production.
- Put the key in
NEXT_PUBLIC_GOOGLE_MAPS_API_KEYas shown in step 2 above.
5) Final Checklist
- ✅ Admin Panel is installed and reachable at a stable URL.
- ✅
web/.env.localhasNEXT_PUBLIC_ADMIN_PANEL_URL,NEXT_PUBLIC_GOOGLE_MAPS_API_KEY, andNEXT_PUBLIC_SITE_URLset. - ✅ Firebase is enabled and filled in under Admin Panel → Settings → Notification Settings.
- ✅ Google Maps API key is restricted appropriately for production.
Once these are in place, continue to Installation.
Theming — Customer Web
The Customer Web uses Tailwind CSS combined with HeroUI's theming system, but color branding actually works in two layers — it's important to know which one you're editing.
Layer 1: Admin Panel brand color (runtime, takes priority)
Just like the Customer/Store/Delivery apps, the Primary Color you set in Admin Panel → Settings → Branding is fetched at runtime from /api/app/branding and applied live, in the browser, by src/components/Functional/BrandingThemeProvider.tsx. It converts your hex color to HSL and overwrites HeroUI's CSS custom properties (--heroui-primary, --heroui-primary-500, --heroui-focus, and the full 50–900 shade scale) directly on <html>.
This means: for day-to-day brand color changes, use the Admin Panel — not the code. No rebuild or redeploy is needed; the color updates the next time a user loads the site (or you refresh branding data).
Layer 2: tailwind.config.ts (build-time defaults & everything else)
tailwind.config.ts in the project root defines the static, build-time design tokens — this is what's active before the Admin Panel's color has loaded, and it's also where you customize things the Admin Panel doesn't control:
// web/tailwind.config.ts
themes: {
  light: {
    colors: {
      background: "#ffffff",
      foreground: "#000000",
      focus: "#3b82f6",
      primary: {
        50: "#eff6ff",
        // ...
        500: "#3b82f6",
        DEFAULT: "#3b82f6",
      },
    },
  },
  dark: {
    colors: {
      background: "#000000",
      foreground: "#FFFFFF",
      // ...
    },
  },
},
Edit this file to change:
- The fallback primary color shown before
BrandingThemeProviderapplies the Admin Panel's color - Light/dark mode
background/foregroundcolors - Border radius scale, border widths, and other HeroUI theme tokens
- Font families (
fontFamily.sans/fontFamily.mono), wired to CSS variables set up insrc/config/fonts.ts
If you change the fallback primary.500/DEFAULT here, keep the full 50–900 scale consistent (same hue/saturation, varying only lightness) — BrandingThemeProvider regenerates the same scale from the Admin Panel color, so mismatched fallback shades will only be visible for a brief flash before the real branding loads.
Site metadata (not color, but adjacent)
src/config/site.ts holds design-time content that isn't fetched from the Admin Panel: the top nav/menu items (navItems, navMenuItems), SEO fallback description/metaKeywords, and a couple of default coordinates used before the browser supplies a real location. Edit this file directly for these — there's no Admin Panel screen for them yet.
Verification
- Change the Primary Color in Admin Panel → Settings → Branding and save.
- Reload the Customer Web in a browser — buttons, links, and focus rings should pick up the new color without a rebuild.
- If you edited
tailwind.config.ts, runnpm run dev(or rebuild) to see the change, since Tailwind classes are generated at build time.
Installation — Customer Web (Next.js)
This guide walks you through installing the tools you need and running the Customer Web on your computer.
1) What you'll need
- A computer with internet access
- The project's source code (the
webfolder) - A running Admin Panel instance (see Admin Panel Installation)
2) Install Node.js
- Go to nodejs.org/en/download and download the LTS version (20.x or newer).
- Run the installer with default options (make sure "Add to PATH" is checked — it is by default).
- Verify the install in a terminal:
node -v
npm -v
3) Install an editor
VS Code is the natural choice for a Next.js/TypeScript project — install the built-in TypeScript support plus the Tailwind CSS IntelliSense extension for a smoother experience.
4) Get the project files and install dependencies
Open the web folder (from your CodeCanyon download) in your editor, then install dependencies:
cd web
npm install
5) Configure environment variables
Create web/.env.local (see Prerequisites for the full explanation of each value):
# web/.env.local
NEXT_PUBLIC_ADMIN_PANEL_URL=http://localhost:8000
NEXT_PUBLIC_GOOGLE_MAPS_API_KEY=your-google-maps-js-api-key
NEXT_PUBLIC_SITE_URL=http://localhost:3000
NEXT_PUBLIC_SSR=false
6) Run the development server
npm run devOpen http://localhost:3000 in your browser. The dev server uses Turbopack and hot-reloads as you edit files.
7) Build for production (optional, local check)
npm run buildThis runs lint, regenerates robots.txt/sitemap.xml, and builds the site. With NEXT_PUBLIC_SSR=false (the default), the build also runs next export automatically and produces a static out/ folder — see Deployment for what to do with it.
8) Troubleshooting
- If the homepage loads but shows no stores/branding, double-check
NEXT_PUBLIC_ADMIN_PANEL_URLin.env.localand that the Admin Panel is running and reachable from your machine (open the URL directly in a browser first). - If the console logs
NEXT_PUBLIC_ADMIN_PANEL_URL is not defined in environment variables., the env var isn't being picked up — confirm the file is named exactly.env.local, sits in theweb/project root, and that you restartednpm run devafter creating/editing it (Next.js only reads env files at server start). - If maps don't render, confirm
NEXT_PUBLIC_GOOGLE_MAPS_API_KEYis set and that Maps JavaScript API is enabled for that key in Google Cloud Console. - If branding colors don't update, confirm the Admin Panel's
/api/app/brandingendpoint is reachable and returns your savedprimary_color— see Theme for how that value is applied.
Deploying Customer Web (Next.js)
The Customer Web can be deployed in two modes, controlled by a single environment variable — NEXT_PUBLIC_SSR. The project also ships with a built-in, automated FTP deploy script, so most users won't need to upload files by hand at all.
Choosing a deployment mode
If you're deploying to shared/cPanel hosting or anywhere that only serves static files, use Static Export (NEXT_PUBLIC_SSR=false, the default). If you have a Node.js server or VPS and want real-time/dynamic server rendering, use SSR (NEXT_PUBLIC_SSR=true).
Option A: Static Export (recommended for shared hosting)
1. Configure
In web/.env.local:
NEXT_PUBLIC_SSR=false2. Build
npm run buildBecause NEXT_PUBLIC_SSR is not "true", next.config.ts sets output: "export" automatically, and the build produces a static out/ folder containing plain HTML/CSS/JS.
3. Deploy automatically over FTP (built in)
Add your FTP credentials to web/.env.local:
FTP_HOST=ftp.your-domain.com
FTP_USER=your-ftp-username
FTP_PASSWORD=your-ftp-password
FTP_PORT=21
FTP_SECURE=false
Then run:
npm run deployThis single command runs npm install && npm run build && node create-htaccess.js && node ftp.js, which:
- Builds the static site into
out/. - Generates an
.htaccessfile (viacreate-htaccess.js) with the correct Apache rewrite rules for this project's dynamic routes (brands/,categories/,delivery-zones/,feature-sections/,my-account/orders/,products/,stores/,share/products/) plus a catch-all fallback toindex.htmlfor client-side routing. - Uploads the entire contents of
out/(including the generated.htaccess) to your FTP server's root, showing live upload progress.
4. Manual upload (alternative)
If you'd rather not store FTP credentials in .env.local, upload the out/ folder yourself with any FTP client or your host's File Manager (e.g. cPanel → File Manager → public_html), making sure the generated .htaccess at out/.htaccess is included.
Option B: Server-Side Rendering (SSR)
Use this if you have a VPS/server that can run a persistent Node.js process.
1. Configure
NEXT_PUBLIC_SSR=true2. Build and start
npm run build
npm run start
npm run start runs next start, a production Node.js server (default port 3000). Put it behind a reverse proxy (Nginx/Apache) for TLS and a custom domain, and keep it running with a process manager like pm2:
pm2 start npm --name "hyperdash-web" -- run start3. Deploy via the same script (SSR mode)
npm run deploy also works in SSR mode — when NEXT_PUBLIC_SSR=true, ftp.js detects this and uploads the entire project root (excluding .next build cache internals it doesn't need, node_modules, .github, .git) instead of just out/, so you can npm install && npm run start on the server side after upload.
After deploying
- Make sure
NEXT_PUBLIC_ADMIN_PANEL_URLandNEXT_PUBLIC_SITE_URLin.env.localpoint at your production URLs before runningnpm run build— these are baked in at build time, not read at runtime. - Visit your deployed site and confirm branding (logo/colors) loads from your Admin Panel — see Theme.
- Check
/sitemap.xmland/robots.txton the live site to confirm they reflectNEXT_PUBLIC_SITE_URLcorrectly.
Flutter & Java JDK Setup
Setting up your development environment correctly ensures a smooth experience while building Flutter applications. Follow these steps to install Flutter, configure Java JDK, set up your IDE, and initialize your project.
Recommended versions
- Flutter:
3.35.4 - Java JDK:
21.0.5
1️⃣ Install Flutter 🛠️
- Download the Flutter SDK from the official site: Flutter SDK
- Extract the ZIP file to a suitable location (e.g.,
C:\flutteron Windows or~/flutteron macOS/Linux). - Add Flutter to your system path:
- Windows: Add
C:\flutter\binto System Environment Variables. - macOS/Linux: Add
export PATH="$HOME/flutter/bin:$PATH"to~/.zshrcor~/.bashrc.
- Windows: Add
- Verify installation:
flutter doctor --verbose - ✅ Ensure all dependencies are installed before proceeding.
2️⃣ Install Java JDK ☕
- Download the latest JDK from Oracle (Oracle JDK) or OpenJDK (OpenJDK).
- Install the JDK and note the installation path.
- Set environment variables:
- Windows:
- Add
JAVA_HOMEas the JDK install path (e.g.,C:\Program Files\Java\jdk-21). - Add
%JAVA_HOME%\bintoPath.
- Add
- macOS/Linux:
export JAVA_HOME=$(/usr/libexec/java_home) export PATH=$JAVA_HOME/bin:$PATH - Windows:
- Verify:
java -version - ✅ Ensure Java is installed correctly before proceeding.
3️⃣ Install IDE 🖥️
Choose an IDE and install Flutter/Dart plugins:
- Android Studio (full Android toolchain)
- Download: Android Studio
- Install Flutter & Dart plugins (Preferences → Plugins).
- Visual Studio Code (lightweight)
- Download: VS Code
- Install Flutter and Dart extensions from the Marketplace.
✅ Pick the IDE that fits your workflow and install the plugins.
4️⃣ Basic Flutter Project Setup 📂
- Create and run a project on emulator or device:
flutter create my_app cd my_app flutter run - Configure platforms:
- Android: Install Android Studio & required SDKs.
- iOS (macOS only): Install Xcode & set up the iOS simulator.
✅ Final Check
Run:
flutter doctor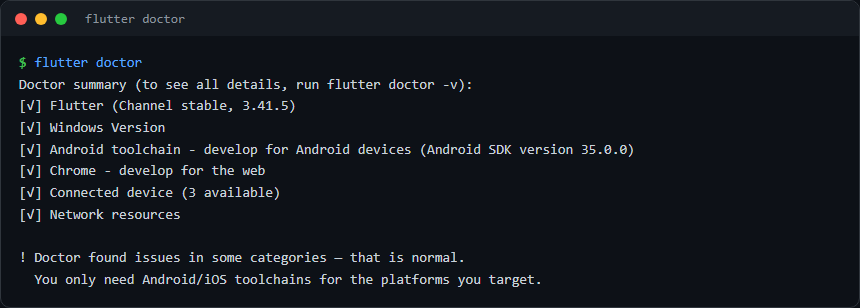
Resolve any items relevant to the platforms you're targeting (you don't need the iOS toolchain if you're only building for Android, for example). Test a simple Flutter app to confirm everything works as expected.
Introduction — Customer App (Flutter)
The Customer App is a feature-rich mobile application built with Flutter, providing end-users with a seamless shopping experience on their mobile devices.
Overview
The Customer App serves as the primary interface for users to interact with your e-commerce platform on mobile devices. It's built with Flutter to ensure:
- Native performance on both iOS and Android
- Consistent user experience across platforms
- Smooth animations and transitions
- Offline capability for basic features
- Real-time order tracking and updates
Key Features
Shopping Experience
- Product browsing and search
- Category navigation
- Advanced filters and sorting
- Wishlist management
- Shopping cart functionality
User Account
- Profile management
- Multiple address management
- Order history
- Saved payment methods
- Wishlist synchronization
Order Management
- Real-time order tracking
- Push notifications for updates
- Order cancellation
- Return/refund processing
- Delivery rating system
Communication
- In-app chat with sellers
- Support ticket system
- Order-related messaging
- Notification center
Payment Integration
- Multiple payment methods
- Secure payment processing
- Wallet functionality
- Promotional code support
Technical Architecture
The app is built using:
- Flutter SDK: For cross-platform development
- Provider Pattern: For state management
- REST APIs: For backend communication
- SQLite: For local data storage
- Firebase: For real-time features and notifications
- Google Maps: For location services
System Requirements
For Users
- Android 6.0 (API level 23) or higher
- iOS 12 or higher
- 100MB free storage space
- Internet connection
For Developers
- Flutter 3.0 or higher
- Dart SDK 2.17 or higher
- Android Studio / VS Code
- Git for version control
Next Steps
- Review the Prerequisites
- Follow the Installation Guide
- Configure the app using the Configuration Guide
Related Documentation
Prerequisites — Customer App (Admin, Firebase & Maps)
Before running or deploying the Flutter Customer App (Android/iOS), make sure the Admin Panel, Firebase, and Google Maps API keys are correctly set up. Most of this configuration lives in two places: your Firebase project (native config files) and the Admin Panel (runtime settings the app fetches over the API) — very little needs to be hardcoded into the Flutter source itself.
1) Admin Panel Setup
- Make sure the Admin Panel is fully installed and reachable at a URL (see Admin Panel Installation).
- Get the Admin URL and a login for it — you'll use this URL as the app's API base (App Base URL).
- Social login, currency, branding, and Maps settings are configured in the Admin Panel, not in the Flutter code — the app reads them at runtime from
/api/app/branding.
2) Firebase Configuration (Android & iOS)
The app uses Firebase for authentication (phone/Google/Apple sign-in) and push notifications. There are two ways to configure it — pick one.
Method 1: FlutterFire CLI (recommended)
This generates lib/firebase_options.dart and downloads the native config files for you in one step.
# 1. Install the Firebase CLI
npm install -g firebase-tools

# 2. Log in (opens a browser window)
firebase login

# 3. Activate the FlutterFire CLI
flutter pub global activate flutterfire_cli

# 4. From the project root, configure the app
flutterfire configureIf you're on a remote machine with no browser, use firebase login --no-localhost.
flutterfire configure is interactive:
- Project — select your Firebase project from the list (or create a new one).
- Platforms — toggle android and ios with the spacebar, then press Enter.
- If asked to overwrite
lib/firebase_options.dart, answer yes.
It automatically places:
android/app/google-services.jsonios/Runner/GoogleService-Info.plist
Method 2: Manual configuration
If you'd rather do it by hand in the Firebase Console:
- Create/open your project in the Firebase Console.
- Add an Android app — use the package name from
android/app/build.gradle.kts(applicationId, currentlycom.localgo.customers). Downloadgoogle-services.jsonand place it inandroid/app/. - Add an iOS app — use the bundle ID from
ios/Runner.xcodeproj(com.localgo.customers). DownloadGoogleService-Info.plistand add it toios/Runner/in Xcode (drag it into theRunnergroup so it's included in the target, not just copied into the folder). - Add SHA-1/SHA-256 fingerprints (required for Google Sign-In and phone auth on Android):
cd android
./gradlew signingReport
This prints the SHA-1/SHA-256 for both the
debugandreleasevariants. Copy the ones you need into Firebase Console → Project Settings → Your Android app → Add fingerprint.
Use the debug keystore's SHA-1 while developing, and your release keystore's SHA-1 (see Deployment for generating one) before you publish.
- iOS URL scheme for Google Sign-In — open the downloaded
GoogleService-Info.plist, copy theREVERSED_CLIENT_IDvalue, and add it as a URL scheme inios/Runner/Info.plistunderCFBundleURLTypes → CFBundleURLSchemes.
Common steps (either method)
- Initialize Firebase — already wired in
lib/main.dart:await Firebase.initializeApp( options: DefaultFirebaseOptions.currentPlatform, );You don't need to change this — it's only relevant if you're starting from a fresh Flutter project instead of this template.
- Enable sign-in providers — in Firebase Console → Authentication → Sign-in method, enable Phone, Google, and Apple (whichever you plan to offer).
- Copy the Google Web Client ID into the Admin Panel — open
android/app/google-services.json, find theoauth_cliententry with"client_type": 3, and paste thatclient_idinto Admin Panel → Settings → Communication → Social Login → Google Web Client ID. See Firebase Server Client ID for the exact steps — this is a runtime setting, not a code change.
3) Google Maps
Both apps use Google Maps for store discovery, delivery tracking, and address selection.
- In Google Cloud Console, enable Maps SDK for Android, Maps SDK for iOS, Places API, and Geocoding API for your project.
- Create an API key under APIs & Services → Credentials, and restrict it per platform (recommended).
- Add the Android key to
android/app/build.gradle.ktsand the iOS key toios/Runner/AppDelegate.swift— see Android Maps API Key and iOS Maps API Key. - Add the same key (or a server-restricted one) in Admin Panel → Settings → Map Settings, so the Admin Panel's own map features work too.
4) Final Checklist
- ✅ Admin Panel is installed and reachable at a stable URL.
- ✅
google-services.json/GoogleService-Info.plistare in place for your own Firebase project. - ✅ SHA-1/SHA-256 fingerprints are added in Firebase for Android sign-in.
- ✅ Google Web Client ID is saved in Admin Panel → Settings → Communication.
- ✅ Google Maps API keys are set in the app's native files and in Admin Panel → Settings → Map Settings.
Once these are in place, continue to Installation to install dependencies and run the app.
Installation — Customer App (Flutter)
This guide walks you through installing the tools you need and running the Customer App (Flutter) on your computer.
1) What you'll need
- A computer with internet access
- The project's source code (the
customerfolder) - An Android emulator, iOS simulator, or a physical device for testing
2) Install Flutter
- Download the Flutter SDK from flutter.dev.
- Extract it and add the
flutter/binfolder to your systemPATH. - Open a terminal and verify the install:
flutter --version- Run Flutter's built-in environment checker and resolve anything relevant to the platforms you plan to build for (you only need the Android toolchain for Android, and Xcode for iOS):
flutter doctor
3) Install an editor
Use Android Studio or VS Code with the Flutter and Dart plugins installed. Either works — Android Studio bundles the Android SDK and emulator manager, which makes first-time setup easier.
4) Get the project files and install dependencies
Open the customer folder (from your CodeCanyon download) in your editor, then install the Dart/Flutter packages:
cd customer
flutter pub get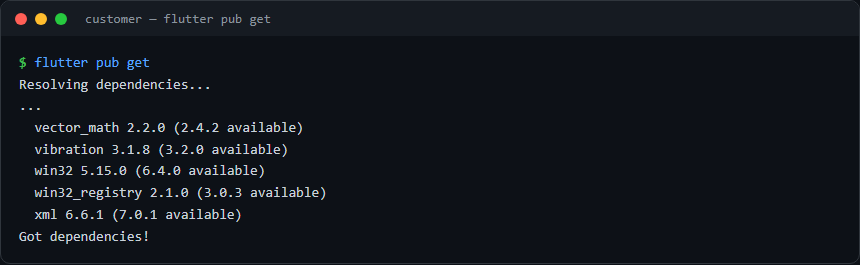
5) Point the app at your Admin Panel
The app's API base URL is defined in lib/config/api_constants.dart:
class ApiConstants {
  static const String baseUrl = String.fromEnvironment(
    'API_BASE_URL',
    defaultValue: 'https://your-admin-panel-url.com/api',
  );
  ...
}
Update defaultValue to your Admin Panel's URL with an /api suffix, or pass it at build/run time instead of editing the file:
flutter run --dart-define=API_BASE_URL=https://your-admin-panel-url.com/api6) Add your Firebase configuration
The Customer App uses Firebase for push notifications and phone/OTP auth. Replace the placeholder Firebase config files with the ones generated for your own Firebase project (see Prerequisites for creating the project):
android/app/google-services.jsonios/Runner/GoogleService-Info.plist
The easiest way to generate both, plus lib/firebase_options.dart, is the FlutterFire CLI:
dart pub global activate flutterfire_cli
flutterfire configure
7) Run the app
With an emulator running or a device connected:
flutter runTo see connected devices/emulators first:
flutter devices8) Troubleshooting
- If
flutter doctorreports a missing Android toolchain, open Android Studio → SDK Manager and install the Android SDK, then accept the licenses withflutter doctor --android-licenses. - If the app can't reach your Admin Panel, double-check
ApiConstants.baseUrland that the Admin Panel is publicly reachable (notlocalhost, unless you're running the emulator with a host-mapped address). - If Firebase features fail silently, confirm
google-services.json/GoogleService-Info.plistbelong to the same Firebase project as your Admin Panel's server credentials.
Configuration
This section covers all the custom changes you need to make to configure and brand your Flutter customer app. Follow each guide below to update app branding, URLs, Firebase, and map keys.
Available Customizations
- App Color — Update the primary/secondary branding color
- App Package / Bundle Name — Set the Android package name and iOS bundle ID
- App Logo — Update app icons for Android and iOS
- App Name — Change the app display name
- App Base URL — Point the app at your own Admin Panel API
- Login & OTP Screen — Replace the login/OTP hero background and logo images
- Google Web Client ID — Enable Google Sign-In via the Admin Panel
- Android Maps API Key — Configure Google Maps for Android
- iOS Maps API Key — Configure Google Maps for iOS
Quick Checklist
After making all changes, verify:
- ✅ Primary/secondary color reflects your branding throughout the app
- ✅ App package name / bundle ID matches what you registered in Play Console / App Store Connect
- ✅ App logo appears correctly on both platforms
- ✅ App name displays correctly in app launcher and settings
- ✅ API calls work against your own Admin Panel URL
- ✅ Login/OTP screen shows your hero background and logo (no broken-image icon)
- ✅ Google Sign-In works (if enabled)
- ✅ Maps display correctly on both Android and iOS
Next Steps
Once you've completed all custom changes, proceed to Deployment to build and publish your app.
App Color (Theme)
The Customer App's primary/secondary brand colors are not hardcoded in Flutter — they're set once in the Admin Panel and fetched by every app at runtime.
Set the Colors
Go to Admin Panel → Settings → Branding → Branding Settings and pick your Primary Color and Secondary Color. The Driver and Restaurant/Store apps have their own optional overrides (Driver App Colors / Store App Colors) further down the same page — leave them blank to fall back to the main Primary/Secondary Color.
How the App Uses It
The color values are served from /api/app/branding as primary_color / secondary_color hex strings, parsed by AppBranding, and turned into a BrandPalette that the whole app's theme reads from:
// lib/theme/brand_palette.dart
BrandPalette.fromBranding(branding) // reads branding.primaryColorHex / secondaryColorHex
If the Admin Panel hasn't returned a value yet (e.g. no network on first launch), the app falls back to a built-in default (#FF6E00 primary / #111827 secondary) — this is only a fallback, not the value you should edit for branding.
There is no rebuild required to change the color — since it's fetched at runtime, updating it in the Admin Panel changes the app's look for all users the next time they open the app or refresh branding data.
Verification
- Save a new Primary Color / Secondary Color in Admin Panel → Settings → Branding.
- Fully close and reopen the Customer App (or pull-to-refresh on a screen that reloads branding).
- Confirm buttons, active tabs, and accent elements reflect the new color.
App / Package Name (Bundle Identifier)
Changing the package name (Android applicationId) or bundle identifier (iOS) is a native-project change — it's not something you set from the Admin Panel, and it must be done before you generate Firebase config files, since they're tied to the package name.
Android
File: android/app/build.gradle.kts
// android/app/build.gradle.kts
android {
    namespace = "com.localgo.customers"   // <-- change this
    defaultConfig {
        applicationId = "com.localgo.customers"   // <-- and this
    }
}
Update both namespace and applicationId to your new package name (they should normally match).
The default applicationId / namespace is com.localgo.customers (seller app: com.localgo.seller, driver app: com.localgo.driver). The Kotlin sources live under a legacy folder path that does not match it — com/swaadsathi/customer/ for the customer app, and com/example/foodflow_restaurant/ / com/example/foodflow_driver/ for the seller and driver apps. The package declaration and the Gradle namespace are what the build actually uses, so the mismatch is harmless. When you rebrand, update namespace + applicationId, change the package line at the top of each .kt file to match, and optionally move the files into a matching folder.
iOS
In Xcode: open ios/Runner.xcodeproj, select the Runner target → General tab → Bundle Identifier, and change it from com.localgo.customers to your own (do this for both Debug and Release configurations, or set it once if your project uses a single value across configs).
After Changing the Package Name
- Regenerate Firebase config — your old
google-services.json/GoogleService-Info.plistare registered against the old package name and will no longer match. Re-runflutterfire configureor re-download the config files from the Firebase Console after adding a new Android/iOS app with the new identifier (see Prerequisites). - Update Google Maps key restrictions — if your Maps API keys are restricted by package name / SHA-1 or bundle ID, update those restrictions in Google Cloud Console.
- Re-sign for release — Android release builds still use the same keystore; you don't need a new one just for a package rename.
Verification
flutter clean
flutter pub get
flutter run
Confirm the app installs under the new package name — on Android, check adb shell pm list packages | grep <yournewpackage>; on iOS, check the identifier in Xcode → Runner → General.
App Logo / Launcher Icon
The project ships with pre-generated launcher icons already in place (android/app/src/main/res/mipmap-*/ic_launcher.png and ios/Runner/Assets.xcassets/AppIcon.appiconset/), but the flutter_launcher_icons package that generates them is not currently added to pubspec.yaml. To replace the logo, add the package yourself and regenerate — this is the recommended approach since it produces every required icon size for both platforms automatically.
Step 1: Add a Source Logo
Add your new logo image to the project, for example:
assets/images/app_launcher_logo/launcher_icon.pngFormat: PNG, square, 1024×1024 px, no transparency/padding around the edges (Android adaptive icons crop it into a circle/rounded-square, so keep the important part of the logo centered).
Step 2: Add and Configure flutter_launcher_icons
Add it under dev_dependencies in pubspec.yaml and configure it at the top level of the same file:
# pubspec.yaml
dev_dependencies:
  flutter_launcher_icons: ^0.14.1

flutter_launcher_icons:
  android: "ic_launcher"
  ios: true
  image_path: "assets/images/app_launcher_logo/launcher_icon.png"
  min_sdk_android: 21
  adaptive_icon_background: "#ffffff"
  adaptive_icon_foreground: "assets/images/app_launcher_logo/launcher_icon.png"
android: "ic_launcher"matches the existing mipmap file name so it overwrites the current icons in place instead of creating a second icon set.- Set
adaptive_icon_backgroundto your brand color (see App Color) instead of white, if you want a colored Android adaptive icon background.
Step 3: Run the Icon Generator
flutter pub get
dart run flutter_launcher_icons
This overwrites:
android/app/src/main/res/mipmap-*/ic_launcher.pngios/Runner/Assets.xcassets/AppIcon.appiconset/
Verification
flutter clean
flutter pub get
flutter run
Check that:
- ✅ The new app icon appears in the device app launcher
- ✅ All icon sizes render properly on Android and iOS
- ✅ The Android adaptive icon (long-press the icon → check the shape on supported launchers) shows your foreground/background correctly
App Name
Android and iOS store the display name differently in this project — Android is a direct manifest edit, iOS goes through an .xcconfig build setting. There is no shared Dart constant for this.
Android
File: android/app/src/main/AndroidManifest.xml
<!-- android/app/src/main/AndroidManifest.xml -->
<application
    android:label="Hyperdash"
    android:name="${applicationName}"
    android:icon="@mipmap/ic_launcher">
    <!-- other configuration -->
</application>
Change the android:label value to your app's name and rebuild.
build.gradle.kts also defines a manifestPlaceholders["APP_NAME"] value that reads from a --dart-define=APP_NAME=... flag, a Gradle property, or an environment variable — but the manifest's android:label is currently a literal string, not ${APP_NAME}, so that placeholder isn't wired to anything yet. Editing android:label directly is the reliable way to change the name today.
iOS
Files: ios/Flutter/Debug.xcconfig and ios/Flutter/Release.xcconfig
// ios/Flutter/Debug.xcconfig and Release.xcconfig
APP_DISPLAY_NAME=Hyperdash
Info.plist reads this build setting — don't hardcode the name there:
<!-- ios/Runner/Info.plist -->
<key>CFBundleDisplayName</key>
<string>$(APP_DISPLAY_NAME)</string>
<key>CFBundleName</key>
<string>$(APP_DISPLAY_NAME)</string>
Update both .xcconfig files (Debug and Release) so the name is consistent across build configurations.
Verification
After updating the app name:
- Rebuild the app:
flutter clean && flutter pub get - Run on device:
flutter run - Check that the app name appears correctly:
- In the app launcher/home screen
- In device settings → Apps
- On the iOS lock screen notification banner (uses
CFBundleDisplayName)
App Base URL (Admin Panel API)
The Customer App talks to your Admin Panel through a single base URL constant.
Configuration
File: lib/config/api_constants.dart
// lib/config/api_constants.dart
class ApiConstants {
  static const String baseUrl = String.fromEnvironment(
    'API_BASE_URL',
    defaultValue: 'https://hype-admin.renjotech.in/api',
  );
  // ...
}The defaultValue above points at the developer's own demo/staging Admin Panel — it will not work for your deployment. You must change it before shipping.
You have two ways to set it:
Option 1: Edit the default value directly (simplest)
Change the defaultValue string to your Admin Panel's API URL, including the /api suffix:
defaultValue: 'https://your-domain.com/api',Option 2: Pass it at build/run time (no source edit needed)
Since baseUrl reads from String.fromEnvironment('API_BASE_URL', ...), you can override it per build without touching the file:
flutter run --dart-define=API_BASE_URL=https://your-domain.com/api
flutter build apk --dart-define=API_BASE_URL=https://your-domain.com/api
flutter build ipa --dart-define=API_BASE_URL=https://your-domain.com/api
This is useful if you maintain separate staging/production URLs and don't want to edit source between builds.
Verification
- Make sure your Admin Panel is reachable at the URL you configured (open it in a browser — you should see the storefront or admin login).
- Run the app:
flutter run(with--dart-defineif using Option 2). - On the login screen, confirm the app loads branding (logo/colors) from your Admin Panel rather than showing default/blank branding — that confirms the API URL is reachable and correct.
- If requests fail, check the URL includes
/api, useshttps://in production, and that your server's CORS settings allow the app's requests.
Login & OTP Screen
The Customer, Store, and Delivery apps all share the same login and OTP verification screen design — a full-bleed hero image, a phone-number field with a country badge, a 3-D pressable "Continue" button, and box-style OTP entry. Only the branding assets and a few app-specific elements (email/password login, partner registration) differ between apps.
Hero Background & Logo
The hero section at the top of the login screen (_HeroBackground, in lib/screens/auth/login_screen.dart) and the OTP screen's header logo (lib/screens/auth/otp_verification_screen.dart) both read from two static image files:
assets/images/background.png
assets/images/logo.pngThese files are not included in any of the three apps by default — assets/images/ is already declared in pubspec.yaml, so you only need to drop the files in place, no config changes required.
Recommended specs:
background.png— ~1080×950 px (portrait, tall). Rendered withBoxFit.cover, cropped to a 398–474 px tall hero panel depending on screen height. Keep the focal art centered/top since the bottom edge gets cropped on shorter screens.logo.png— ~640×320 px, transparent background. Rendered withBoxFit.containat ~190×96–216×110 px, overlaid near the top of the hero background.
Place matching (or app-specific) copies of both files in each app you customize:
customer/assets/images/background.png,customer/assets/images/logo.pngdriver/assets/images/background.png,driver/assets/images/logo.pngrestaurant/assets/images/background.png,restaurant/assets/images/logo.png
Brand Color
The "Continue" / "Verify & Continue" buttons, the focused OTP box border, and the "Resend" link all use the app's branding color, not a hardcoded value:
- Customer App —
AppTheme.brandPrimary(context)(Primary Color from Admin Panel branding). - Driver App —
_branding.driverPrimaryColorHexon the login screen,Theme.of(context).colorScheme.primaryon the OTP screen. - Store App —
_branding.restaurantPrimaryColorHexon the login screen,Theme.of(context).colorScheme.primaryon the OTP screen.
See App Color for where these values are set in the Admin Panel — no code changes are needed to re-brand the button/accent color, only the two image assets above.
App-Specific Differences
The Driver and Store apps keep functionality the Customer app doesn't need, styled to match:
- OTP / Email toggle — Driver and Store partners can also sign in with email + password (
_loginModeToggle()), since staff accounts are provisioned by the business rather than self-registered by phone like customers. - Register as Partner — A link below the Continue button opens the partner sign-up flow (
RegisterScreen). The Customer app doesn't show this because phone signup happens inline in the same OTP flow. - Terms & Privacy footer — Currently shown only on the Customer and Driver apps (both have a
/privacy-legalroute). To add it to the Store app, add an equivalent legal screen/route inrestaurant/lib/main.dartand copy the_TermsTextwidget fromdriver/lib/screens/auth/login_screen.dart. - Social login (Google/Apple) — Customer-app only. Driver and Store accounts are provisioned by the platform/business, so social sign-up isn't wired up for them.
Verification
- Drop
background.png/logo.pnginto each app'sassets/images/folder. flutter clean && flutter pub get && flutter runfor each app you changed.- Open the login screen and confirm the hero image and logo render (no broken-image icon).
- Continue through to the OTP screen and confirm the logo/shield header, OTP boxes, and "Verify & Continue" button all pick up your branding color.
Google Web Client ID (Social Login)
Google Sign-In on the Customer App needs a Web Client ID to verify the ID token. This value is entered once, in the Admin Panel — it is not hardcoded anywhere in the Flutter source.
Find Your Web Client ID
- Open
android/app/google-services.json(the file you downloaded while completing Firebase Configuration). - Find the
oauth_clientarray and locate the entry with"client_type": 3:
"oauth_client": [
  {
    "client_id": "123456789012-abcdefghijklmnopqrstuvwxyz012345.apps.googleusercontent.com",
    "client_type": 3
  }
]- Copy that
client_idvalue — this is your Web Client ID.
Save It in the Admin Panel
Go to Admin Panel → Settings → Communication → Social Login, paste the value into Google Web Client ID, and save.
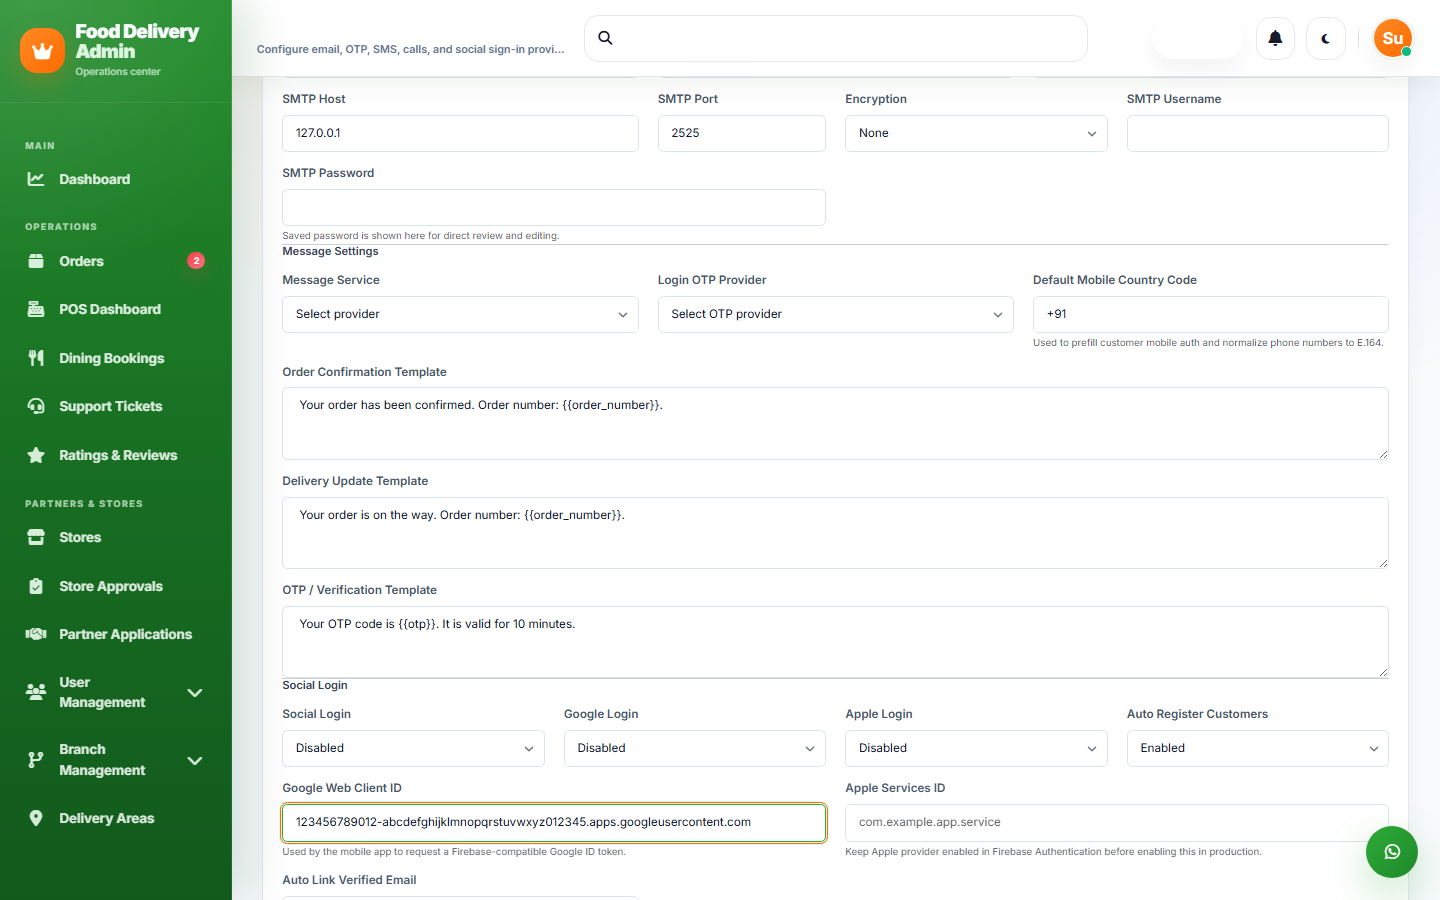
Why the Admin Panel and Not the App Code?
The Flutter app fetches this value at runtime from /api/app/branding and passes it into GoogleSignIn(serverClientId: ...):
// lib/screens/auth/login_screen.dart
_socialAuthService.signInWithGoogle(webClientId: _branding.googleWebClientId);
// lib/models/app_branding.dart
googleWebClientId = json['web_client_id'];This means you can update it later — for a new environment, a new Firebase project, or a key rotation — without rebuilding or resubmitting the app.
Verification
- In Admin Panel → Settings → Communication, confirm Google Login is set to Enabled and the Google Web Client ID field is saved.
- Run the Customer App and tap Continue with Google on the login screen.
- Confirm the Google account picker appears and sign-in completes successfully.
- Check Firebase Console → Authentication → Users for the new sign-in event.
Android Maps API Key
The Android Maps key is set in one place: android/app/build.gradle.kts. It's injected into AndroidManifest.xml automatically through a Gradle manifest placeholder — you don't edit the manifest or any Dart file directly.
Step 1: Get Your Android Maps API Key
- Go to Google Cloud Console.
- Select your project (or create one).
- Enable Maps SDK for Android, Places API, and Geocoding API.
- Go to APIs & Services → Credentials → Create Credentials → API Key.
- Restrict the key to Maps SDK for Android and, if you want, to your app's package name (
com.localgo.customers) and signing certificate SHA-1 (recommended for production). - Copy the key.
Step 2: Set the Key in build.gradle.kts
File: android/app/build.gradle.kts
// android/app/build.gradle.kts
manifestPlaceholders["GOOGLE_MAPS_API_KEY"] = "AIzaSyCNGOec3zc7sPQqpnh10yKIYQ7D97LQmj0"
Replace the value with your own key.
This line already exists in the template with a placeholder key checked in for development convenience — replace it before you build for production. For production builds, consider reading it from a Gradle property or environment variable (project.findProperty("GOOGLE_MAPS_API_KEY")) instead of committing a real key to source control.
AndroidManifest.xml already references this placeholder — you don't need to touch it:
<!-- android/app/src/main/AndroidManifest.xml -->
<meta-data
    android:name="com.google.android.geo.API_KEY"
    android:value="${GOOGLE_MAPS_API_KEY}"/>
Step 3: Add the Same Key to the Admin Panel
Go to Admin Panel → Settings → Map Settings and paste the same key (or a server-restricted variant) into Google Maps API Key, so the Admin Panel's own map features (store location pickers, delivery zone maps) work too.
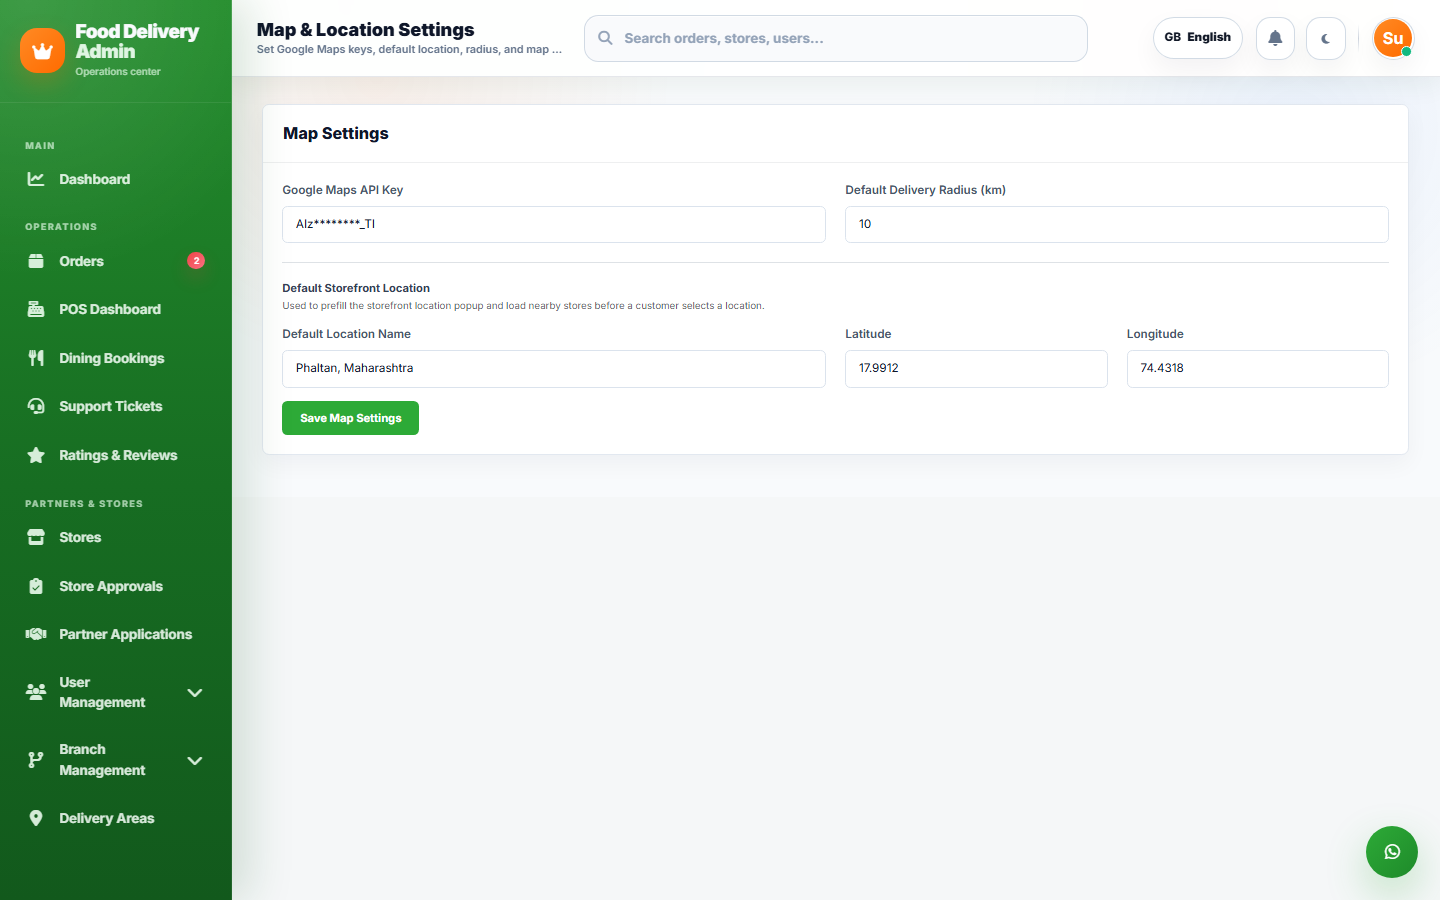
Verification
- Run
flutter clean && flutter pub getafter changing the key. - Run the app on an Android device/emulator:
flutter run. - Open a screen that uses Google Maps (e.g. address selection, order tracking) and confirm the map tiles load — a blank grey map with a Google logo usually means the key is missing, restricted, or the required APIs aren't enabled.
- Check Google Cloud Console → APIs & Services → Credentials for API usage to confirm requests are coming through.
iOS Maps API Key
The iOS Maps key is set in one place: ios/Runner/AppDelegate.swift, as a literal argument to GMSServices.provideAPIKey(...). There is no separate constants file to edit.
Step 1: Get Your iOS Maps API Key
- Go to Google Cloud Console.
- Select your project (or create a new one — you can reuse the same GCP project as Android, just create a second, separate key restricted to iOS).
- Enable Maps SDK for iOS, Places API, and Geocoding API.
- Go to APIs & Services → Credentials → Create Credentials → API Key.
- Restrict the key to Maps SDK for iOS and, if you want, to your app's bundle identifier (
com.localgo.customers) for production. - Copy the key.
Step 2: Set the Key in AppDelegate.swift
File: ios/Runner/AppDelegate.swift
// ios/Runner/AppDelegate.swift
import UIKit
import Flutter
import GoogleMaps

@main
@objc class AppDelegate: FlutterAppDelegate {
  override func application(
    _ application: UIApplication,
    didFinishLaunchingWithOptions launchOptions: [UIApplication.LaunchOptionsKey: Any]?
  ) -> Bool {
    GMSServices.provideAPIKey("YOUR_IOS_MAPS_KEY") // <-- replace with your key
    GeneratedPluginRegistrant.register(with: self)
    return super.application(application, didFinishLaunchingWithOptions: launchOptions)
  }
}
Replace the string literal with your own key. This call must run before the app finishes launching, which is why it lives at the top of application(_:didFinishLaunchingWithOptions:).
AppDelegate.swift may already contain other setup code (Firebase, plugin registration). Add the provideAPIKey line alongside it rather than replacing the whole file.
Step 3: Add the Same Key to the Admin Panel
Go to Admin Panel → Settings → Map Settings and paste a key (the Android one, or a combined/unrestricted key for testing) into Google Maps API Key, so the Admin Panel's own map features work too.
Verification
- Run
flutter clean && flutter pub getafter changing the key. - Run the app on an iOS device or simulator:
flutter run. - Open a screen that uses Google Maps (e.g. address selection, order tracking) and confirm the map tiles load — a blank grey map means the key is missing, restricted, or the required APIs aren't enabled for iOS.
- Check Google Cloud Console → APIs & Services → Credentials for API usage to confirm requests are coming through.
Deploying the Customer App (Flutter)
This guide explains how to build and release the Customer App to the Google Play Store and Apple App Store.
Before you deploy
- Confirm
lib/config/api_constants.dartpoints at your production Admin Panel URL, not a local/dev server (see App Base URL). - Confirm your production
google-services.json/GoogleService-Info.plistare in place (see Prerequisites). - Confirm your production Google Maps keys are set in
android/app/build.gradle.ktsandios/Runner/AppDelegate.swift(see Android Maps API Key and iOS Maps API Key). - Bump the version in
pubspec.yaml(version: 1.0.0+1— the number after+is the build number and must increase on every store upload).
Android: build a signed release
- Generate a keystore if you don't already have one (skip this if
android/app/upload-keystore.jksalready exists in your project):
keytool -genkey -v -keystore upload-keystore.jks -keyalg RSA -keysize 2048 -validity 10000 -alias upload- Create
android/key.propertieswith your keystore details (this file is git-ignored and must never be committed):
storePassword=your-store-password
keyPassword=your-key-password
keyAlias=upload
storeFile=upload-keystore.jks- Set your unique application ID in
android/app/build.gradle.kts(applicationId). This must match the package name you register in Google Play Console — see App Package / Bundle Name. - Build the Android App Bundle (the format Play Console requires for new apps):
flutter build appbundle --releaseThe output is written to build/app/outputs/bundle/release/app-release.aab.
- In Google Play Console, create an app (or open your existing one), go to Production → Create new release, and upload the
.aabfile. - Make sure the release SHA-1/SHA-256 fingerprint (from
./gradlew signingReporton this same keystore) is added in Firebase Console → Project Settings → Your Android app, otherwise Google Sign-In and phone auth will fail in the released build even though they worked in debug.
iOS: build and archive
- Open
ios/Runner.xcworkspacein Xcode (not.xcodeproj). - Under Signing & Capabilities, select your Apple Developer team and confirm the Bundle Identifier matches what you registered in App Store Connect.
- Build the release archive from the command line, or use Xcode's Product → Archive:
flutter build ipa --releaseThe output is written to build/ios/ipa/.
- Upload the
.ipausing Xcode Organizer or Transporter, then submit it for review in App Store Connect.
After release
- Keep the same signing key/keystore for every future update — Play Store and App Store both reject updates signed with a different key.
- Tag the release in your version control and keep a changelog; you'll need the version number again when publishing updates through System Updates in the Admin Panel.
Introduction — Store App (Flutter)
The Store App (project folder restaurant/, Flutter package food_delivery_restaurant) is the mobile counterpart to the web Restaurant Panel — it lets a store/restaurant owner or staff member run their store from a phone instead of a browser.
Overview
The Store App is built with Flutter to give store owners a native, on-the-go way to:
- Accept, prepare, and track orders in real time, including in-app order chat with customers
- Manage the store's menu, categories, and availability
- Take and manage table/dining bookings
- Discover and pair Bluetooth receipt/kitchen printers
- Track wallet balance and view analytics
- Manage staff accounts and permissions
- Run promotions and view/edit store settings
Key Features
📦 Order Management
- Live incoming order feed with accept/reject actions
- Order detail and status progression (preparing, ready, picked up, etc.)
- In-app order chat with the customer
- Order notifications
🍽️ Menu & Store
- Menu item and category management
- Store info and operating status (open/closed)
- Dining booking management
🖨️ Operations
- Printer discovery and Bluetooth pairing for KOTs/receipts
- Promotions management
- Staff management (owner-level)
📊 Insights
- Analytics dashboard
- Wallet balance and transaction history
Technical Architecture
The app is built using:
- Flutter SDK — cross-platform development (Android/iOS)
- REST APIs — backend communication with the same Admin Panel API used by the Customer and Delivery apps
- Firebase — phone-number authentication and push notifications (new order alerts)
- Google Maps SDK — used where store location/delivery-radius context is needed
System Requirements
For Store Owners/Staff
- Android 6.0 (API level 23) or higher
- iOS 13 or higher
- Active internet connection (WiFi or mobile data)
For Developers
- Flutter 3.0 or higher
- Dart SDK 3.0 or higher
- Android Studio / VS Code with the Flutter extension
- Git for version control
- Google Maps API key
- Firebase project setup
Next Steps
- Review the Prerequisites
- Follow the Installation Guide
- Configure the app using the Configuration Guide
Related Documentation
- Flutter Setup Guide
- Admin Panel Integration
- Restaurant Panel Overview — the web equivalent of this app
- Deployment Guide
Prerequisites — Store App (Admin, Firebase & Maps)
Before running or deploying the Flutter Store App (Android/iOS), make sure the Admin Panel, Firebase, and Google Maps API keys are correctly set up. The Store App logs owners/staff in with phone OTP or email/password — it does not use Google/Apple social sign-in, so there's no social-login client ID to configure here (that only applies to the Customer App).
1) Admin Panel Setup
- Make sure the Admin Panel is fully installed and reachable at a URL (see Admin Panel Installation).
- Get the Admin URL — the app's API base is configured the same way as the Customer App (see App Base URL, same mechanism, different Flutter project).
- The store owner account itself is created either through the Partner Applications approval flow or directly in Admin Panel → User Management — see Admin Panel Overview.
2) Firebase Configuration (Android & iOS)
The Store App uses Firebase for phone (OTP) authentication and push notifications (new order alerts) — enable only those, not Google/Apple sign-in.
Method 1: FlutterFire CLI (recommended)
# 1. Install the Firebase CLI
npm install -g firebase-tools

# 2. Log in (opens a browser window)
firebase login

# 3. Activate the FlutterFire CLI
flutter pub global activate flutterfire_cli

# 4. From the restaurant app's project root, configure it
flutterfire configureIf you're on a remote machine with no browser, use firebase login --no-localhost.
flutterfire configure is interactive:
- Project — select your Firebase project (you can reuse the same Firebase project as the Customer/Delivery apps, or use a separate one).
- Platforms — toggle android and ios with the spacebar, then press Enter.
- If asked to overwrite
lib/firebase_options.dart, answer yes.
It automatically places:
android/app/google-services.jsonios/Runner/GoogleService-Info.plist
Method 2: Manual configuration
- Create/open your project in the Firebase Console.
- Add an Android app — use the package name from
android/app/build.gradle.kts(applicationId, currentlycom.localgo.seller). Downloadgoogle-services.jsonand place it inandroid/app/. - Add an iOS app — use the bundle ID from
ios/Runner.xcodeproj(com.localgo.seller). DownloadGoogleService-Info.plistand add it toios/Runner/in Xcode (drag it into theRunnergroup so it's included in the target). - Add SHA-1/SHA-256 fingerprints (required for phone-number auto-verification on Android):
cd android
./gradlew signingReport
Copy the ones you need into Firebase Console → Project Settings → Your Android app → Add fingerprint.
Use the debug keystore's SHA-1 while developing, and your release keystore's SHA-1 (see Deployment for generating one) before you publish.
Common steps (either method)
- Initialize Firebase — already wired in
lib/main.dart; no change needed unless starting from a fresh Flutter project. - Enable Phone sign-in — in Firebase Console → Authentication → Sign-in method, enable Phone. Email/password login is verified against the Admin Panel's own API, not Firebase Auth, so no extra provider is needed for it.
- Enable Cloud Messaging (FCM) — no extra Console setup is required beyond having the project created; the app registers its own FCM token automatically on login.
3) Google Maps
The Store App uses Google Maps wherever store location/delivery-radius context is shown.
- In Google Cloud Console, enable Maps SDK for Android, Maps SDK for iOS, and Geocoding API for your project.
- Create an API key under APIs & Services → Credentials, and restrict it per platform (recommended).
- Add the Android key to
android/app/build.gradle.kts(manifestPlaceholders["GOOGLE_MAPS_API_KEY"]) and the iOS key toios/Runner/AppDelegate.swift(GMSServices.provideAPIKey(...)) — the mechanism is identical to the Customer App; see Android Maps API Key and iOS Maps API Key (apply the steps insiderestaurant/instead ofcustomer/). - Add the same key (or a server-restricted one) in Admin Panel → Settings → Map Settings.
4) Final Checklist
- ✅ Admin Panel is installed and reachable at a stable URL.
- ✅
google-services.json/GoogleService-Info.plistare in place for your own Firebase project. - ✅ SHA-1/SHA-256 fingerprints are added in Firebase for Android phone-auth.
- ✅ Phone sign-in is enabled in Firebase Console → Authentication.
- ✅ Google Maps API keys are set in the app's native files and in Admin Panel → Settings → Map Settings.
Once these are in place, continue to Installation to install dependencies and run the app.
Installation — Store App (Flutter)
This guide walks you through installing the tools you need and running the Store App (Flutter) on your computer.
1) What you'll need
- A computer with internet access
- The project's source code (the
restaurantfolder) - An Android emulator, iOS simulator, or a physical device for testing
2) Install Flutter
- Download the Flutter SDK from flutter.dev.
- Extract it and add the
flutter/binfolder to your systemPATH. - Open a terminal and verify the install:
flutter --version- Run Flutter's built-in environment checker and resolve anything relevant to the platforms you plan to build for:
flutter doctor
3) Install an editor
Use Android Studio or VS Code with the Flutter and Dart plugins installed. Either works — Android Studio bundles the Android SDK and emulator manager, which makes first-time setup easier.
4) Get the project files and install dependencies
Open the restaurant folder (from your CodeCanyon download) in your editor, then install the Dart/Flutter packages:
cd restaurant
flutter pub get
5) Point the app at your Admin Panel
The app's API base URL is defined in lib/config/api_constants.dart:
class ApiConstants {
  static const String baseUrl = String.fromEnvironment(
    'API_BASE_URL',
    defaultValue: 'https://your-admin-panel-url.com/api',
  );
  ...
}
Update defaultValue to your Admin Panel's URL with an /api suffix, or pass it at build/run time instead of editing the file:
flutter run --dart-define=API_BASE_URL=https://your-admin-panel-url.com/api6) Add your Firebase configuration
The Store App uses Firebase for phone-number authentication and push notifications (new order alerts). Replace the placeholder Firebase config files with the ones generated for your own Firebase project (see Prerequisites):
android/app/google-services.jsonios/Runner/GoogleService-Info.plist
The easiest way to generate both, plus lib/firebase_options.dart, is the FlutterFire CLI:
dart pub global activate flutterfire_cli
flutterfire configure
7) Run the app
With an emulator running or a device connected:
flutter runTo see connected devices/emulators first:
flutter devicesLog in with a restaurant_owner or restaurant_staff account — the same credentials used to sign into the web Restaurant Panel.
8) Troubleshooting
- If
flutter doctorreports a missing Android toolchain, open Android Studio → SDK Manager and install the Android SDK, then accept the licenses withflutter doctor --android-licenses. - If the app can't reach your Admin Panel, double-check
ApiConstants.baseUrland that the Admin Panel is publicly reachable (notlocalhost, unless you're running the emulator with a host-mapped address). - If login fails, confirm the account has the
restaurant_ownerorrestaurant_staffrole assigned in Admin Panel → User Management, and that it's linked to at least one store. - If push notifications for new orders don't arrive, confirm
google-services.json/GoogleService-Info.plistbelong to the same Firebase project as your Admin Panel's server credentials.
Configuration
This section covers the custom changes you can make to configure and brand the Flutter Store App. Most mechanisms are identical to the Customer App — just applied inside the restaurant/ project instead of customer/.
Available Customizations
- App Color — Store App colors are set via Admin Panel → Settings → Branding → Store App Colors, which fall back to the main Primary/Secondary Color if left blank. See App Color for how the main colors work.
- App Package / Bundle Name —
applicationId/namespaceinrestaurant/android/app/build.gradle.kts(currentlycom.localgo.seller) and the Bundle Identifier inrestaurant/ios/Runner.xcodeproj. See App Package / Bundle Name. - App Logo — Same
flutter_launcher_iconsapproach as the Customer App (it isn't a dependency yet, add it the same way), run from insiderestaurant/. See App Logo. - App Name — Slightly different from the other two apps:
restaurant/android/app/src/main/AndroidManifest.xmlalready readsandroid:label="${APP_NAME}"from the GradlemanifestPlaceholders["APP_NAME"]value (itself sourced from a--dart-define=APP_NAME=...flag, a Gradle property, or an environment variable) — so on Android you can set the name at build time without editing the manifest:flutter build apk --dart-define=APP_NAME="My Store App"Or edit
android/app/build.gradle.ktsto hardcode a fallback default. iOS still uses the.xcconfigmechanism — see App Name for the iOS steps (ios/Flutter/Debug.xcconfig/Release.xcconfig,APP_DISPLAY_NAME). - App Base URL —
lib/config/api_constants.dartin therestaurant/project has the sameApiConstants.baseUrlpattern. See App Base URL. - Login & OTP Screen — The Store App login/OTP screens use the same design as the Customer App. Drop your
background.png/logo.pngintorestaurant/assets/images/. See Login & OTP Screen for asset specs and the Store-App-specific differences (email/password login, "Register as Partner" link, no social login). - Google Maps API Keys — See Prerequisites → Google Maps for the store-app-specific steps (same mechanism as Android Maps API Key / iOS Maps API Key, applied in
restaurant/).
Not Applicable
There is no Google Sign-In / social login configuration for the Store App — owners and staff authenticate with phone OTP or email/password, so the Google Web Client ID page does not apply here.
Quick Checklist
After making all changes, verify:
- ✅ Store App Colors (or the fallback Primary/Secondary Color) reflect your branding
- ✅ App package name / bundle ID matches what you registered in Play Console / App Store Connect
- ✅ App logo appears correctly on both platforms
- ✅ App name displays correctly in app launcher and settings
- ✅ API calls work against your own Admin Panel URL
- ✅ Login/OTP screen shows your hero background and logo (no broken-image icon)
- ✅ Maps display correctly on both Android and iOS
Next Steps
Once you've completed all custom changes, proceed to Deployment to build and publish the app.
Deploying the Store App (Flutter)
This guide explains how to build and release the Store App to the Google Play Store and Apple App Store.
Before you deploy
- Confirm
lib/config/api_constants.dartpoints at your production Admin Panel URL, not a local/dev server (see App Base URL). - Confirm your production
google-services.json/GoogleService-Info.plistare in place (see Prerequisites). - Confirm your production Google Maps keys are set in
android/app/build.gradle.ktsandios/Runner/AppDelegate.swift. - Bump the version in
pubspec.yaml(version: 1.0.0+1— the number after+is the build number and must increase on every store upload).
Android: build a signed release
- Generate a keystore if you don't already have one (skip this if
android/app/upload-keystore.jksalready exists in your project):
keytool -genkey -v -keystore upload-keystore.jks -keyalg RSA -keysize 2048 -validity 10000 -alias upload- Create
android/key.propertieswith your keystore details (this file is git-ignored and must never be committed):
storePassword=your-store-password
keyPassword=your-key-password
keyAlias=upload
storeFile=upload-keystore.jks- Set your unique application ID in
android/app/build.gradle.kts(applicationId). This must match the package name you register in Google Play Console — see App Package / Bundle Name. - Build the Android App Bundle (the format Play Console requires for new apps):
flutter build appbundle --releaseThe output is written to build/app/outputs/bundle/release/app-release.aab.
- In Google Play Console, create an app (or open your existing one), go to Production → Create new release, and upload the
.aabfile. - Make sure the release SHA-1/SHA-256 fingerprint (from
./gradlew signingReporton this same keystore) is added in Firebase Console → Project Settings → Your Android app, otherwise phone-number sign-in will fail in the released build even though it worked in debug.
iOS: build and archive
- Open
ios/Runner.xcworkspacein Xcode (not.xcodeproj). - Under Signing & Capabilities, select your Apple Developer team and confirm the Bundle Identifier matches what you registered in App Store Connect.
- Build the release archive from the command line, or use Xcode's Product → Archive:
flutter build ipa --releaseThe output is written to build/ios/ipa/.
- Upload the
.ipausing Xcode Organizer or Transporter, then submit it for review in App Store Connect.
After release
- Keep the same signing key/keystore for every future update — Play Store and App Store both reject updates signed with a different key.
- Tag the release in your version control and keep a changelog; you'll need the version number again when publishing updates through System Updates in the Admin Panel.
Introduction — Delivery App (Flutter)
The Delivery App is a comprehensive mobile solution built with Flutter, empowering delivery partners to manage orders, track earnings, and optimize their deliveries in real-time. Designed for maximum efficiency and user experience across multiple languages and regions.
Overview
The Delivery App is built with Flutter to ensure:
- Multi-language support (6 languages) with dynamic theme switching
- Real-time order tracking, acceptance/rejection, and multi-stage delivery status updates
- Real-time earnings dashboard, cash collection tracking, and withdrawal system
- Complete verification with document upload and delivery zone assignment
- GPS-based location tracking with online/offline status toggle and connectivity monitoring
Key Features
📦 Order Management
- View and manage available orders
- Accept/reject orders based on preference
- Real-time order status tracking
- OTP-based delivery verification
- Item collection with confirmation
- Order history and details
💰 Earnings & Payments
- Real-time earnings dashboard
- Daily/Weekly/Monthly earnings breakdown
- Cash collection module
- Withdrawal request system
- Performance-based analytics
- Income tracking and insights
👤 Profile & Verification
- Document upload (Driver License, Vehicle Registration)
- Multi-stage account verification process
- Delivery zone management and assignment
- Profile image management
- Personal information updates
- Verification status tracking
🗺️ Navigation & Location
- Interactive map integration
- Real-time GPS tracking
- Route optimization for efficient deliveries
- Distance calculation and navigation
- Geolocation services
- Offline location support
📊 Analytics & Statistics
- Performance metrics dashboard
- Customer ratings and reviews
- Delivery history tracking
- Earnings analytics with charts
- Statistics and insights
- Performance trends analysis
Technical Architecture
The app is built using:
- Flutter SDK: For cross-platform development (Android/iOS)
- Provider Pattern: For efficient state management
- REST APIs: For backend communication
- SQLite: For local data storage and offline support
- Firebase: For real-time features and push notifications
- Google Maps SDK: For location tracking and navigation
- Localization (Intl): For multi-language support
System Requirements
For Delivery Partners
- Android 6.0 (API level 23) or higher
- iOS 12 or higher
- 150MB free storage space
- Active internet connection (WiFi or mobile data)
- GPS-enabled device for location tracking
For Developers
- Flutter 3.0 or higher
- Dart SDK 2.17 or higher
- Android Studio / VS Code with Flutter extension
- Git for version control
- Google Maps API key
- Firebase project setup
Key Capabilities
- Real-time Synchronization: Instant order updates and status changes
- Offline Mode: Basic functionality available without internet
- Multi-Language Support: 6 languages with automatic locale detection
- Performance Optimized: Lightweight app with minimal data usage
- Secure Authentication: Phone number and OTP-based authentication
- Analytics Integration: Track performance and earnings metrics
- Push Notifications: Instant alerts for new orders and updates
Next Steps
- Review the Prerequisites
- Follow the Installation Guide
- Configure the app using the Configuration Guide
- Explore Custom Changes for branding
Related Documentation
Prerequisites — Delivery App (Admin, Firebase & Maps)
Before running or deploying the Flutter Delivery App (Android/iOS), make sure the Admin Panel, Firebase, and Google Maps API keys are correctly set up. The Delivery App logs drivers in with phone OTP or email/password — it does not use Google/Apple social sign-in, so there's no social-login client ID to configure here (that only applies to the Customer App).
1) Admin Panel Setup
- Make sure the Admin Panel is fully installed and reachable at a URL (see Admin Panel Installation).
- Get the Admin URL — the app's API base is configured the same way as the Customer App (see App Base URL, same mechanism, different Flutter project).
- Branding (colors, currency, app name) is fetched by the app at runtime from
/api/app/branding— configured entirely in Admin Panel → Settings, not in the Flutter code.
2) Firebase Configuration (Android & iOS)
The Delivery App uses Firebase for phone (OTP) authentication and push notifications (FCM) — enable only those two providers/services, not Google/Apple sign-in.
Method 1: FlutterFire CLI (recommended)
This generates lib/firebase_options.dart and downloads the native config files for you in one step.
# 1. Install the Firebase CLI
npm install -g firebase-tools

# 2. Log in (opens a browser window)
firebase login

# 3. Activate the FlutterFire CLI
flutter pub global activate flutterfire_cli

# 4. From the driver app's project root, configure it
flutterfire configureIf you're on a remote machine with no browser, use firebase login --no-localhost.
flutterfire configure is interactive:
- Project — select your Firebase project from the list (you can reuse the same Firebase project as the Customer App, or use a separate one — either works, since each app registers as its own Firebase "app").
- Platforms — toggle android and ios with the spacebar, then press Enter.
- If asked to overwrite
lib/firebase_options.dart, answer yes.
It automatically places:
android/app/google-services.jsonios/Runner/GoogleService-Info.plist
Method 2: Manual configuration
If you'd rather do it by hand in the Firebase Console:
- Create/open your project in the Firebase Console.
- Add an Android app — use the package name from
android/app/build.gradle.kts(applicationId, currentlycom.localgo.driver). Downloadgoogle-services.jsonand place it inandroid/app/. - Add an iOS app — use the bundle ID from
ios/Runner.xcodeproj(com.localgo.driver). DownloadGoogleService-Info.plistand add it toios/Runner/in Xcode (drag it into theRunnergroup so it's included in the target, not just copied into the folder). - Add SHA-1/SHA-256 fingerprints (required for phone-number auto-verification on Android):
cd android
./gradlew signingReport
This prints the SHA-1/SHA-256 for both the
debugandreleasevariants. Copy the ones you need into Firebase Console → Project Settings → Your Android app → Add fingerprint.
Use the debug keystore's SHA-1 while developing, and your release keystore's SHA-1 (see Deployment for generating one) before you publish.
Common steps (either method)
- Initialize Firebase — already wired in
lib/main.dart:await Firebase.initializeApp( options: DefaultFirebaseOptions.currentPlatform, );You don't need to change this — it's only relevant if you're starting from a fresh Flutter project instead of this template.
- Enable Phone sign-in — in Firebase Console → Authentication → Sign-in method, enable Phone. Google/Apple/Email providers do not need to be enabled in Firebase — email/password login is verified against the Admin Panel's own API, not Firebase Auth.
- Enable Cloud Messaging (FCM) — no extra setup is required in the Firebase Console beyond having the project created; the app registers its own FCM token automatically on login.
3) Google Maps
The Delivery App uses Google Maps for live location tracking, route display, and navigation.
- In Google Cloud Console, enable Maps SDK for Android, Maps SDK for iOS, and Directions API for your project.
- Create an API key under APIs & Services → Credentials, and restrict it per platform (recommended).
- Add the Android key to
android/app/build.gradle.kts(manifestPlaceholders["GOOGLE_MAPS_API_KEY"]) and the iOS key toios/Runner/AppDelegate.swift(GMSServices.provideAPIKey(...)) — the mechanism is identical to the Customer App; see Android Maps API Key and iOS Maps API Key for the exact steps (just apply them inside thedriver/project instead ofcustomer/). - Add the same key (or a server-restricted one) in Admin Panel → Settings → Map Settings, so the Admin Panel's own map features work too.
4) Final Checklist
- ✅ Admin Panel is installed and reachable at a stable URL.
- ✅
google-services.json/GoogleService-Info.plistare in place for your own Firebase project. - ✅ SHA-1/SHA-256 fingerprints are added in Firebase for Android phone-auth.
- ✅ Phone sign-in is enabled in Firebase Console → Authentication.
- ✅ Google Maps API keys are set in the app's native files and in Admin Panel → Settings → Map Settings.
Once these are in place, continue to Installation to install dependencies and run the app.
Installation — Delivery App (Flutter)
This guide walks you through installing the tools you need and running the Delivery App (Flutter) on your computer.
1) What you'll need
- A computer with internet access
- The project's source code (the
driverfolder) - An Android emulator, iOS simulator, or a physical device for testing
2) Install Flutter
- Download the Flutter SDK from flutter.dev.
- Extract it and add the
flutter/binfolder to your systemPATH. - Open a terminal and verify the install:
flutter --version- Run Flutter's built-in environment checker and resolve anything relevant to the platforms you plan to build for (you only need the Android toolchain for Android, and Xcode for iOS):
flutter doctor
3) Install an editor
Use Android Studio or VS Code with the Flutter and Dart plugins installed. Either works — Android Studio bundles the Android SDK and emulator manager, which makes first-time setup easier.
4) Get the project files and install dependencies
Open the driver folder (from your CodeCanyon download) in your editor, then install the Dart/Flutter packages:
cd driver
flutter pub get
5) Point the app at your Admin Panel
The app's API base URL is defined in lib/config/api_constants.dart:
class ApiConstants {
  static const String baseUrl = String.fromEnvironment(
    'API_BASE_URL',
    defaultValue: 'https://your-admin-panel-url.com/api',
  );
  ...
}
Update defaultValue to your Admin Panel's URL with an /api suffix, or pass it at build/run time instead of editing the file:
flutter run --dart-define=API_BASE_URL=https://your-admin-panel-url.com/api6) Add your Firebase configuration
The Delivery App uses Firebase for push notifications (new order alerts) and authentication. Replace the placeholder Firebase config files with the ones generated for your own Firebase project (see Prerequisites for creating the project):
android/app/google-services.jsonios/Runner/GoogleService-Info.plist
The easiest way to generate both, plus lib/firebase_options.dart, is the FlutterFire CLI:
dart pub global activate flutterfire_cli
flutterfire configure
7) Run the app
With an emulator running or a device connected:
flutter runTo see connected devices/emulators first:
flutter devices8) Troubleshooting
- If
flutter doctorreports a missing Android toolchain, open Android Studio → SDK Manager and install the Android SDK, then accept the licenses withflutter doctor --android-licenses. - If the app can't reach your Admin Panel, double-check
ApiConstants.baseUrland that the Admin Panel is publicly reachable (notlocalhost, unless you're running the emulator with a host-mapped address). - If push notifications for new orders don't arrive, confirm
google-services.json/GoogleService-Info.plistbelong to the same Firebase project as your Admin Panel's server credentials, and that location/background permissions are granted on the test device.
Configuration
This section covers the custom changes you can make to configure and brand the Flutter Delivery App. The mechanisms are identical to the Customer App — just applied inside the driver/ project instead of customer/.
Available Customizations
- App Color — Driver app colors are set via Admin Panel → Settings → Branding → Driver App Colors, which fall back to the main Primary/Secondary Color if left blank. See App Color for how the main colors work.
- App Package / Bundle Name — Same mechanism as the Customer App:
applicationId/namespaceindriver/android/app/build.gradle.kts(currentlycom.localgo.driver) and the Bundle Identifier indriver/ios/Runner.xcodeproj. See App Package / Bundle Name. - App Logo — Same
flutter_launcher_iconsapproach, run from insidedriver/. See App Logo. - App Name — Same
AndroidManifest.xml(android:label) and.xcconfig(APP_DISPLAY_NAME) mechanism, edited insidedriver/. See App Name. - App Base URL —
lib/config/api_constants.dartin thedriver/project has the sameApiConstants.baseUrlpattern. See App Base URL. - Login & OTP Screen — The Delivery App login/OTP screens use the same design as the Customer App. Drop your
background.png/logo.pngintodriver/assets/images/. See Login & OTP Screen for asset specs and the Delivery-App-specific differences (email/password login, "Register as Partner" link, terms/privacy footer, no social login). - Google Maps API Keys — See Prerequisites → Google Maps for the driver-app-specific steps (same mechanism as Android Maps API Key / iOS Maps API Key, applied in
driver/).
Custom Changes
There is no Google Sign-In / social login configuration for the Delivery App — drivers authenticate with phone OTP or email/password, so the Google Web Client ID page does not apply here.
Quick Checklist
After making all changes, verify:
- ✅ Driver App Colors (or the fallback Primary/Secondary Color) reflect your branding
- ✅ App package name / bundle ID matches what you registered in Play Console / App Store Connect
- ✅ App logo appears correctly on both platforms
- ✅ App name displays correctly in app launcher and settings
- ✅ API calls work against your own Admin Panel URL
- ✅ Login/OTP screen shows your hero background and logo (no broken-image icon)
- ✅ Maps display correctly on both Android and iOS
Next Steps
Once you've completed all custom changes, proceed to Deployment to build and publish the app.
Deploying the Delivery App (Flutter)
This guide explains how to build and release the Delivery App to the Google Play Store and Apple App Store.
Before you deploy
- Confirm
lib/config/api_constants.dartpoints at your production Admin Panel URL, not a local/dev server. - Confirm your production
google-services.json/GoogleService-Info.plistare in place (see Installation). - Bump the version in
pubspec.yaml(version: 1.0.0+1— the number after+is the build number and must increase on every store upload).
Android: build a signed release
- Generate a keystore if you don't already have one (skip this if
android/app/upload-keystore.jksalready exists in your project):
keytool -genkey -v -keystore upload-keystore.jks -keyalg RSA -keysize 2048 -validity 10000 -alias upload- Create
android/key.propertieswith your keystore details (this file is git-ignored and must never be committed):
storePassword=your-store-password
keyPassword=your-key-password
keyAlias=upload
storeFile=upload-keystore.jks- Set your unique application ID in
android/app/build.gradle.kts(applicationId). This must match the package name you register in Google Play Console. - Build the Android App Bundle (the format Play Console requires for new apps):
flutter build appbundle --releaseThe output is written to build/app/outputs/bundle/release/app-release.aab.
- In Google Play Console, create an app (or open your existing one), go to Production → Create new release, and upload the
.aabfile.
iOS: build and archive
- Open
ios/Runner.xcworkspacein Xcode. - Under Signing & Capabilities, select your Apple Developer team and confirm the Bundle Identifier matches what you registered in App Store Connect.
- Build the release archive from the command line, or use Xcode's Product → Archive:
flutter build ipa --releaseThe output is written to build/ios/ipa/.
- Upload the
.ipausing Xcode Organizer or Transporter, then submit it for review in App Store Connect.
After release
- Keep the same signing key/keystore for every future update — Play Store and App Store both reject updates signed with a different key.
- Tag the release in your version control and keep a changelog; you'll need the version number again when publishing updates through System Updates in the Admin Panel.